Installing the LPR (Line Printer Remote) Monitor
13
Windows NT 4.0
P
ri
n
te
r
S
e
c
ti
o
n
4
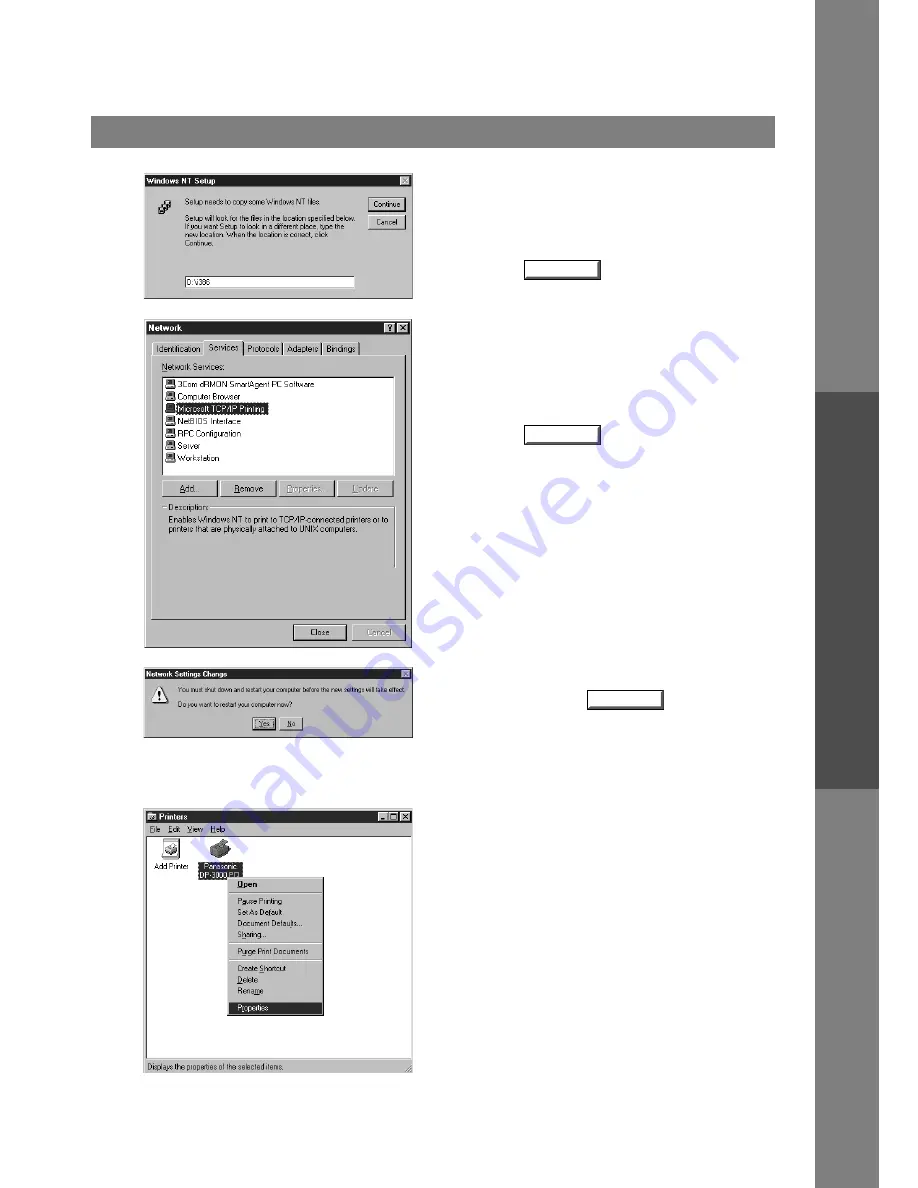
The
Windows NT Setup
dialog box appears.
Insert the Windows NT 4.0 CD-ROM, and type
D:\i386
(where "D:" is your CD-ROM drive).
Click on the
button.
5
After the files are copied into your Hard Drive, the
display returns to the Network dialog box. Confirm
that the Microsoft TCP/IP Printing service was added
to Network Services list.
Click on the
button.
Note:
Delete and Reinstall the Microsoft TCP/IP
Printing if an error occurs, and the Microsoft
TCP/IP Printing is displayed in the Network
Services list, but, the OK button does not
change into a Close button.
6
The
Network Settings Change
dialog box is
displayed, click on the
button to confirm
whether to restart your computer now.
You have now completed the LPR Service
installation.
7
After your computer is rebooted, click the
Start
button, point to
Settings
, and then click
Printers
.
The
Printers
folder appears.
Right-click on your desired printer (Ex. Panasonic
DP-3000 PCL) and select
Properties
from the pop-
up menu.
Continue
Close
Yes
Continued on the next page...


