45
Notes:
• To cancel the motion detection area setup, press
the MON (ESC) button. The VMD search list window
will be displayed again on the monitor.
• Refer to the unit's operating instructions for details
on each detection mode.
14. Select a desired detection mode with the joystick, and
select a desired parameter by pressing the NEXT or
PREV button.
Note:
To cancel the setting and return to the motion
detection area setup window, press the MON (ESC)
button.
15. Press the CAM (SET) button.
The motion detection mode will be determined, the
VMD search will be started, and the VMD search list
window will be displayed again on the monitor.
Note:
To cancel the VMD seach, press the STOP but-
ton.
16. To select a desired recording event, perform the follow-
ing.
• Move the joystick upward or downward.
• Press the NEXT or PREV button.
Notes:
• To exit the search mode, press the MON (ESC) but-
ton.
• To change the monitor display to the thumbnail,
press the F1 button. (Refer to the operating instruc-
tions of recorder for details on monitor display.)
• You cannot display the DATA COPY window.
17 Press the PLAY button.
The playback of selected recording event will start.
• Marking search
The recording time of the recorded images with a marked
point will be displayed in a list or a thumbnail. For playback,
you will select the desired recording time to play. (Refer to
the recorder's operating instructions for details on marking.)
1. Enter the recorder mode. (Refer to the unit's operating
instructions.)
2. Repeat pressing the INDEX button until the marking list
window is displayed on the monitor.
The recorder will enter the searching mode.
Note:
• To change the monitor display to the thumbnail,
press the F1 button. (Refer to the operating instruc-
tions of recorder for details on monitor display.)
• You cannot display the DATA COPY window.
3. Select the desired marked time by performing either of
the following.
• Move the joystick upward or downward.
• Press the NEXT or PREV button.
4. Press the PLAY button.
The playback of recorded image will start from the
selected time.
5. To exit the search mode, press the MON (ESC) button.
The live image will be displayed again on the monitor.
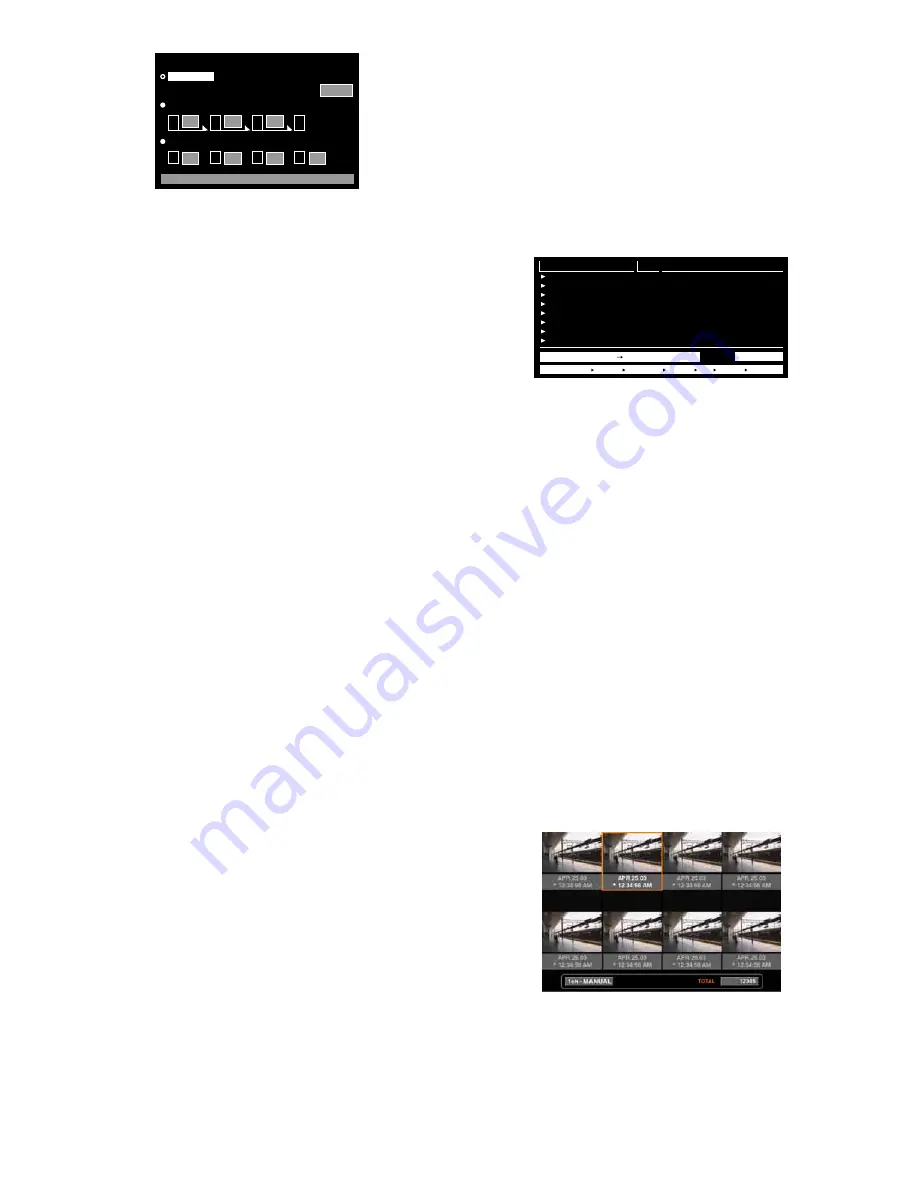
• Thumbnail window
The thumbnail window is displayed when you press the F1
button while the recording event list window, VMD search
list window, or marking list window is displayed.
Available controls and functions
Joystick:
Moves the cursor.
NEXT or PREV button:
Moves the cursor.
PLAY button:
Plays back the selected recording event.
F1 button:
Changes the monitor display to the list.
MON (ESC) button:
Exits the search mode.
VECTOR
ANY AREA
MASKING DURATION
SET : [SET] SEARCH : [PLAY] CANCEL : [ESC]
20s
20s
20s
20s
20s
20s
20s
■
VMD SEARCH
DURATION
24h
A
B
C
D
A
B
C
D
TIME&DATE
01ch
01ch
01ch
01ch
01ch
01ch
01ch
01ch
CAM
APR.25.03*12:34:56 AM
APR.25.03*12:34:56 AM
APR.25.03*12:34:56 AM
APR.25.03*12:34:56 AM
APR.25.03*12:34:56 AM
APR.25.03*12:34:56 AM
APR.25.03*12:34:56 AM
APR.25.03*12:34:56 AM
TIME&DATE SEARCH REC EVENT SEARCH VMD SEARCH MARK
TOTAL
APR.25.03*12:34:56 AM APR.25.03*12:34:56 AM
12345
Содержание WJ-SX 150A
Страница 8: ...9 FEATURES OF THE MATRIX SWITCHER SYSTEM ...
Страница 22: ...23 DETAILED PRODUCT DESCRIPTION ...
Страница 29: ...31 INSTALLATIONS AND SYSTEM CONNECTIONS ...
Страница 54: ...57 WJ SX150A SETUP PROCEDURES ...
Страница 100: ...103 OPERATING PROCEDURES TERMINAL MODE ...
Страница 119: ...123 OPERATING PROCEDURES PS DATA ...
Страница 125: ...129 EXPANDED FUNCTION ...
Страница 147: ...151 APPENDIX ...


