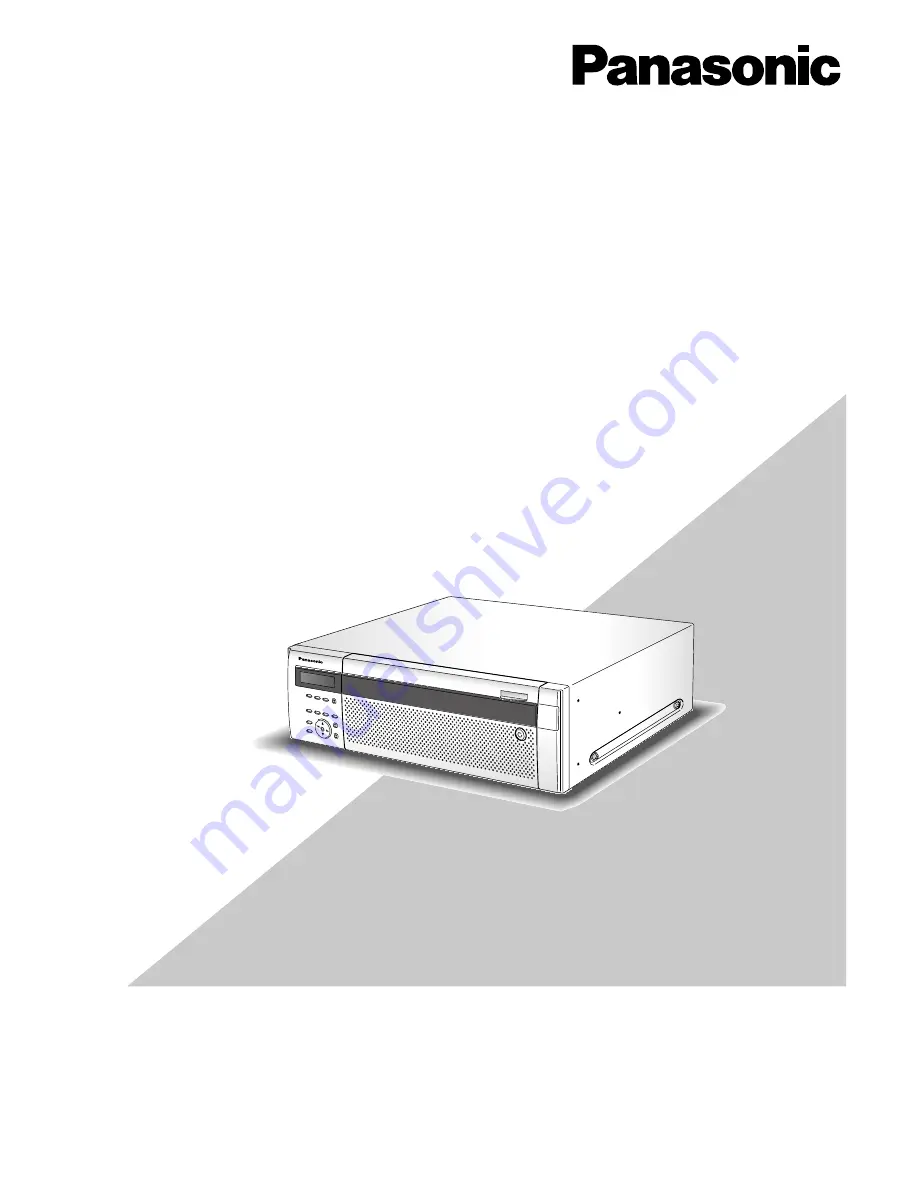
background image

Before attempting to connect or operate this product,  

please read these instructions carefully and save this manual for future use.

The model number is abbreviated in some descriptions in this manual.


Installation Guide

Network Disk Recorder 

Model No.  

WJ-ND400K

WJ-ND400K/G

1

2

3

4

5

6

7

8

9

Содержание WJ-ND400K

Страница 1: ...s product please read these instructions carefully and save this manual for future use The model number is abbreviated in some descriptions in this manual Installation Guide Network Disk Recorder Model No WJ ND400K WJ ND400K G 1 2 3 4 5 6 7 8 9 ...

Страница 2: ...ance with the follow ing code Green and yellow Earth Blue Neutral Brown Live As the colours of the wire in the mains lead of this appliance may not correspond with the coloured markings identifying the terminals in your plug proceed as follows The wire which is coloured green and yellow must be connected to the terminal in the plug which is marked with the letter E or by the earth symbol I or colo...

Страница 3: ...SS OR IMPLIED INCLUDING BUT NOT LIMITED TO THE IMPLIED WARRANTIES OF MERCHANTABILITY FITNESS FOR ANY PARTICULAR PURPOSE OR NON INFRINGEMENT OF THE THIRD PARTY S RIGHT THIS PUBLICATION COULD INCLUDE TECHNICAL INACCURACIES OR TYPOGRAPHICAL ERRORS CHANGES ARE ADDED TO THE INFORMATION HEREIN AT ANY TIME FOR THE IMPROVEMENTS OF THIS PUBLICATION AND OR THE CORRESPONDING PRODUCT S Disclaimer of warranty ...

Страница 4: ... your outlet consult an electrician for replacement of the obsolete outlet 10 Protect the power cord from being walked on or pinched particularly at plugs convenience receptacles and the point where they exit from the apparatus 11 Only use attachments accessories specified by the manufacturer 12 Use only with the cart stand tripod bracket or table specified by the manufacturer or sold with the app...

Страница 5: ...bout the connectors 33 How to use the terminals of the ALARM CONTROL connector 33 Pin configuration 33 Connection for emergency recording 34 Connection for external recording switching 34 Connection 1 for the auto adjustment time function 35 Connection 2 for the auto adjustment time function 35 Connection of the control output 36 Connection with the Uninterruptible Power System UPS 36 How to use t...

Страница 6: ...vided for the WJ ND400K WJ ND400K G as follows Installation Guide this book Contains descriptions of how to install connect this product and descriptions of how to operate this product with the buttons on the front panel Setup Instructions PDF Contains descriptions of how to configure the required settings and how to connect to other devices Operating Instructions PDF Contains descriptions of how ...

Страница 7: ...indows XP Professional SP2 SP3 or Microsoft Windows XP Home Edition SP2 SP3 respectively Important When using a PC that does not meet the above requirements displaying of images may become slow or the web browser may become inoperable Audio may not be heard if a sound card is not installed on a PC Audio may be interrupted depending on the network environ ment Microsoft Windows XP Professional x64 ...

Страница 8: ...ures such as user authentication to protect your network against leakage or theft of information including image data authentication information user names and passwords alarm mail information FTP server information and DDNS server informa tion Copyright Except for open source software licensed under GPL LGPL and so on distributing copying disassembling reverse compiling and reverse engineering of...

Страница 9: ...n used at the recommended ambient tempera ture approx 25 C 77 F It is recommended to replace them after around 18 000 hours of operation to prevent data loss from disk failures When hard disk drive trouble occurs replace it immediate ly Contact your dealer about servicing When replacing the hard disk drives take notice of the following Protect the hard disk drives from static electricity Do not st...

Страница 10: ...tivity and or was obtained from a video provider licensed by MPEG LA to provide MPEG 4 Video No license is granted or shall be implied for any other use Additional information including that relating to promotional internal and commercial uses and licensing may be obtained from MPEG LA LLC See http www mpegla com Copyright Distributing copying disassembling reverse compiling and reverse engineerin...

Страница 11: ...e unit Do not block the front and rear for smooth ventilation Keep the unit 5 cm 1 97 or more away from the both sides and the upper side Keep clean the ventilation openings of the unit to prevent overheating A lifetime of the cooling fan is limited by use Avoid placing this product near noise sources If this product is placed near noise sources such as fluorescent lamps noises may be produced In ...

Страница 12: ...ors HDD1 HDD9 Indicate the statuses of the hard disk drives HDD access indicator right side Indicates the status access failure of the respective hard disk drive When an HDD failure error occurs during operation in the RAID 5 RAID 6 mode the indicator will light blink red Off Indicates that the respective hard disk drive is not being accessed Lights green Indicates that the respective hard disk dr...

Страница 13: ...ont cover Insert push and turn the key to the right i Maintenance port For maintenance purpose only Use this port to connect directly to a PC and perform maintenance operations Do not use for normal operation Note When connecting to a PC directly use the straight LAN cable o Recording indicator REC Lights when recording is being performed and goes off when recording is finished 0 Timer indicator T...

Страница 14: ...drive Blinks orange Indicates that the respective hard disk drive is currently being formatted Lights red Indicates that formatting of the respective hard disk drive has failed Off Indicates that the power of the respective hard disk drive is off or that the hard disk drive is not connect ed recognized r HDD access failure indicator A F Indicates the status access failure of the respective hard di...

Страница 15: ...ional mode Single RAID 5 RAID 6 Select the operational mode by determining the RAID switch position and then turn on the power of the recorder by pressing the POWER switch while holding down the USE button until the buzzer sounds The recorder will start up in the selected operational mode S Single mode Default R5 RAID 5 mode R6 RAID 6 mode Important Do not change the operational mode after startin...

Страница 16: ...t WJ HDE400 for further information t External storage connector EXT STORAGE Use this connector to connect to the extension unit WJ HDE400 y Client PC port Use this port to connect the recorder to a network com patible with 10BASE T 100BASE TX or 1000BASE T to connect with a PC via a network u Camera port Use this port to connect the recorder to a network com patible with 10BASE T 100BASE TX or 10...

Страница 17: ... recorder are managed by virtually dividing into 4 recording areas Refer to the setup instructions PDF Only one of the 4 recording areas can be assigned to a single hard disk drive Recorded data to be stored in each area is as follows q Normal recording area Image audio data recorded by manual recording Image audio data recorded by the schedule recording SD memory data w Event recording area Image...

Страница 18: ...t among the hard disk drives in the recorder x number of the hard disk drives in the recorder 2 Depending on the model of the hard disk drive the avail able capacity may be a few percent smaller Recording Playback Stable image recording and playback High throughput is achieved by equipping the camera port and the client PC port individually It brings stable image reception using up to 64 cameras a...

Страница 19: ... event recording so that images recorded at the event occurrence can be played as if the recording started before the event occurrence Pre event recording Display the event notification window A pop up window that notifies of an event occurrence will be displayed Blink the alarm indicator The alarm indicator on the front panel will start blinking Sound the buzzer The buzzer will start sounding for...

Страница 20: ...ding to the schedules set in advance Pre event recording 5 Recording of images for the set period of time just before an event occurrence that is to be automatically performed Priority When two or more recordings with different recording modes started simultaneously only recording with the highest pri ority will start Setup menu and its items Refer to the setup instructions PDF for further informa...

Страница 21: ...portant The network settings of the recorder will be different depending on the settings of the LAN or the Internet service provider to which the recorder is to be connected Ask your network administrator for the network security Connection example IP address 192 168 1 250 subnet mask 255 255 255 0 Default gateway 192 168 1 1 IP address 192 168 0 100 subnet mask 255 255 255 0 Default gateway 192 1...

Страница 22: ...y recording can be set for each camera channel The start time of the SD memory recording varies depending on the set recording rate Refer to the setup instructions PDF Obtain image recorded on the SD memory card It is possible to obtain images recorded on the SD memory card of the camera and save them on the hard disk drive of the recorder It is also possible to check if images are currently being...

Страница 23: ...e recorder to configure the net work settings of the recorder Refer to the setup instructions PDF n Network settings of a PC Change the TCP IP setting of the PC to conform to the settings of the recorder Refer to the setup instructions PDF m Formatting of the hard disk drives When changing the assignment of the recording areas on the hard disk drives display the disk configuration menu from the se...

Страница 24: ...ck the ventilation openings or slots to prevent the recorder from overheating Install the recorder in a rack Install the recorder in an EIA standard 19 inch rack Depth 550 mm or more Note Use four M5 x 12 screws locally procured to install the recorder in a rack Installation procedure 1 Remove the five rubber feet from the bottom of the recorder using a flathead screwdriver Use a screwdriver to re...

Страница 25: ...center of the rack When the recorder is installed at the top or the bottom of the rack it may have diffi culties in connecting the extension units since the cable length is not long enough When installing the recorder in the rack leave a space of 1U 44 mm 1 73 above and below the recorder for ventilation Fix the connection cable firmly using the cable clamp provided with the extension unit When th...

Страница 26: ... the PCs and the cameras Important Be sure to use a hub to connect the recorder and a PC with a straight LAN cable Do not connect directly between the recorder and a PC with a cross LAN cable Otherwise some PCs may have trouble in com municating securely displaying images or playing recorded images Connection Description Port to be used 1 port operation Suitable when direct access between PCs and ...

Страница 27: ...PCs using the camera port and the client PC port at the rear of the recorder Images from the cameras transmitted to the camera port will be transmitted to the PCs from the client PC port Important Connect the cable from the hub to which the cameras are connected to the camera port and connect the cable from the hub to which the PCs are connected to the client PC port An incorrect connection may lo...

Страница 28: ...times may not be displayed Refer to the network administrator for information on how to configure the settings of the router PC WAN PC ADSL line ADSL router Locally procured Network cameras Recorder Hub LAN cable Locally procured 10BASE T 100BASE TX 1000BASE T category 5e straight NTSC model category 7 straight PAL model ...

Страница 29: ...Recorder 2 Hub Hub LAN cable Locally procured 10BASE T 100BASE TX 1000BASE T category 5e straight NTSC model category 7 straight PAL model LAN cable Locally procured 10BASE T 100BASE TX 1000BASE T category 5e straight NTSC model category 7 straight PAL model ...

Страница 30: ...rt operation Connecting a PC using an ADSL line WAN PC Recorder ADSL router ADSL line PC Network cameras Hub Hub LAN cable Locally procured 10BASE T 100BASE TX 1000BASE T category 5e straight NTSC model category 7 straight PAL model ...

Страница 31: ...der 1 Recorder 2 Hub Hub Hub LAN cable Locally procured 10BASE T 100BASE TX 1000BASE T category 5e straight NTSC model category 7 straight PAL model LAN cable Locally procured 10BASE T 100BASE TX 1000BASE T category 5e straight NTSC model category 7 straight PAL model ...

Страница 32: ...he connection cable provided with the extension unit when connecting the recorder and the extension unit Fix the connection cable with the cable clamp provided with the extention unit to prevent disconnection or an unstable connec tion that may cause recording failures or an unstable system Do not wind the cable in a coil 4 5 Attach a cable clamp to each connection cable Fix the connection cable 3...

Страница 33: ... 7 Alarm input 14 8 Alarm input 15 9 Alarm input 16 10 Network error output Signal output upon detection of a disconnect ed Ethernet link Signal output upon DHCP IP address expiration Open collector output 24 V DC max 100 mA 11 Alarm reset input Canceling the alarm display Non voltage make contact 5 V pull up 150 kΩ 12 Emergency recording input Starting emergency recording signal input 13 Signal g...

Страница 34: ...l ground External switch ALARM CONTROL Pin No Signal Operation Remarks 20 Time adjustment I O The time of this recorder is adjusted to the preset time according to the signal input This signal output is then generated for the setting time of this recorder The time of all other recorders is adjusted to the setting time of this recorder 52 kΩ 5 V pull up Output current 100 mA Non voltage make contac...

Страница 35: ...be applied to other devices The time adjust output signal will be supplied from pin no 20 to other recorders at the time set for Activation time of Time date under Basic on the setup menu 20 13 Signal ground Time adjustment output Front panel LED monitor output Series recording output Time adjustment output Temperature warning output System error output Buzzer output Disk Recording Alarm recording...

Страница 36: ...ng stops recording safely will start to shut off the power supply for the recorder After completing the internal processing a signal will be supplied from the outage processing end output terminal to the uninterrupt ible power system UPS Then the power supply to the recorder can be suspended Important Be sure to use an UPS that provides a sine wave output Do not use an UPS that provides a square w...

Страница 37: ...s 1 Alarm input 17 Event action will be performed according to the settings Non voltage make contact 5 V pull up 150 kΩ 2 Alarm input 18 3 Alarm input 19 4 Alarm input 20 5 Alarm input 21 6 Alarm input 22 7 Alarm input 23 8 Alarm input 24 9 Alarm input 1 10 Alarm input 2 11 Alarm input 3 12 Alarm input 4 13 Signal ground 14 Signal ground 15 Alarm input 25 Event action will be performed according t...

Страница 38: ...es from the cameras will be performed according to the settings When an alarm device such as a buzzer a lamp etc is installed outside connect them to the alarm output terminals pin no 21 of the ALARM CONTROL connector ALARM 21 9 Alarm equipment Relays etc ALARM CONTROL Alarm input 17 Signal ground Sensor Door security switch Alarm input 1 Alarm output Attached when necessary Signal ground 13 1 14 ...

Страница 39: ...utput Duration set for Error output duration starting from the time of the error occurrence or until the camera is reset from the time of the error occurrence L active Error output Duration set for Error output duration starting from the time of the error occurrence L active Time adjustment I O Input 100 ms or more Output 1 s Input Output L active Alarm suspension input 100 ms or more L active jud...

Страница 40: ...00 turn on the power of the recorder after turning on the power of all the extension units Turn off the power of the recorder To shutdown the recorder do the following Important Remove the plug from the outlet if not operating the recorder not in use long When the recorder has not been used for a certain period turn on the power of the recorder approximately once a week and perform recording playb...

Страница 41: ...isplaying this display It is possi ble to check the network settings such as the IP address or the subnet mask Refer to page 43 for further information IP address setup display The network settings can be configured Press the SET button on the front panel while displaying this display It is possi ble to configure the network settings such as the IP address or the subnet mask Refer to page 44 for f...

Страница 42: ...number Shift the display and configure each setting as described below The display on the LCD can be shifted using the arrow button up or down It is possible to shift to the display of the client PC port PT 2 or the maintenance port PT 3 by pressing the arrow button left or right while the PT 1 MAC address indication is being displayed SET ESC ...

Страница 43: ...settings of Gateway and HTTP port can be checked with the display of the client PC port PT 2 The default network settings of the recorder are as follows Item Camera port Client PC port Maintenance port DHCP OFF IP address 192 168 0 250 192 168 1 250 192 168 2 250 Subnet mask 255 255 255 0 255 255 255 0 255 255 255 0 Default gateway 192 168 1 1 HTTP port 80 Shift the display and configure each sett...

Страница 44: ...elow the number by pressing the SET button while the underscore mark is displayed below the indication When pressing the arrows button left or right while the underscore mark is displayed below the indication the display will be shifted to the display of the client PC port PT 2 or of the maintenance port PT 3 2 Move the underscore mark using the arrow button left or right and then enter values usi...

Страница 45: ... the hard disk drive from static electricity do not touch the circuit board and the connectors of the hard disk drive Use an anti static mat and an anti static grounding strap when installing replacing the hard disk drives When installing hard disk drives use a low torque powered screwdriver or a torque screwdriver to tighten screws with the specified torque The hard disk drive and the HDD caniste...

Страница 46: ...from HDD1 The leftmost slot of the HDD slots is HDD1 and the rightmost one is HDD9 Once the operation has started in the RAID 5 or RAID 6 mode do not change the positions of the HDD units If they are changed it may become impossible to read recorded data Item Reference Page Installation insertion Individual HDD units Install the HDD units 47 All the HDD units in the extension unit Install link all...

Страница 47: ...ntil the removal knob clicks 3 Recognition process of the hard disk drive will start automatically The HDD status indicator will blink orange during the rec ognition process When the recognition process is complete the HDD status indicator will light or blink green When the inserted hard disk drive is unformatted format ting will start automatically When formatting is complete the HDD status indic...

Страница 48: ...er to the setup instructions PDF for further information Total capacity of the hard disk drive Available remaining capacity of the hard disk drive Hour meter Operational mode of the hard disk drive Time and date range of the images recorded on the hard disk drive Note It is impossible to add a hard disk drive when running the system in the RAID 5 or RAID 6 mode Even if an HDD unit is installed lin...

Страница 49: ...displayed 5 Press the SET button 6 Press the arrow button up or down repeatedly until the Link EXT indication is displayed 7 Move the underscore mark below YES using the arrow button left or right and then press the SET button 8 Select the HDD slot number to which the HDD unit is to be inserted using the arrow button up or down and then press the SET button 9 Move the underscore mark below YES usi...

Страница 50: ... the arrow button up or down and then press the SET button 9 Move the underscore mark below YES using the arrow button left or right and then press the SET button The HDD status indicator will blink orange during the shut down process of the selected HDD unit When the shutdown process is complete the HDD status indicator will go off When the shutdown process of the HDD unit on which recording is b...

Страница 51: ...n the extension unit at the same time It is possible to remove all the HDD units in the extension unit Refer also to the operating instructions of the extension unit 1 After inserting the provided key into the key hole on the front cover push and turn it to the right to open the front cover The following operations are to be performed on the net work disk recorder after the recognition process is ...

Страница 52: ...and handle it gently so as not to give it a shock or vibration 10 Close the front cover and lock it by pushing and turning the key to the left Keep the key in a safe place 11 Check the disk information The following can be checked on the Disk information page on the setup menu Refer to the setup instructions PDF for further information Total capacity of the hard disk drive Available capacity of th...

Страница 53: ...6 RAID 6 mode 5 Turn on the power of the recorder by pressing the POWER switch while holding down the USE but ton until the buzzer starts sounding The recorder will start up in the selected operational mode Important Do not change the operational mode after starting the sys tem operation If the operational mode is changed after starting the system operation reading of the recorded data may fail US...

Страница 54: ...data recovery RCV START WAIT During process of data recovery writing data RECOVERING XX Indicates only on extension unit HDD access indicator Lights red The respective hard disk drive is faulty which can be recov ered by replacing the hard disk drive In the RAID 5 mode it indicates that the respective hard disk drive is the first faulty drive In the RAID 6 mode it indicates that the respective har...

Страница 55: ...from the HDD slot Pull the HDD unit out carefully so as not to drop it and handle it gently so as not to give it a shock or vibration 2 Insert a new HDD unit into the HDD slot respective to the HDD access indicator Lift the lever on the HDD unit while holding down the removal knob and then insert the HDD unit all the way into the HDD slot 1 Pinch the tab on the HDD slot with the hook on the HDD un...

Страница 56: ...Reboot When pressing the SET button while the Manual Reboot indication is being displayed the ACCEPT indication will be displayed Select YES and then press the SET button The recorder will be rebooted SET ...

Страница 57: ... sides of the recorder blocked Make sure that if the fans at the rear the ventilation slots on the front or both sides of the recorder are not blocked 11 Temperature inside the unit is too high low Use the recorder at appropriate ambient temperatures 9 When the error indicator blinks orange the temperature inside the recorder may be too high Check whether dust is collected around the fans or not T...

Страница 58: ...ive to the hard disk drive that failed first will light red and the indicators respective to the other failed hard disk drive will blink red 55 Cannot recover data after replacing the HDD units in the RAID 5 RAID 6 mode Make sure that the HDD unit is inserted all the way into the HDD slot 55 The hard disk drive on which there is data to be recovered is faulty Check if the capacity of the new hard ...

Страница 59: ...r to qualified service personnel The power cord plug and connectors get hot during use The power cord gets hot when bent or stretched The MAIN ERR INITIAL indi cation is displayed on the LCD Set the HDD operation mode 52 The EXTu ERR INITIAL ERR indication is displayed on the LCD u Unit number Connect the extension unit again after resetting its settings to the default Refer to the operating instr...

Страница 60: ...e only when 4 or more hard disk drives are installed Input Output External storage High speed serial interface 1 5 Gbps theoretical value x5 Alarm Control connector Alarm input 8 16 ch 1 Network error output 2 Alarm reset input 1 Emergency recording input 1 Available disk space warning output 2 HDD error output 2 Camera error output 2 Error output 2 Outage processing end output 3 Time adjustment i...

Страница 61: ... the PAL model 2 pcs Key 2 pcs Label 2 1 pc Rack mounting bracket 2 pcs Rack mounting bracket fixing screw 6 pcs Rack handle 2 pcs Screws for the rack handle 4 pcs Washer 4 pcs HDD canister 9 pcs HDD fixing screw 54 pcs 1 The CD ROM contains the operating instructions PDFs 2 This label is the same one found on the surface of this product Keep it in view when installing this product in the rack ...

Страница 62: ...al recording 34 External recording switching 34 F FTP server 20 G Gateway 43 44 GNU 10 GPL 10 H Hard disk unit 17 HDD 17 46 54 HDD error output 33 35 39 HDD fault tolerance 18 HDD replacement 17 46 55 HDD unit 15 17 45 High definition images 17 Host 21 Host authentication 21 HTTP port 21 43 44 HUB 26 I IP address 43 44 J JPEG 17 19 K Key lock 44 L LAN 26 LGPL 10 LINK ACT 13 LINK ACT1 13 LINK ACT2 ...

Страница 63: ...ording 20 Schedules 19 SD Memory Recording 22 Security measurement 21 Sequential display 20 SIGNAL GND terminal 16 Site alarms 19 Slave 35 Subnet mask 21 43 SXGA 17 T Terminal alarm 19 Time and date display 41 U Uninterruptible Power Supply 36 Unit 48 51 UPS 36 Use authentication 21 V VGA 17 VPN 21 ...

Страница 64: ...pplier for further information Information on Disposal in other Countries outside the European Union These symbols are only valid in the European Union If you wish to discard these items please contact your local authori ties or dealer and ask for the correct method of disposal Note for the battery symbol bottom two symbol examples This symbol might be used in combination with a chemical symbol In...

Отзывы: