background image

18

19

V

iewing

 V

iewing with VIERA

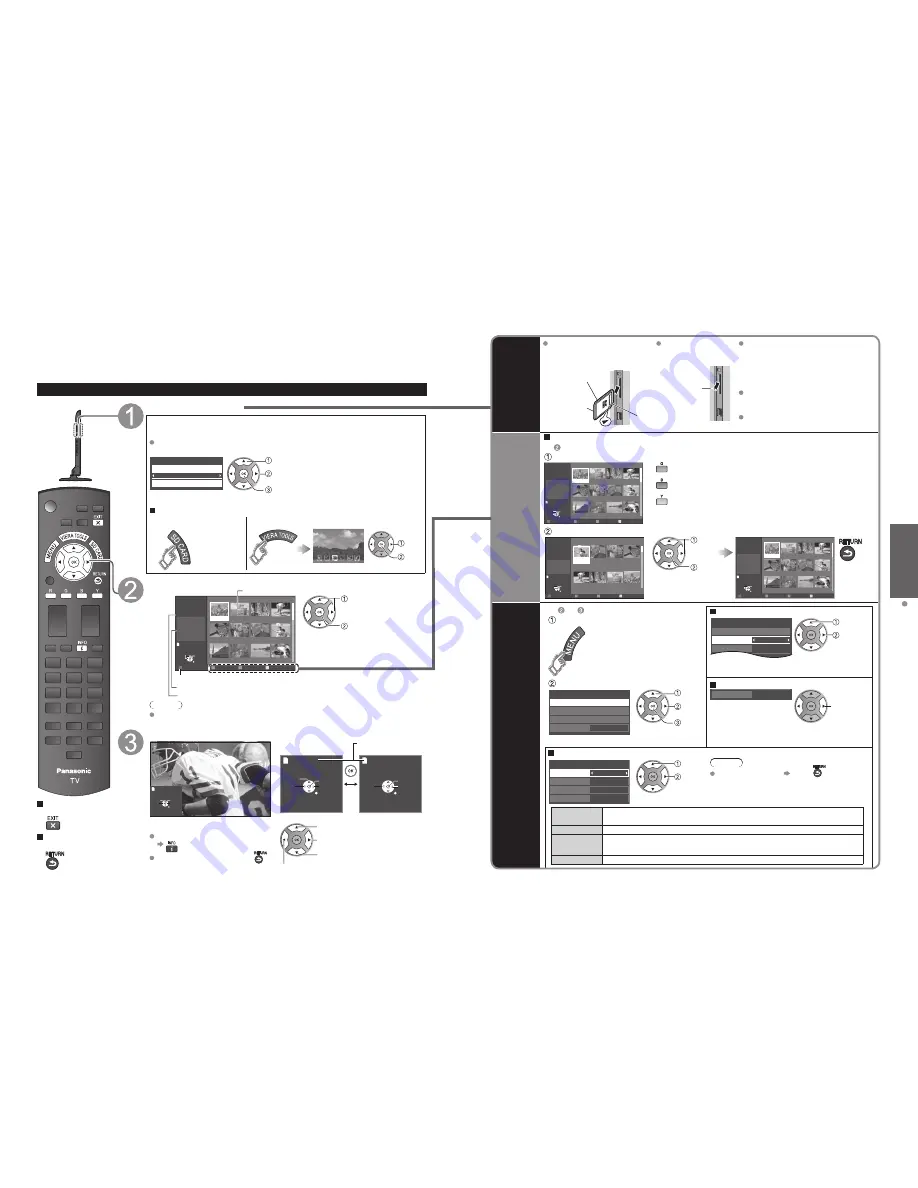
 IMAGE VIEWER

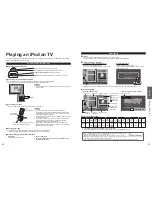
Viewing with VIERA IMAGE VIEWER

The VIERA Image Viewer is a function that lets you easily view still images on a VIERA television by simply inserting an 
SD card into the VIERA SD card slot.
(Media other than SD Cards will not work.)

 Press to exit from 

a menu screen

 Press to return to 

the previous screen

Insert the SD card

 *  This setting will be skipped next time unless you select “Set later”.

Set “Image viewer settings” and select “Play image viewer now”

  “Image viewer settings” will be displayed automatically each time an SD card is 

inserted for the first time.

Set later

Image viewer settings

Image viewer auto play

Play image viewer now

 select

 change

 set

Slideshow:

  A Slideshow will start 

automatically next time.

Thumbnail:

  The Photo viewer menu will be 

displayed automatically next time.

Set later:

   “Image viewer settings” menu 

will be displayed repeatedly.

Off:


 The data can be played manually.

 Manual operation 

(“Image viewer auto play” is “Off”)

Display “Photo viewer”

Start the Slideshow

 select

 next

Slideshow

Select the data to be viewed

Slideshow

Folders

R

Y

Sort by month

G

Sort by date

B

OK

Select

RETURN

Name

Pana0001

Date

 03/04/2010

Size

1029×1200

Photo viewer

All photos

Total

238

Pana0001

Pana0002

Pana0003

Pana0004

Pana0005

Pana0006

Pana0007

Pana0008

Pana0009

Pana0010

Pana0011

Pana0012

 select

 view

Thumbnail view

To launch Slideshow
Selected picture information is displayed
Total number of images

Note

  Depending on the JPEG format, “Information” contents may not be displayed 

correctly. Refer to p. 46 (Data format for SD Card browsing) for details.

View

Next

Rotate

Prev.

RETURN

Play

Accessing

Displays one at a time

  To display/hide the Navigation area 


  Return to the Thumbnail view 

Accessing

Next

Prev.

Rotate

RETURN

Accessing

Pause

Next

Prev.

RETURN

Play

Navigation area

Present status

(While reading the data)

Single photo view

Slideshow

Rotate 90 degrees (counter-clockwise)

To next photo

Rotate 90 degrees (clockwise)

To previous photo

Photo viewer

SD Card

  Insert the card

  Remove the card

  Compliant card type (maximum capacity): 

SDHC Card (32 GB), microSDHC Card 
(16 GB), SD Card 
(2 GB), miniSD Card (2 GB), microSD 
Card (2 GB) (requiring microSDHC Card/
miniSD Card/microSD Card adapter)

  If a microSDHC Card, miniSD Card or 

microSD Card is used, insert / remove it 
together with the adapter.

  For cautions and details on SD Cards 

(p. 46)

Gently insert the SD Card label 

surface facing front.

Label surface

Push until a 

click is heard

Press in lightly 

on SD Card, 

then release.

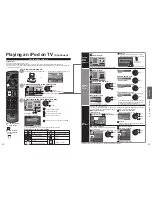
Sort

 To sort by Folder, month or date

In 

 Select the sort type 

Slideshow

Folders

R

Y

Sort by month

G

Sort by date

B

OK

Select

RETURN

Name

Pana0001

Date

 03/04/2010

Size

1029×1200

Photo viewer

All photos

Total

238

Pana0001

Pana0002

Pana0003

Pana0004

Pana0005

Pana0006

Pana0007

Pana0008

Pana0009

Pana0010

Pana0011

Pana0012

  Folders (ascending order of numeric/alphabetical)

  Sort by month (ascending order of the month)

  Sort by date (ascending order of the date )

 Select the directory 

Accessing

Slideshow

R

Y

G

B

OK

Select

RETURN

09/23/2009

28 photos

09/28/2009

58 photos

10/10/2009

3 photos

11/20/2009

8 photos

12/25/2009

24 photos

01/01/2010

10 photos

02/15/2010

16 photos

03/04/2010

32 photos

Date

 09/23/2009

Number of photos

28 photos

Photo viewer

All photos

Sort by date

15

Accessing

Slideshow

R

Y

G

B

OK

Select

RETURN

Name

Pana0001

Date

 09/23/2009

Size

1029×1200

Photo viewer

All photos

09/23/2009

Total                 28

Pana0001

Pana0002

Pana0003

Pana0004

Pana0011

Pana0012

Pana0013

Pana0014

Pana0055

Pana0056

Pana0057

Pana0058

 select

 OK

Return to 
previous 
screen

Photo 

settings

In   or 

 Adjust the Picture/Audio

  Display “Photo settings”  

example: Picture menu

Picture menu/Audio menu (p. 28)

0

20

Vivid

Picture

1/2

Picture mode

Contrast

Back light

Reset to defaults

 select

 adjust

 Select the item 

 Set the Soundtrack

Off

Photo settings

Picture

Audio
Slideshow settings
Soundtrack

 select

 change

 next

Off

Soundtrack

change

Select the music from 6 types.

(Off/Music 1/Music 2/Music 3/Music 4/Music 5/iPod)

 Slideshow settings

Fast

Off

Off

Sepia

Slideshow settings

Display interval

Repeat playback
Transition effect
Photo effect

 select

 adjust

Note

  To stop in mid-cycle   Press 

Display interval

You can set how many seconds each image is displayed in the Slideshow 
mode. 

(Short/Fast/Normal/Slow/Very slow)

Repeat playback

Turn the Slideshow Repeat function on or off. 

(Off/On)

Transition effect

Select the Transition effect. 

(Off /Wipe 

/Wipe 

/Wipe 

/Wipe 

/Comb 

↑↓

/Comb 

→←

/Dissolve/Checker wipe/Random/Array/Collage)

Photo effect

Select the conversion effect. 

(Off/Sepia/Gray scale)

Cutout

Содержание viera TC-L37D2M

Страница 1: ... for Warranty Service purposes Model Number Serial Number Web Site http panasonic net Panasonic Corporation 2010 Printed in U S A M0510 0 Quick Start Guide See page 7 14 Operating Instructions 37 42 Class 1080p LCD HDTV 37 0 42 0 inches measured diagonally TQB2AC0019 Model No TC L37D2M TC L42D2M English Thank you for purchasing this Panasonic product Please read these instructions before operating...

Страница 2: ...cture sound quality etc 27 VIERA LinkTM HDAVI ControlTM 30 Lock 36 Editing and Setting Channels 38 Closed Caption 40 Input Labels 41 Using Timer 42 Recommended AV Connections 43 Ratings List for Lock 44 Technical Information 45 Care and Cleaning 49 FAQ 50 Specifications 52 Enjoy your TV Basic Features Advanced Features FAQs etc Safety Precautions 4 Please read before using the unit Accessories Opt...

Страница 3: ...nding of the lead in wire to an antenna discharge unit size of grounding conductors location of antenna discharge unit connection to grounding electrodes and requirements for the grounding electrode CAUTION RISK OF ELECTRIC SHOCK DO NOT OPEN WARNING To reduce the risk of electric shock do not remove cover or back No user serviceable parts inside Refer servicing to qualified service personnel The l...

Страница 4: ...e wall hanging bracket installation manual Back of the TV Holes for wall hanging bracket installation Screw for fixing the TV onto the wall hanging bracket not supplied with the TV Depth of screw Minimum 0 39 10 0 mm Maximum 0 67 17 0 mm View from the side 7 9 200 mm 7 9 200 mm Customer assumes liability if mounting the unit themselves or if a Panasonic bracket is not used Any damage resulting fro...

Страница 5: ...f you use the pedestal when it is physically damaged personal injury may result Contact your nearest Panasonic Dealer immediately During set up make sure that all screws are securely tightened If sufficient care is not taken to ensure screws are properly tightened during assembly the pedestal will not be strong enough to support the TV and it might fall over and become damaged and personal injury ...

Страница 6: ...V controls indicators Changes the input mode Chooses Menu and Submenu entries Volume up down Selects channels in sequence Front of the TV POWER button Menu navigations Remote control Basic Connection Continued Switches TV On or Off Standby Changes the input mode p 24 Displays Main Menu p 27 Displays Sub Menu p 15 29 Colored buttons used for various functions for example p 14 18 22 35 Volume up dow...

Страница 7: ...ock later go to the Menu screen p 29 First Time Setup First time setup screen is displayed only when the TV is turned on for the first time after the power cord is inserted into a wall outlet and when Auto power on p 29 is set to No Press to return to the previous screen Auto channel setup ANT Cable setup Select the connected Antenna in terminal ANT Cable setup Step 3 of 6 Cable Antenna Not used A...

Страница 8: ...he Input labels Label inputs Select NEXT then press OK to go to the next step Label inputs Step 5 of 6 Press RIGHT to select a label for each input Example DVD Blu ray etc or Not used Press OK to customize the label Edit Blu ray DVD HDMI HDMI RETURN Change Select HDMI 3 Component Video 1 Video 2 PC Next HDMI 1 HDMI 2 ABC Delete abc R G B Y 1 4 GHI 7PQRS 2 ABC 5 JKL 8 TUV 3 DEF 6MNO 9WXYZ 0 LAST se...

Страница 9: ...played channel select the list number to save the channel without pressing OK or Delete a Favorite channel Set favorite 1 3 26 1 2 3 4 5 select delete while holding down Favorite Feature Use the Favorite Feature 1 Display Favorite channels 2 Select the channel Favorite channels 1 3 26 1 2 3 4 5 select or 3 Set a Favorite channel Favorite channels 1 3 26 1 2 3 4 5 OK To change the page Press repeat...

Страница 10: ... microSDHC Card miniSD Card microSD Card adapter If a microSDHC Card miniSD Card or microSD Card is used insert remove it together with the adapter For cautions and details on SD Cards p 46 Gently insert the SD Card label surface facing front Label surface Push until a click is heard Press in lightly on SD Card then release Sort To sort by Folder month or date In Select the sort type Slideshow Fol...

Страница 11: ... Music Video Podcasts You can operate your iPod through the TV screen using the TV remote control p 22 Remote mode Photo You can operate your iPod through the iPod screen using either the TV remote control or the iPod itself p 23 R Y G B Music Playlists Artists Albums Songs Audiobooks 01 02 05 23 OK Select Select Videos Podcasts Remote Settings AXX Correction Sing a song Prev page Next page RETURN...

Страница 12: ...04 Pana0005 Pana0006 Pana0007 Pana0008 Pana0009 Pana0010 Pana0011 Pana0012 Set iPod in Soundtrack Refer to Photo settings on p 19 iPod Photo settings Picture Audio Slideshow settings Soundtrack select change next Operate Operate your iPod using either the TV remote control or the iPod itself On Timer playback When the TV is turned On using the Timer the iPod starts playing Follow the direction in ...

Страница 13: ...he connected equipment using the remote control supplied with the equipment Note For details see the manual for the connected equipment If you connect equipment that has the HDAVI Control function to the TV using an HDMI cable you will find it easier to use Please refer to p 30 35 Before using these functions you need to set VIERA Link setting to On as shown below Press to exit from a menu screen ...

Страница 14: ...ust or select Displaying PC Screen on TV The screen of the PC connected to the unit can be displayed on the TV You can also listen to PC sound with the audio cable connected To connect PC p 43 PC menu setting change as desired Making settings How to Use Menu Functions to p 27 Menu Item Adjustments Configurations options Picture PC adjustments Reset to defaults Resets PC adjustments Confirmation sc...

Страница 15: ...avorite channels p 16 Edit CH caption Changes the station identifier p 39 Signal meter Checks the signal strength if interference or freezing occurs on a digital image How to Use Menu Functions Menu list Menu Item Adjustments Configurations alternatives Picture Reset to defaults Resets all picture adjustments to factory default settings except for Advanced picture Picture mode Basic picture mode V...

Страница 16: ...Control equipped components using one button on the TV remote Enjoy additional HDMI Inter Operability with Panasonic products which have the HDAVI Control function This TV supports HDAVI Control 5 function Connections to the equipment DVD recorder DIGA HD Camcorder Home theater system Amplifier etc with HDMI cables allow you to interface with them automatically Equipment with the HDAVI Control fun...

Страница 17: ...formation about the TV settings can be transmitted to each piece of an equipment Recorder Home theater Player that has HDAVI Control 3 or later function connected to a TV with an HDMI cable Transmittable data Recorder Home theater Player On Screen Display Language setting English Español Français Panel Aspect Ratio 16 9 fixed Closed caption information Mode CC type Channel information Input signal...

Страница 18: ... and a total of three for Home theater Player Camcorder LUMIX Digital camera Note There is a limit to the number of HDMI connectors Recorder TV VIERA Link control Speaker output Back to TV select change You can select available items only Operate the equipment with the TV remote control pointing it at the TV To operate the equipment read the manual of the equipment Available TV remote control butt...

Страница 19: ...ating and any other more restrictive ratings will also be blocked To select the channel or the rating of the program to lock Channel lock Select up to 7 1 7 channels to block These channels will be blocked regardless of the program rating Select Mode and set to Custom Select a channel to lock Menu Selects the lock mode Custom Channel lock Mode Channel 1 Channel 2 Channel 3 Channel 4 Channel 5 Chan...

Страница 20: ...ress Number of channels Press RETURN to quit 8 10 RETURN After the scanning is completed select Apply see below All previously saved channels are erased Manual program Set manually Use this procedure when changing the channel setup or changing the channel display Also use this to add or skip channels from the channel list manually Edit Caption 80 Edit CH caption Caption Channel RETURN Delete ABC a...

Страница 21: ... Adjusts Surf mode Language Clock Channels Inputs and other settings Setup 1 2 Clock ANT Cable setup Input labels Language All Channel surf mode next select Select Input labels Menu Customize TV inputs with the names of your connected devices For easier input selections Setup 1 2 Clock ANT Cable setup Input labels Language All Channel surf mode next select Closed Caption Closed caption Display Clo...

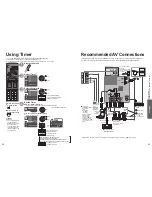
Страница 22: ...ep Off Timer Set to shut the unit off after a pre selected amount of time Menu 0 Sleep Sleep minutes set 0 15 30 60 90 minutes To set Timer 1 5 On Off Timer Select the item and set Menu Sets the time when the TV turns on The TV will turn off after 90 minutes or as specified Off TV 4 18 SUN Timer 1 Timer set Inputs Channel Day On time Off time select set or Sets the time when the TV turns on The TV...

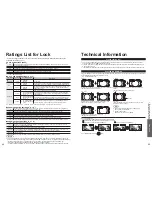
Страница 23: ...ming restricted to adults Contains constant violence or scenes of extreme violence CANADIAN FRENCH RATINGS C F L R E Exempt Exempt programming G General Programming intended for audience of all ages Contains no violence or the violence content is minimal or is depicted appropriately 8 ans 8 General Not recommended for young children Programming intended for a broad audience but contains light or o...

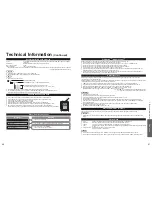
Страница 24: ...r function to the TV with an HDMI cable the sound from the DIGITAL AUDIO OUT terminal can be output as multi channel surround HDAVI Control 5 is the newest standard current as of December 2009 for the HDAVI Control compatible equipment This standard is compatible with the conventional HDAVI equipment HDMI connection HDMI high definition multimedia interface allows you to enjoy high definition digi...

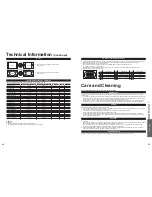
Страница 25: ...he surface is dry Do not scratch or hit the surface of the panel with fingernails or other hard objects Furthermore avoid contact with volatile substances such as insect sprays solvents and thinner otherwise the quality of the surface may be adversely affected Cabinet If the cabinet becomes dirty wipe it with a soft dry cloth If the cabinet is particularly dirty soak the cloth in a weak mild liqui...

Страница 26: ...d will have no impact on the performance of the TV Chaotic image noisy Check nearby electrical products car or motorcycle ignition systems fluorescent lamp etc No image is displayed on screen Check Picture menu p 28 Check the cable connections Check that the correct input has been selected Only spots are displayed instead of images Check the channel settings p 38 Check the antenna cables Neither i...

Страница 27: ...Vertical scanning frequency 59 86 Hz Channel Capability NTSC Analog VHF UHF 2 69 CATV 1 135 Operating Conditions Temperature 32 F 95 F 0 C 35 C Humidity 20 80 RH non condensing Connection Terminals VIDEO IN 1 2 VIDEO RCA PIN Type 1 1 0 V p p 75 Ω AUDIO L R RCA PIN Type 2 0 5 V rms COMPONENT IN Y 1 0 V p p including synchronization PB PR 0 35 V p p AUDIO L R RCA PIN Type 2 0 5 V rms HDMI 1 3 TYPE A...

Отзывы: