


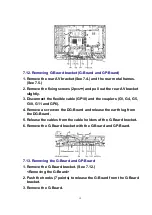
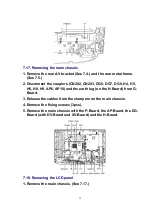
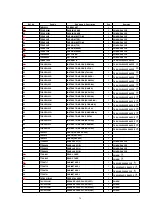

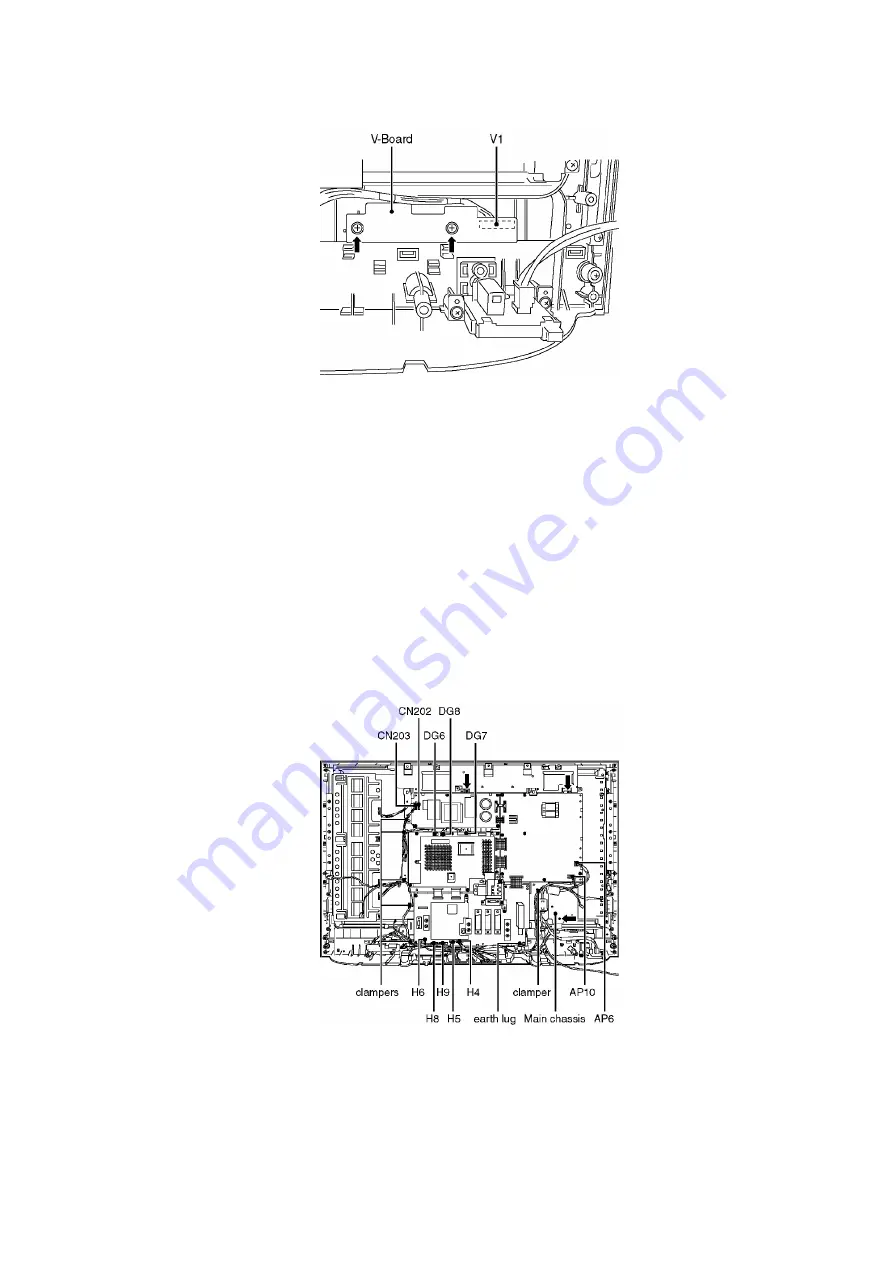
7.17. Removing the main chassis
1. Remove the rear AV bracket (See 7.4.) and the rear metal frame.
(See 7.5.)
2. Disconnect the couplers (CN202, CN203, DG6, DG7, DG8, H4, H5,
H6, H8, H9, AP6, AP10) and the earth lug (on the H-Board) from G-
Board.
3. Release the cables from the clampers on the main chassis.
4. Remove the fixing screws (3pcs).
5. Remove the main chassis with the P-Board, the AP-Board, the DG-
Board (with DV-Board and XV-Board) and the H-Board.
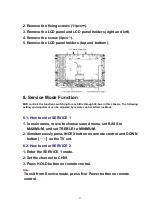
7.18. Removing the LCD panel
1. Remove the main chassis. (See 7.17.)
22
Содержание TX-26LX500F
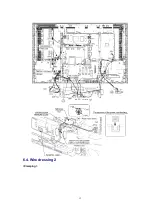
Страница 12: ...6 4 Wire dressing 2 Clamping 12 ...
Страница 24: ...24 ...
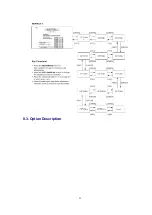
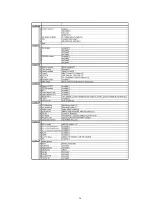
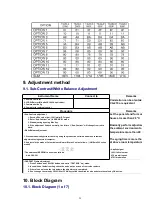
Страница 25: ...8 3 Option Description 25 ...
Страница 26: ...26 ...
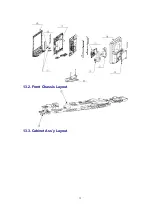
Страница 32: ...13 2 Front Chassis Layout 13 3 Cabinet Ass y Layout 32 ...
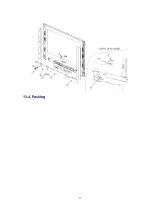
Страница 33: ...13 4 Packing 33 ...
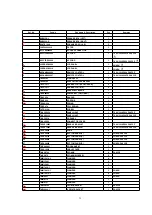
Страница 58: ...IC2108 C0EBF0000354 IC 1 58 ...
Страница 63: ...L8501 ELJNA2R7JB INDUCTION COIL 1 63 ...
Страница 105: ...IC1104 C2CBYF000032 IC 1 105 ...
Страница 107: ...IC5015 C0CBCAD00016 IC 1 107 ...
Страница 111: ...Q1119 2SA207700L TRANSISTOR 1 111 ...
Страница 162: ...11 Schematic Diagram 11 1 Schematic Diagram Notes 35 ...
Страница 163: ...11 Schematic Diagram 11 1 Schematic Diagram Notes 35 ...