27
Getting Started
Usef
ul Inform
ation
Troubleshooting
Appendix
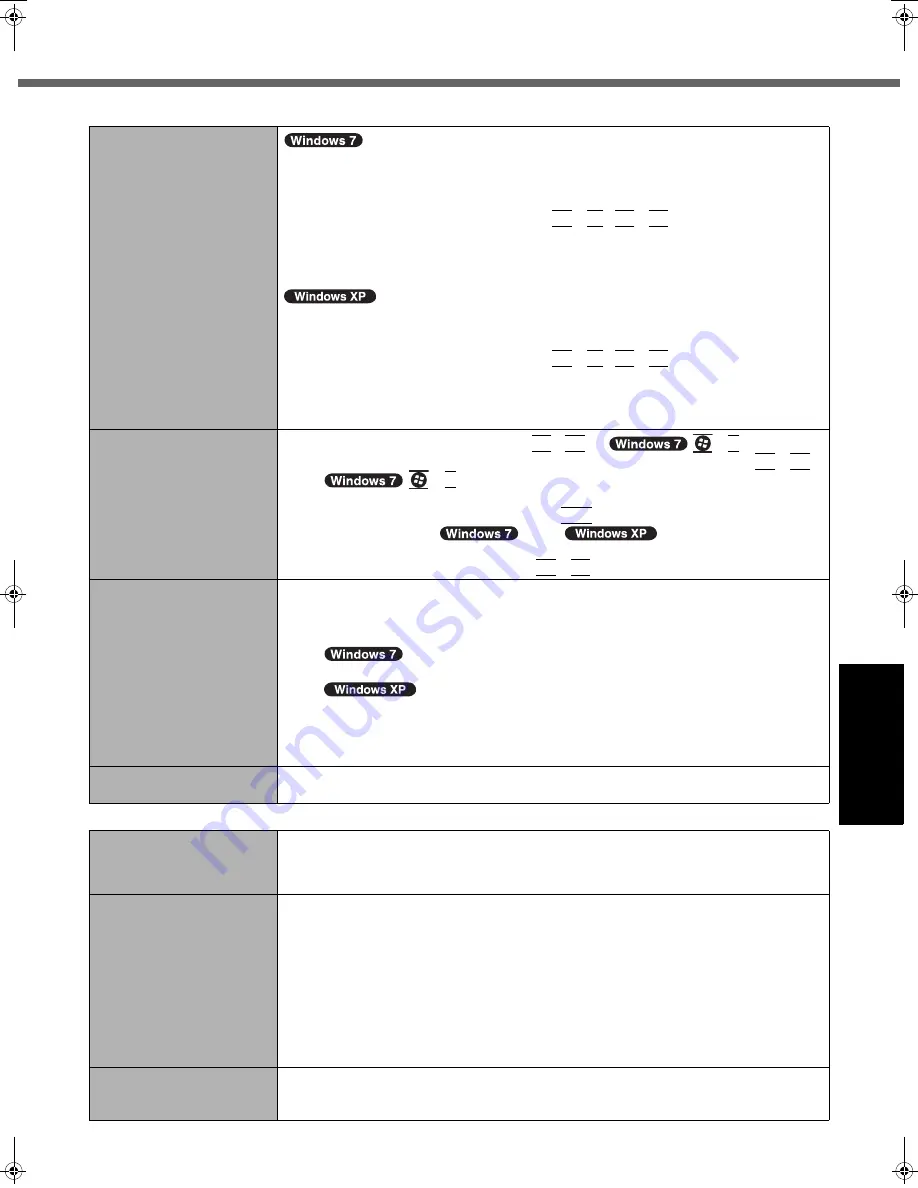
Display
When the screen becomes
black for a moment.
z
When you set [Intel(R) video driver power saving function] - [Intel(R) Display Power Sav-
ing Technology] of Panasonic Power Plan Extension Utility to [Enabled], if you do the fol-
lowing operations, the screen becomes black for a moment, but this is not a malfunction.
You can use it.
• Adjust the brightness of the screen with
Fn
+
F1
/
Fn
+
F2
.
• Remove and insert the AC adaptor.
While you are using motion video playback software, benchmark software for graphic, if error
screen is displayed or application software does not function normally, set [Intel(R) video
driver power saving function] - [Intel(R) Display Power Saving Technology] to [Disabled].
z
When you set [Intel video driver power saving function (Intel(R) Display Power Saving Tech-
nology)] of Power Saving Utility to [Enable], if you do the following operations, the screen
becomes black for a moment, but this is not a malfunction. You can use it.
• Adjust the brightness of the screen with
Fn
+
F1
/
Fn
+
F2
.
• Remove and insert the AC adaptor.
While you are using motion video playback software, benchmark software for graphic, if
error screen is displayed or application software does not function normally, set [Intel video
driver power saving function (Intel(R) Display Power Saving Technology)] to [Disable].
No display.
z
The external display is selected. Press
Fn
+
F3
(or
+
P
)
to switch the
display. Wait until the display has been switched completely before pressing
Fn
+
F3
(or
+
P
)
again.
z
The display is turned off by the power-saving function. To resume, do not press the direct
selection keys, but press any other key like
Ctrl
.
z
The computer entered
sleep/
standby or hibernation by
the power-saving function. To resume, slide the power switch.
z
The screen may become darker. Press
Fn
+
F2
to make the screen brighter.
The screen is disordered.
z
Changing the number of display colors and resolution may affect the screen. Restart the
computer.
z
The refresh rate of the internal LCD may be 40 hertz. Change the refresh rate of the
internal LCD.
A
Right-click on the desktop, and click [Graphics Properties].
Click [start] - [Control Panel] - [Other Control Panel Options] - [Intel(R) GMA Driver
for Mobile].
B
Click [Display Settings].
C
If [Refresh Rate] of the Notebook is [40 Hertz], change to [60 Hertz] and click [OK].
The external display does
not work normally.
z
If the external display does not support the power saving function, it may not work nor-
mally when the computer enters the power saving mode. Turn off the external display.
Battery
The battery indicator is
lights red.
z
The battery level is very low (the charge is approx. 9% or less).
z
Connect the AC adaptor. You can use the computer when the indicator light is orange. If
you do not have an AC adaptor, save your data and power off your computer. After
replacing the battery pack with a fully charged one, turn your computer on again.
The battery indicator is
blinking.
z
If blinking red:
Quickly save your data and power off your computer. Remove the battery pack and dis-
connect the AC adaptor, then connect them again. If the problem persists, contact your
technical support office. The battery pack or charging circuit may be defective.
z
If blinking orange:
• Battery cannot be recharged temporarily because the internal temperature of the bat-
tery pack is outside the acceptable temperature range for recharging. Your computer
can be used normally in this state. Once the range requirement is satisfied, charging
begins automatically.
• Software applications and peripheral devices (USB devices, etc.) are consuming too
much power. Exit the software applications currently running, and remove all peripher-
als. Once the range requirement is satisfied, charging begins automatically.
The battery indicator is
flashing.
z
The battery is recharging.
If [Battery Charging Indicator] in [Main] menu of the Setup Utility is set to [Flashing], the
indicator will alternately become lighter and darker.
DFQW5372ZA_CF-T8mk4_7XP_OI_EN.book 27 ページ 2010年1月22日 金曜日 午後5時12分
Содержание Toughbook CF-T8EWATZJM
Страница 38: ...38 MEMO...
Страница 39: ...39...


