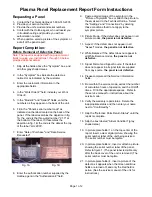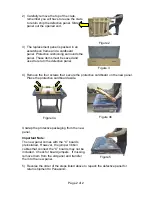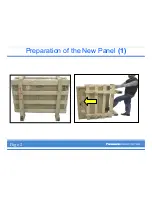
2) Carefully remove the top of the crate,
remember you will have to reuse the crate
to return ship the defective panel. Slide the
panel out the opened end.
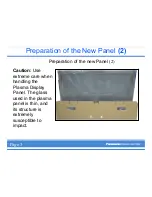
3) The replacement panel is packed in an
escutcheon frame and a cardboard
panel. Protective cushioning surrounds the
panel. These items must be saved and
used to return the defective panel.
Figure 2
Figure 3
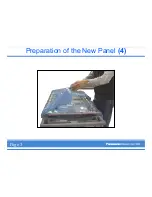
4) Remove the four screws that secure the protective cardboard on the new panel.
Place the protective cardboard aside.
Figure 4a
Figure 4b
Unwrap the protective packaging from the new
panel.
Important Note:
The new panel comes with the “C” boards
preinstalled. However, the jumper ribbon
cables that connect the “C” boards may not be
included. Check for board jumpers. If missing,
remove them from the old panel and transfer
them to the new panel.
Figure 5
5) Reverse the order of the steps listed above to repack the defective panel for
return shipment to Panasonic.
Page 2 of 2
Содержание TH-42PX50U
Страница 1: ...Panel Replacement Procedure TH 37PX50U TH 42PD50U TH 42PX50U...
Страница 11: ...Preparation of the New Panel 1 Page 2...
Страница 13: ...Preparation of the New Panel 3 Page 3...
Страница 14: ...Preparation of the New Panel 4 Page 3...
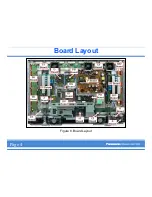
Страница 16: ...Board Layout Figure 8 Board Layout Page 4...
Страница 31: ...Lead Dressing Figure 39 Lead Dressing Location Page 20...
Страница 38: ...I2C Mode Menu Structure B Page 32...
Страница 42: ...PDP White Balance Adjustment Step 2 Adjust the Sub Bright Setting to 10cd m2 Page 34...
Страница 56: ...Examples Of Defective Panels Horizontal and Vertical error Page 37...
Страница 57: ...Examples Of Defective Panels 2 Errors Changing Not a Full Width Page 38...
Страница 58: ...Examples Of Defective Panels 3 Errors in 2 places Errors Changing Page 38...
Страница 59: ...Examples Of Defective Panels 4 These are NOT TH 42PW5UZ or TH 37PW5UZ Panels Double Width Error Page 39...
Страница 60: ...Panel Replacement Procedure...

