


Removal of the SU and SD Boards
1.
Remove the 2 screws of the SU board as
indicated in figure 15.
2.
Disconnect the bridge connector (SU45 or
SC45) and slide the SU-board to the left to
disconnect the coupler (SC41 -SU41) from
the SC board.
3.
Remove the flexible cables (SU1, SU2, SU3,
SU4) and place the SU board aside.
Installation is performed after the removal of
the SC board.
Figure 15. SU and SD boards
Page 8
Содержание TH-42PX50U
Страница 1: ...Panel Replacement Procedure TH 37PX50U TH 42PD50U TH 42PX50U...
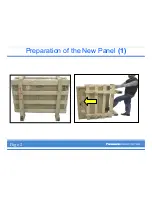
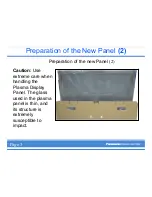
Страница 11: ...Preparation of the New Panel 1 Page 2...
Страница 13: ...Preparation of the New Panel 3 Page 3...
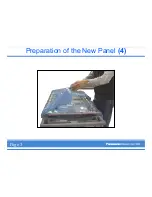
Страница 14: ...Preparation of the New Panel 4 Page 3...
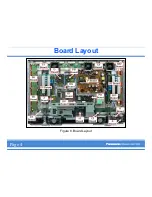
Страница 16: ...Board Layout Figure 8 Board Layout Page 4...
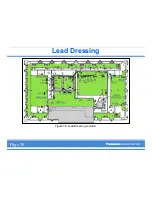
Страница 31: ...Lead Dressing Figure 39 Lead Dressing Location Page 20...
Страница 38: ...I2C Mode Menu Structure B Page 32...
Страница 42: ...PDP White Balance Adjustment Step 2 Adjust the Sub Bright Setting to 10cd m2 Page 34...
Страница 56: ...Examples Of Defective Panels Horizontal and Vertical error Page 37...
Страница 57: ...Examples Of Defective Panels 2 Errors Changing Not a Full Width Page 38...
Страница 58: ...Examples Of Defective Panels 3 Errors in 2 places Errors Changing Page 38...
Страница 59: ...Examples Of Defective Panels 4 These are NOT TH 42PW5UZ or TH 37PW5UZ Panels Double Width Error Page 39...
Страница 60: ...Panel Replacement Procedure...