


65
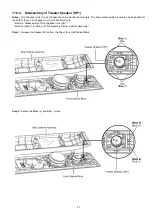
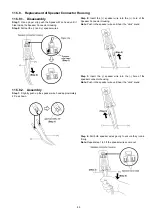
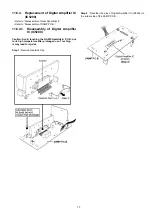
11.5.7. Replacement of the Speaker Wires
Notes :
Front Speaker Unit (L) and (R) have the same mechanical structure. The same disassembly procedure can be applied for
the both of them. Front Speaker Unit (L) is illustrated here.
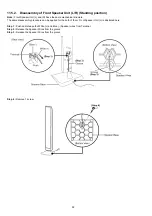
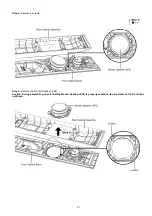
11.5.7.1. Disassembly of the Speaker Wires
• Refer to “Disassembly of Front Speaker Unit (L/R)”.
• Refer to (Step 1) to (Step 6) of “Disassembly of Rear Cabinet Assembly”.
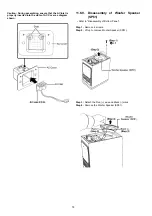
• Refer to (Step 1) to (Step 2) of “Disassembly of Tweeter Speaker (SP1)”.
• Refer to (Step 1) to (Step 3) of “Disassembly of Woofer Speaker (SP2)”.
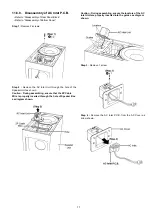
• Refer to (Step 2) of “Disassembly of Port Unit”.
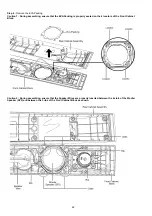
Step 1 :
Remove the Speaker Wires as arrow shown.
Содержание SU-HTB550GK
Страница 5: ...5 1 6 Caution for the AC Mains Lead For GS only ...
Страница 7: ...7 1 8 Safety Installation Instructions ...
Страница 12: ...12 5 General Introduction 5 1 About VIERA Link ...
Страница 26: ...26 ...
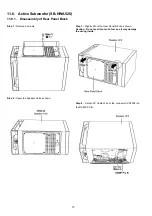
Страница 30: ...30 11 1 3 Active Subwoofer SB HWA520 ...
Страница 33: ...33 11 3 2 2 Standing Position 11 3 3 Active Subwoofer SB HWA520 ...
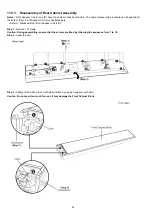
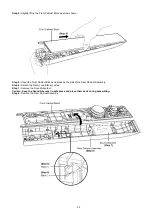
Страница 53: ...53 Step 5 Remove the Speaker Base Step 6 Remove 2 screws Step 7 Push up and remove the Front Ornament Assembly ...
Страница 84: ...84 ...
Страница 96: ...96 ...
Страница 98: ...98 ...
Страница 120: ...120 ...
Страница 135: ...135 99 W_SDO O Wireless control Serial Data Out 100 W_SCL O Wireless control Serial Clock Pin No Mark I O Function ...
Страница 136: ...136 ...
Страница 142: ...142 ...


