8
4 Test Method
4.1.
Pre-test setting
Make sure that the inner pan set in the cooker and the power cord plugged into the wall socket.
4.2.
Bubble test
1. Insert the pan into the cooker’s main body, and then turn it slightly clockwise and anti-clockwise to place the pan properly on
top of the cast heater.
2. Pour a small quantity of water into the pan so that the bottom of the pan is immersed with water. Close the lid completely and
press the switch to start cooking.
3. When the water boils, the cooker will blow off steam. When you see the steam, open the lid, and press the brim of the pan to
completely touch the bottom of the pan to the cast heater. Check the water bubbling condition.
4.3.
Steaming Test
After that, place two or three sheets of tissue paper (gauze) into the pan in such a way that the sheets are spread over the bottom
of the pan, then leave the cooker on without closing the lid.
*If the unit fails the switching timing test, check for poor contact between the inner pan and the pan sensor. If necessary, remove
any dirt deposit from between them, or replace the inner pan and/or the pan sensor.
4.4.
Keep Warm Test
1. Place a mercury thermometer between urethane foam blocks. (Urethane foam blocks (ASN-300) and the thermometer (ASN-
150H) are supplied as spare parts.)
2. Place the urethane foam blocks holding the thermometer in the center of the bottom of the pan, and allow the cooker to run in
the Keep Warm process.
3. More than one hour later, open the lid and read the temperature within 10 seconds.
• If it is within 65
°
C ~ 78
°
C, then considered as normal.
• If the waring temperature is out of this range, check wether there is any dirt of foreign material stuck on the pan sensor or
bottom of the pan, if so, please remove them.
See the right figures:
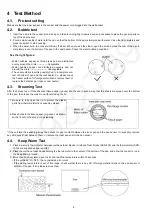
• Water bubbles appear at three areas and are distributed
evenly around the circle ------------- Acceptable
• Water bubbles appear are distributed unevenly and not
around the circle ---------------------- Unacceptable
• The unacceptable result is possibly due to incomplete con-
tact of bottom of pan and the cast heater. So, please check
the heater surface for foreign material and remove them or
replace the defective part (pan or cast heater).
1. Be sure to fully open the lid to protect the plastic
parts from thermal distortion caused by steam.
2. Make holes in the tissue paper (or gauze), as shown,
so that it will not float up during steaming.
Содержание SR-JP185WVA-US
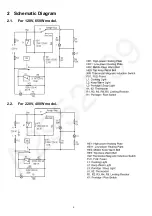
Страница 4: ...4 2 Schematic Diagram 2 1 For 120V 650W model 2 2 For 220V 400W model ...
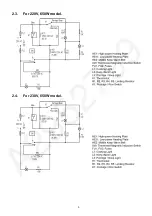
Страница 5: ...5 2 3 For 220V 650W model 2 4 For 230V 650W model ...
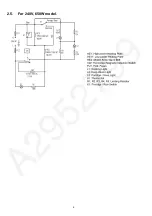
Страница 6: ...6 2 5 For 240V 650W model ...
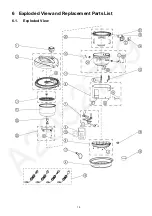
Страница 15: ...15 6 Exploded View and Replacement Parts List 6 1 Exploded View ...
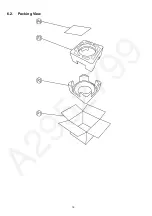
Страница 16: ...16 6 2 Packing View ...

