background image

16

RQ

T

9

81

2

(For “HDAVI Control 2 or later”)

You can control the playback menus of this unit with the TV’s remote 
control. When operating the TV’s remote control, refer to the below 
illustration for operation buttons.


Depending on the menu, some button operations cannot be performed from 
the TV’s remote control.

You cannot input numbers with the numbered buttons on the TV’s remote 
control ([0] to [9]). Use this unit’s remote control to select the play list etc.

Preparation

Before connecting/disconnecting the microphone(s), reduce the volume 
of the main unit to its minimum.
Select “DVD/CD” or “USB” in accordance with the source.

If a strange noise (howling) is emitted during use, move the microphone 
away from the speakers, or lower the microphone volume.

When you are not using the microphone, lower the microphone volume 
to “MIC VOL1” and disconnect the microphone from the microphone 
jack.

Karaoke mode will automatically turn off when you turn this unit off, 
open the disc tray or select another source.

You can connect and play tracks or files from USB mass storage class 
devices (

B

19).

Devices which are defined as USB mass storage class:
– USB devices that support bulk only transfer.

Preparation

Before connecting any USB mass storage device to the unit, ensure 
that the data stored therein has been backed up.

It is not recommended to use a USB extension cable. The USB device 
connected using the cable will not be recognised by this unit.

To playback a selected item, press [

STOP]

5

 and refer to “Playing 

from the selected item” (

B

13).

For other operating functions, they are similar to those described in 
“Playing Discs” (

B

12 to 14).


Maximum: 259 folders (excluding Root folder), 2600 files, 16 characters for 
file/folder name.

Only one memory card will be selected when connecting a multiport USB 
card reader. Typically the first memory card inserted.

Easy control only with VIERA remote control

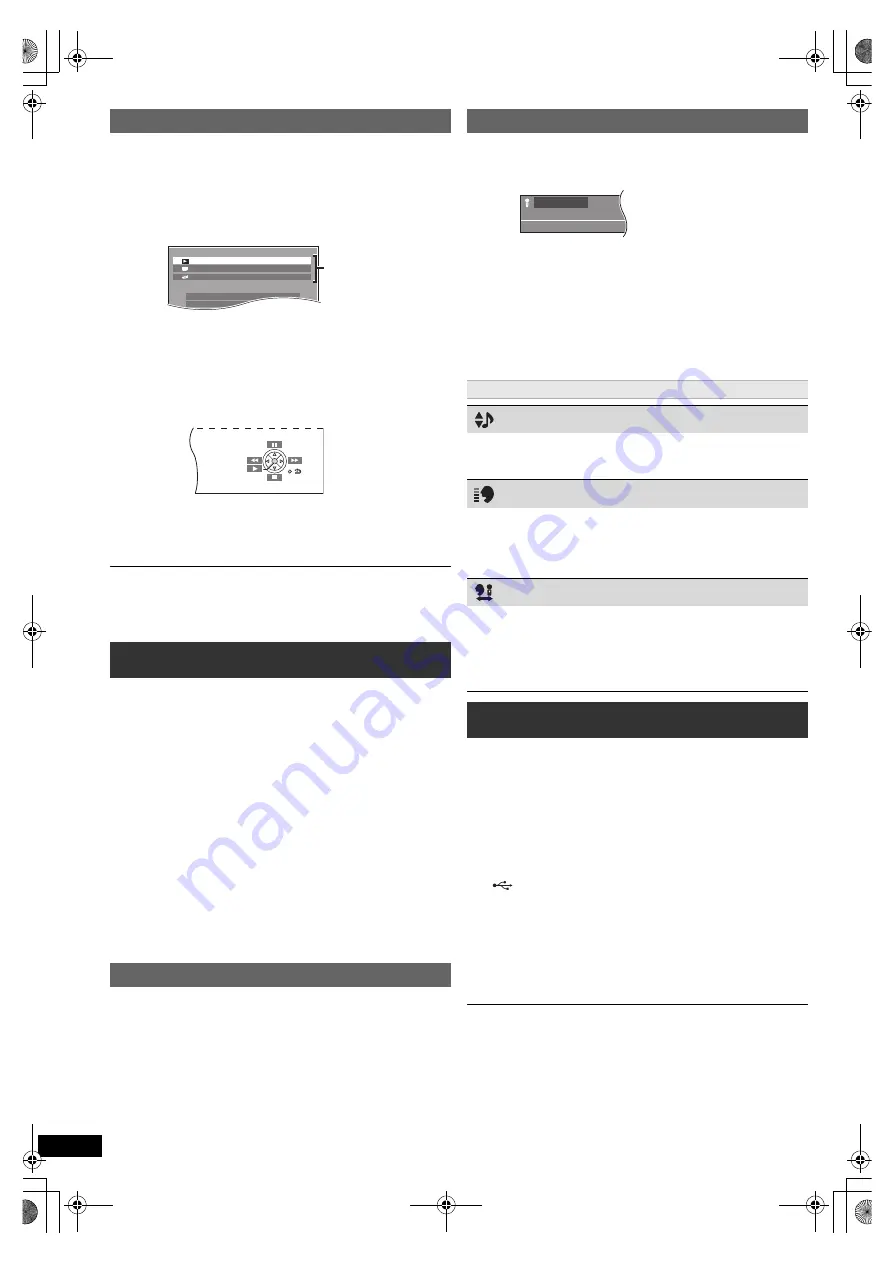
1 Select this unit’s operation menu by using the TV menu settings.

(For details, refer to the operating instructions for your TV.)
The START menu will be shown.
e.g. 

[DVD-V]

The START menu can also be shown by using a button on the TV’s 
remote control (e.g. [OPTION]).
– When “DVD/CD” or “USB” is selected as the source, the TV’s 

remote control works only during stop mode.

2 Select the desired item on the START menu (

B

10).

When the on-screen control panel appears
e.g. 

[DVD-V]

 (when “Playback Disc” is selected from the START menu.)

You can operate the playback with the indicated controls.

The on-screen control panel can also be shown by using a button on the 
TV’s remote control (e.g. [OPTION]).
– This works only during “DVD/CD” or “USB” playback and resume 

modes.

Enjoying Karaoke

1

Connect the microphone(s) (not supplied) to the 
microphone jack(s)

5

.

Plug type: 

6.3 mm monaural standard plug

2

Start playback and adjust the volume of the main unit.

5.1-channel sound will be down-mixed to 2-channel.

3

Press [SOUND]

:

 to select “MIC VOL”.

4

Press [

2

,

1

]

8

 to adjust the microphone volume and 

start singing.

MIC VOL1 (lowest) to MIC VOL4 (highest).

Adding echo effect

1

Press [SOUND]

:

 to select “ECHO”.

2

Press [

2

,

1

]

8

 to adjust the level.

ECHO 1

,-.

ECHO 2

,-.

ECHO 3

,-.

ECHO 4

^--------------------.

 ECHO OFF

,-------------------J

The effect increases with the level.

To cancel, select “ECHO OFF”.

DVD/CD

Home Cinema

Input Selection
Setup

P l a y b a c k   D i s c

TOP MENU(DVD)
MENU(DVD)

Playback/menu access

Using Karaoke mode

1

Press [FUNCTIONS]

6


to select the Karaoke mode 

on-screen menu. (

B

14, Menu 4 (Karaoke))

e.g.

2

Press [OK]

8

 to enter Karaoke mode.

3

Press [

3

,

4

]

8

 to select “On” and press [OK]

8


.

4

Press [

3

,

4

,

2

,

1

]

8

 to select an item and press 

[OK]

8

.

5

Press [

3

,

4

]

8

 to make the settings and press [OK]

8

.

To exit the screen, press [RETURN]

D

.

Items shown differ depending on the type of disc.

Key Control

To change the key of a song

6 (lowest) to 

6 (highest)

Off:

 Normal

Vocal Cancel

Except 

[Xvid]

To reduce the vocal level
On:

 Reduces vocal level

Off:

 Cancel

This may not work depending on the type of song.

Audio Change

To change the audio mode 

(when using Karaoke formatted disc)

[DVD-V]

Off: 

Vocals off

V1:

 Vocal 1

V2:

 Vocal 2

V1+V2:

 Vocal 1 and 2

Playing from an USB device

1

Connect the USB device (not supplied) to the USB port 
(

6

).

2

When you press [USB]

4

 to select “USB”, this unit 

automatically starts playing the contents in the USB 
device.

O f f

K a r a o k e   M o d e

SC-XH380-370-300_GAGS_RQT9812-G_eng.book  16 ページ  2012年12月10日 月曜日 午後8時27分

Содержание SC-XH380

Страница 1: ...ore using this product and save this manual for future use The illustrations shown may differ from your unit Region number The player plays DVD Video marked with labels containing the region number or ALL Region Number Example The Middle East and South Africa 2 Southeast Asia 3 2 ALL 3 5 2 3 ALL 3 5 2 This illustration shows SC XH380 SC XH380 370 300_GAGS_RQT9812 G_eng book 1 ページ 2012年12月10日 月曜日 午...

Страница 2: ...185 These operating instructions are applicable to models SC XH380 SC XH370 and SC XH300 for a variety of regions Unless otherwise indicated illustrations in these operating instructions are of SC XH380 for the Middle East and South Africa Operations in these instructions are described mainly with the remote control but you can perform the operations on the main unit if the controls are the same A...

Страница 3: ...e above RETURN VOL STOP VOL TV INPUT AV SKIP SLOW PAUSE SEARCH SEARCH PLAY DVD USB EXIT REPEAT PLAYMODE SOUND SURROUND FLDISPLAY 1 2 3 4 5 6 7 8 0 9 10 10 CANCEL FUNCTIONS MUTE M E N U START T O P M E N U OK SKIP SLEEP RADIO EXT IN CHSELECT W SRD 1 MIC 2 SC XH380 370 300_GAGS_RQT9812 G_eng book 3 ページ 2012年12月10日 月曜日 午後8時27分 ...

Страница 4: ...tton again TV operations Aim the remote control at the Panasonic TV and press the button TV Í Turn the TV on off INPUT AV Change the TV s video input mode r VOL s Adjust the TV volume This may not work properly with some models Adjust the volume of the main unit Mute the sound MUTE flashes on the main unit s display while the function is on To cancel press the button again or adjust the volume Mut...

Страница 5: ...elected item 13 Other modes of play 13 Program and Random play 13 Repeat play 14 Using on screen menus 14 Other Operations Linked operations with the TV VIERA Link HDAVI ControlTM 15 Setting the audio link 15 Easy control only with VIERA remote control 16 Enjoying Karaoke 16 Adding echo effect 16 Using Karaoke mode 16 Playing from an USB device 16 Reference Changing the player settings 17 Media th...

Страница 6: ...Caution Do not stand on the base Be cautious when children are near When carrying the speaker hold the stand and base parts Do not let foreign objects fall inside the speakers step 1 Preparing the speakers Make sure you have all the indicated components before starting assembly setup and connection Keep the screws out of reach of children to prevent swallowing For optional wall mount refer to page...

Страница 7: ... equipment before connection and read the appropriate operating instructions Do not connect the AC mains lead until all other connections are completed Use an FM outdoor antenna if radio reception is poor step 2 Positioning Caution The main unit and supplied speakers are to be used only as indicated in this setup Failure to do so may lead to damage to the amplifier and or the speakers and may resu...

Страница 8: ... from the DIGITAL AUDIO IN OPTICAL terminal on the main unit to the OPTICAL OUT terminal on your STB If the DIGITAL AUDIO IN OPTICAL terminal is already in use for the TV audio reconnect the TV audio to the AUX terminal using an audio cable If you have various sound sources such as Blu ray Disc player DVD recorder VCR etc connect them to the available inputs on the TV and the TV output should then...

Страница 9: ...AC mains lead connection step 5 Preparing the remote control Use AC IN To household mains socket Main unit rear AC mains lead supplied R6 LR6 AA Press in and lift up Replace the cover Insert so the poles i and j match those in the remote control step 6 Easy setup Preparation Turn on your TV and select the appropriate video input mode e g VIDEO 1 AV 1 HDMI etc to suit the connection to this unit To...

Страница 10: ... can operate the playback with the indicated controls Confirm the audio connection to the AUX HDMI AV OUT or DIGITAL AUDIO IN OPTICAL terminal on the main unit when you select the corresponding sources B 8 Reduce the volume on the TV to its minimum and then adjust the volume of the main unit Listening to the radio Presetting stations automatically 1 Press RADIO 4 to select FM 2 Press MENU C to sel...

Страница 11: ...n the signal is Dolby Digital DOLBY DIGITAL will also be displayed Selected mode in Speaker layout B 9 Easy setup Listening to the TV or other device s audio from this unit s speakers Making settings for digital audio input Available settings Mode Setting DUAL Only works with Dolby Dual Mono MAIN SAP stereo audio MAIN SAP SAP Secondary Audio Program Set PCM FIX mode to OFF to listen to the MAIN or...

Страница 12: ...ayback source LEVEL 1 LEVEL 2 LEVEL 3 LEVEL 4 J The setting you make is retained and recalled every time you play the same type of source C FOCUS Center Focus Effective when playing audio containing the center channel sound or when DOLBY PLII B 11 is selected You can make the sound of the center speaker seem like it is coming from within the TV ON OFF Whisper mode Surround Adjusting the speaker le...

Страница 13: ...elect an item and press OK 8 Press 2 1 8 to skip page by page Selecting the picture in Thumbnail menu JPEG 1 While the picture is displayed press TOP MENU 7 to show the thumbnail menu e g 2 Press 3 4 2 1 8 to select a picture and press OK 8 Press SKIP SKIP 9 5 to skip page by page While a picture is displayed press 3 4 2 1 8 to rotate the picture Underwater MP3 1 3 Perfume Underwater Fantasy plane...

Страница 14: ...he audio on a Xvid video disc T 1 C 1 1 5 5 Off O Title Search D Current item Item name e g DVD V Menu 1 Disc T 1 C 1 Off O Chapter Search 1 5 5 D Current setting e g DVD V Menu 1 Disc Play Speed DVD V To change play speed from k0 6 to k1 4 in 0 1 unit steps Press 1 PLAY 5 to return to normal play After you change the speed Dolby Pro Logic II has no effect Audio output switches to 2 channel stereo...

Страница 15: ...ower Off Link in HDMI menu When you press Í 1 only this unit turns off Other connected equipment compatible with VIERA Link HDAVI Control stays on For details refer also to the operating instructions for your TV You can select whether audio will output from this unit s speakers or the TV speakers by using the TV menu settings For details refer to the operating instructions for your TV Home Cinema ...

Страница 16: ...own e g DVD V The START menu can also be shown by using a button on the TV s remote control e g OPTION When DVD CD or USB is selected as the source the TV s remote control works only during stop mode 2 Select the desired item on the START menu B 10 When the on screen control panel appears e g DVD V when Playback Disc is selected from the START menu You can operate the playback with the indicated c...

Страница 17: ...enu Item Current setting For the Middle East and South Africa For Southeast Asia For the Middle East and South Africa For Southeast Asia Video menu TV Aspect Choose the setting to suit your TV 16 9 Widescreen TV 16 9 4 3 Pan Scan Regular aspect TV 4 3 The sides of the widescreen picture are cut off so it fills the screen unless prohibited by the disc 4 3 Letterbox Regular aspect TV 4 3 Widescreen ...

Страница 18: ... the test tone to listen to the speaker output to confirm speaker connections Test tone will be output to each channel in the following order Left Center Right Surround Right Surround Left Subwoofer To stop the test tone press RETURN D HDMI menu VIERA Link On The VIERA Link HDAVI Control function is available B 15 Off Audio Out On When audio output is from the HDMI AV OUT terminal Depending on the...

Страница 19: ...le systems are supported This unit supports USB 2 0 Full Speed Never use alcohol paint thinner or benzine to clean this unit Before using chemically treated cloth carefully read the instructions that came with the cloth Do not use commercially available lens cleaners as they may cause malfunction Cleaning of the lens is generally not necessary although this depends on the operating environment Med...

Страница 20: ...eft or right Move the speaker so that the screw is in this position XH300 Front speaker XH300 Surround speaker Center speaker At least 30 mm 7 0 mm to 9 4 mm Wall or pillar 5 5 mm to 7 5 mm 4 0 mm A 25 mm B 198 mm C 45 mm D 45 mm E 41 mm F 102 mm G 40 mm H 40 mm I 18 mm J 66 mm K 25 mm L 101 mm M 28 mm XH380 XH370 Front Surround speaker Attach to a wall without the base and the stand To prevent sp...

Страница 21: ...Control with HDAVI Control 3 or later compatible TV 2 When using VIERA Link HDAVI Control with HDAVI Control 2 or later compatible TV It takes time before play starts Play may take time to begin when an MP3 track has still picture data Even after the track starts the correct play time will not be displayed This is normal MP3 This is normal on Xvid video Xvid A menu screen appears during skip or se...

Страница 22: ... is excessive Change the audio to be output as monaural Press and hold PLAY MODE 9 to select MONO The sound becomes monaural To cancel the mode press and hold the button again until AUTO ST is displayed The mode is also cancelled when you change the frequency In normal circumstances select AUTO ST The following messages or service numbers may appear on the TV or unit s display The operation is pro...

Страница 23: ...lder 5 Plays Xvid video Pick up Wavelength DVD CD 655 790 nm VIDEO SECTION Video system PAL NTSC Composite video output Output level Terminal 1 Vp p 75 Pin jack 1 system HDMI AV output Terminal 19 pin type A connector HDAVI Control This unit supports HDAVI Control 5 function SPEAKER SECTION XH380 XH370 Front speakers SB HF4800 Type Speaker unit s 2 way 2 speaker system Bass reflex Impedance 3 1 Fu...

Страница 24: ...ion Reverse engineering and disassembly are prohibited HDMI the HDMI Logo and High Definition Multimedia Interface are trademarks or registered trademarks of HDMI Licensing LLC in the United States and other countries HDAVI ControlTM is a trademark of Panasonic Corporation DVD Logo is a trademark of DVD Format Logo Licensing Corporation MPEG Layer 3 audio coding technology licensed from Fraunhofer...

Страница 25: ...unit and the mobile telephone This unit is intended for use in tropical climates Placement Place this unit on an even surface To reduce the risk of fire electric shock or product damage Do not install or place this unit in a bookcase built in cabinet or in another confined space Ensure this unit is well ventilated Do not obstruct this unit s ventilation openings with newspapers tablecloths curtain...

Страница 26: ...Panasonic Corporation Web Site http panasonic net C Panasonic Corporation 2012 RQT9812 G F1212SN0 p SC XH380 370 300_GAGS_RQT9812 G_eng book 22 ページ 2012年12月10日 月曜日 午後8時27分 ...

Отзывы: