T
Q
BJ09
96
8
1
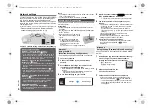
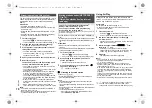
Turn this system on.
2
Press [RADIO, EXT-IN] on the remote control
repeatedly to select “NETWORK”.
3
To enter “WPS Push” mode
1 Press [SETUP] on the remote control repeatedly
to select “Net Setup” and then press [OK].
“WPS Push” is indicated on the display.
2 Press [OK].
3 Press [
2
,
1
] on the remote control to select
“OK? Yes” and then press [OK].
• Alternatively, while pressing and holding down
[
5
/
9
] on the main unit, press and hold
[SELECTOR, -NET PRESET] on the main unit for at
least 4 seconds.
• If the unit is already connected to a wireless LAN network,
“Network Initializing” is displayed for about 1 minute.
“WPS” flashes on the display.
4
Activate the WPS button on the wireless router.
• On the main unit’s display, “Success” appears when the
connection is established. (“
” will be displayed.)
– “Fail” may be displayed if the connection was not made
within the set time limit. Press [OK]. Try the setting
again. If “Fail” is still displayed, try other methods.
∫
Using the WPS PIN code
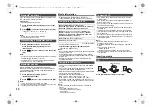
1
Turn this system on.
2
Press [RADIO, EXT-IN] on the remote control
repeatedly to select “NETWORK”.
3
To enter “WPS PIN” mode
1 Press [SETUP] on the remote control repeatedly
to select “Net Setup” and then press [OK].
2 Press [
2
,
1
] on the remote control to select
“WPS PIN” and then press [OK].
• Alternatively, while pressing and holding down
[
:
/
6
] on the main unit, press and hold
[SELECTOR, -NET PRESET] on the main unit for at
least 4 seconds.
• If the unit is already connected to a wireless LAN network,
“Network Initializing” is displayed for about 1 minute.
The PIN code is indicated on the display.
4
Enter the PIN code into the wireless router.
Note:
• Once the system enters WPS PIN code mode, you cannot
set up using the WPS button. To use the WPS button, turn
the system off and then on, and redo the network settings.
• Depending on a router, other connected devices may
temporarily lose their connection.
• For details, refer to the operating instructions of the
wireless router.
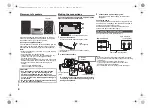
1
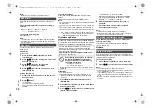
Disconnect the AC power supply cord.
2
Connect the main unit to a broadband router, etc.
using a LAN cable.
3
Connect the AC power supply cord to the main
unit and turn this system on.
• When the connection is established, “
” is indicated
on the main unit’s display.
Note:
• Use category 5 or above straight LAN cables (STP) when
connecting to peripheral devices.
• The LAN cable must be connected or disconnected while
the AC power supply cord is disconnected.
• Inserting any cable other than a LAN cable in the LAN port
can damage the system.
• If the LAN cable is disconnected, the network-related
settings (
below) will be initialized. In that case, make the
settings again.
• When a LAN cable is connected, the Wi-Fi function will be
disabled.
You can change this system’s name on the network,
change the security options for this system, and use
specific IP address, subnet mask, default gateway,
primary DNS, etc.
Preparation
• Complete the network settings. (
6)
• Connect your device to the same network as this
system.
• Check this system’s IP address (
17), and note it
down.
1
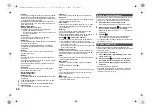
Start an Internet browser on your device and
then type this system’s IP address into the
address field to display the settings page.
• It may take a few minutes until the settings page is
displayed depending on the environment. In that case,
reload the browser.
• If the unit is connected with Wi-Fi, only a device name
and the security options for this system can be
changed. Close the settings page after making the
changes.
– To change the device name, select “Change”, and
type a new device name, and then select “Apply”.
– To change the security options for this system, select
“Change” for the AirPlay password setting.
If you have set an AirPlay password previously, you
will need your old password before making changes.
Make the changes and then select “Apply”.
2
Type a device name and then select “Next”.
• Refer to the step 6 of “Using an Internet browser” (
7)
for details on a device name.
3
Select your security options for this system.
• Refer to the step 7 of “Using an Internet browser” (
7)
for details on security options for this system.
Method 4:
Using WPS (Wi-Fi Protected Setup™)
A compatible wireless router may have the WPS
identifier mark.
e.g.,
Wired LAN connection
Method 5:
Using a LAN cable
LAN cable
(not supplied)
Broadband router, etc.
e.g.,
To make network-related settings
You can also change the name of this system by
changing a setting in the app “Panasonic Music
Streaming” (
9). For details on the app, refer to the
site below.
http://panasonic.jp/support/global/cs/audio/app/
(This site is in English only.)
SC-PMX150_PC-TQBJ0996_eng.book 8 ページ 2017年2月27日 月曜日 午後5時25分


