background image

12

RQT9640

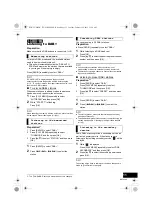
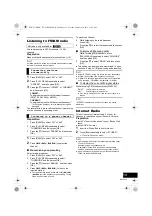
Press [DISPLAY] to change the display.

The information will scroll through the display.
Each time you press the button:

If the DAB broadcast includes time information, this 
unit’s clock will be automatically updated.

1

Press [PLAY MENU] repeatedly to select “AUTO 
CLOCK ADJ” and then press [OK].

2

Press [

3

,

4

] to select “ON ADJUST” and then 

press [OK].


Select “OFF ADJUST” to turn the automatic clock adjustment 
function off.

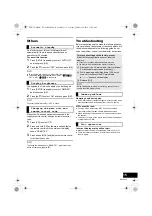
To check the signal reception quality, at least 1  
frequency block needs to be successfully memorised.

If “SCAN FAILED” is displayed after “DAB+” is 
selected or after an auto scan, proceed to “Manually 
tuning 1 frequency block” (

>

below)

If stations have already been memorised to this unit, 
proceed to “Checking the DAB+ signal reception 
quality” (

>

right)

Manually tuning 1 frequency block

Use this function to scan 1 frequency block after 
adjusting the position of the DAB antenna.

Preparation

Note down a frequency block that can be received in 
your region (e.g., 9C 206.352 MHz).

1

While “SCAN FAILED” is displayed.
Adjust the position of the DAB antenna.

2

Press [PLAY MENU] repeatedly to select 
“TUNEMODE” and then press [OK].

3

Press [

3

,

4

] to select “MANUAL” and then press 

[OK].

*

1

4

Press [

3

,

4

] to select the frequency block that is 

receivable in your region and then press [OK].


If broadcasting stations are memorised, proceed to 
“To re-scan DAB+ stations” to memorise stations on other 
frequency blocks. 

If “SCAN FAILED” is still displayed, repeat steps 1 to 4 until a 
station is memorised. If the situation does not improve, try 
using an outdoor DAB antenna or consult your dealer.

Checking the DAB+ signal reception 
quality

1

While listening to the DAB broadcast:
Press [PLAY MENU] repeatedly to select “SIGNAL 
QUALITY” and then press [OK].

The current frequency block is displayed and 
then the reception quality is indicated.

2

If the signal reception quality is poor, move the 
antenna to a position where the reception 
quality improves.

3

To continue checking the quality of other 
frequency blocks
Press [

3

,

4

] again and select the desired 

frequency.

4

Press [OK] to exit.


If the antenna has been adjusted, perform auto scanning and 
update the station memory. (

>

11)

Only the frequencies currently used in Australia as of 
February 2012 on BAND 

III

 are Auto scanned 

(“AUSTRALIA”, factory setting).

Select “ALL BAND 

III

” when you want to store stations 

on other frequencies to memory.

1

Press [PLAY MENU] repeatedly to select “SCAN 
MODE”.

2

Press [

3

,

4

] to select “ALL BAND 

III

” or 

“AUSTRALIA” and then press [OK].

The “DAB AUTO SCAN” begins automatically.


The DAB preset channels are erased when the 
“SCANMODE” is changed.

If the play timer has been set and DAB+ is the music source, 
the timer switches off. (

>

14)

*1: The “TUNEMODE” setting is memorised until it is changed.

Display

Dynamic label:

Information about the broadcast

PTY display:

Programme type

Ensemble label:

The name of the ensemble

Frequency display:

The frequency block and 
frequency is displayed.

Time display

Automatic clock adjustment

To verify or improve the 
signal reception quality

Changing the Auto scan 
frequency range

SC-HC37DBGN_37GN~RQT9640-1L.book  Page 12  Tuesday, February 28, 2012  11:30 AM

Содержание SC-HC37DB

Страница 1: ...C HC37 Included Installation Instructions 2 6 The installation should never be done by any other than a qualified installation specialist Before commencing work carefully read these installation instr...

Страница 2: ...caused by mobile telephones during use If such interference occurs please increase separation between this unit and the mobile telephone This unit is intended for use in moderate climates Placement Pl...

Страница 3: ...plied accessories before using this unit 1 Remote control with a battery N2QAYC000057 1 AC mains lead SC HC37DB 1 DAB antenna SC HC37 1 AM loop antenna SC HC37 1 FM indoor antenna Wall mounting access...

Страница 4: ...devices FAT12 FAT16 and FAT32 file systems are supported This unit supports USB 2 0 full speed This unit can support USB devices of up to 32 GB Supported format Files with the extension mp3 or MP3 Co...

Страница 5: ...he battery should normally last about 1 year however this depends on how frequently the unit is used Main unit 1 Standby on switch I Press to switch the unit from on to standby mode or vice versa In s...

Страница 6: ...ace required Installation accessories Keep the safety holder out of reach of children to prevent swallowing Keep the screws out of reach of children to prevent swallowing Keep the wall mount brackets...

Страница 7: ...it onto the wall 8 After hanging the unit release your hand carefully to confirm the unit sits securely on the wall 7 Drive the safety holder fixing screw not supplied to secure the safety holder onto...

Страница 8: ...d supplied To household mains socket Adhesive tape not supplied DAB indoor antenna supplied Be sure to tighten fully the nut In the interest of power conservation if you will not be using this unit fo...

Страница 9: ...fall when inserting or removing media Be sure to remove the iPod iPhone from its case When moving this unit be sure to remove all media and turn this unit to standby mode Insert the USB device direct...

Страница 10: ...Press 3 4 to select ON REPEAT and press OK is displayed When using iPod iPhone use the setting on the iPod iPhone To cancel repeat play select OFF REPEAT in step 2 The mode is also cancelled when you...

Страница 11: ...IO repeatedly to select DAB 1 While listening to a DAB broadcast Press OK 2 Press 3 4 to select the desired preset channel number and then press OK You cannot preset stations when the station is not b...

Страница 12: ...a station is memorised If the situation does not improve try using an outdoor DAB antenna or consult your dealer Checking the DAB signal reception quality 1 While listening to the DAB broadcast Press...

Страница 13: ...ect the channel and then press OK To improve FM sound quality 1 While receiving FM broadcasts press PLAY MENU repeatedly to select FM MODE and then press OK 2 Press 3 4 to select MONO and then press O...

Страница 14: ...is turned on below Turn the timer on 1 Select the music source 2 and set the desired volume 2 Press SETUP repeatedly to select TIMER SET and then press OK 3 Press 3 4 to select SET and then press OK F...

Страница 15: ...following guide do not solve the problem consult your dealer for instructions Humming heard during play An AC mains lead or fluorescent light is near the cords Keep other appliances and cords away fr...

Страница 16: ...t frequency Continue to hold the button down The lowest frequency changes and the step is changed Cannot charge or operate Check that the iPod iPhone is connected firmly 9 The battery of the iPod iPho...

Страница 17: ...ppeared start operating REMOTE stands for a number The remote control and this unit are using different codes Change the code on the remote control When REMOTE 1 is displayed press and hold OK and 4 f...

Страница 18: ...MHz to 108 00 MHz 50 kHz step Antenna terminals 75 unbalanced SC HC37 Amplitude Modulation AM Frequency range 520 kHz to 1630 kHz 10 kHz step 522 kHz to 1629 kHz 9 kHz step DAB memories 20 channels F...

Страница 19: ...ansfer this unit The unit may keep the user settings information in the unit If you discard this unit either by disposal or transfer then follow the procedure to return all the settings to the factory...

Страница 20: ...Panasonic Corporation Web Site http panasonic net p C Panasonic Corporation 2012 RQT9640 1L F0212AT1032 SC HC37DBGN_37GN RQT9640 1L book Page 20 Tuesday February 28 2012 11 30 AM...

Отзывы: