Sound quality/sound field operations
26
RQT5265
1
2
1
2
1
2
1
1
2
2
1
2
Varying the sound quality with the
manual equalizer
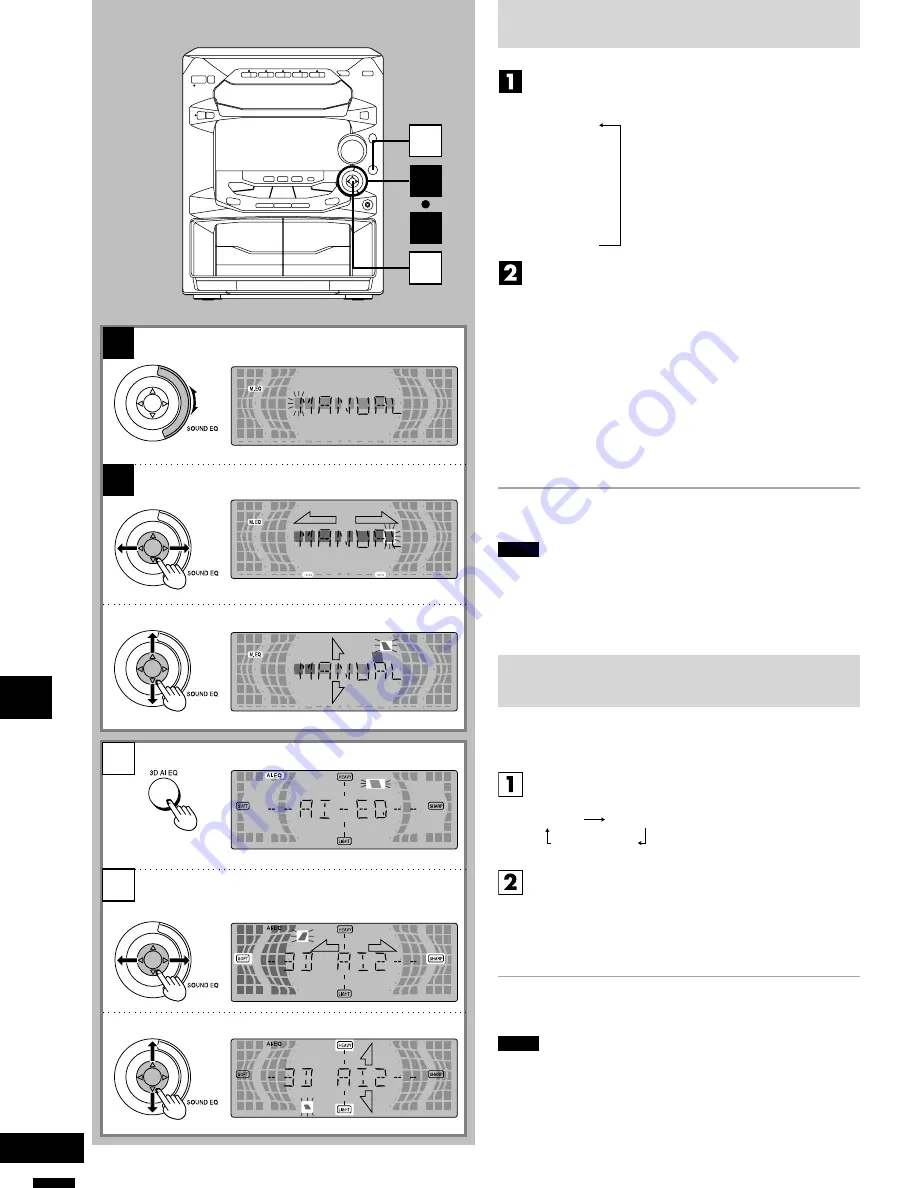
Dial [SOUND EQ] to display “MANUAL”.
When it is turned clockwise, the settings are selected in the
following sequence.
1
HEAVY
2
CLEAR
3
SOFT
4
DISCO
5
LIVE
6
HALL
7
MANUAL
8
AI EQ
9
FLAT
Adjust the sound quality.
1
← →
direction:
For selecting the range of the sound to
be adjusted
Characteristics of each sound range
Under 100 Hz:
Super woofer range
Around 330 Hz:
Bass to midrange
Around 1 kHz:
Midrange
Around 3.3 kHz:
Midrange to treble
Above 10 kHz:
Treble
2
↓ ↑
direction:
For adjusting the level (7 steps)
When the level is in the center, the dot flashes rapidly.
Repeat steps
1
and
2
to set the desired sound quality.
The original display is restored on the display panel in about 5
seconds.
To release the equalizer
Dial [SOUND EQ] to display “FLAT”.
Notes
•
The sound quality setting is stored automatically. It is recalled
when “MANUAL” is next selected.
•
All recordings are performed at the flat setting even if an alternative
sound quality setting has been selected.
Varying the sound quality with the
acoustic image (Al) equalizer
The Al equalizer uses the SOFT, SHARP, HEAVY and LIGHT sound
quality coordinates to achieve subtle sound quality settings with ease.
Press [3D AI EQ] to adjust the surround level.
Every time you press the button:
3D AI 1
3D AI 2
AI EQ (Light off)
Adjust the sound quality.
1
← →
direction:
SOFT–SHARP setting
2
↓ ↑
direction:
LIGHT–HEAVY setting
Repeat steps
1
and
2
to set the desired sound quality.
The original display is restored on the display panel in about 5
seconds.
To release the equalizer
Dial [SOUND EQ] to display “FLAT”.
Notes
•
The sound quality setting is stored automatically. It is recalled
when “Al EQ” is next selected.
•
All recordings are performed at the flat setting even if an alternative
sound quality setting has been selected.


