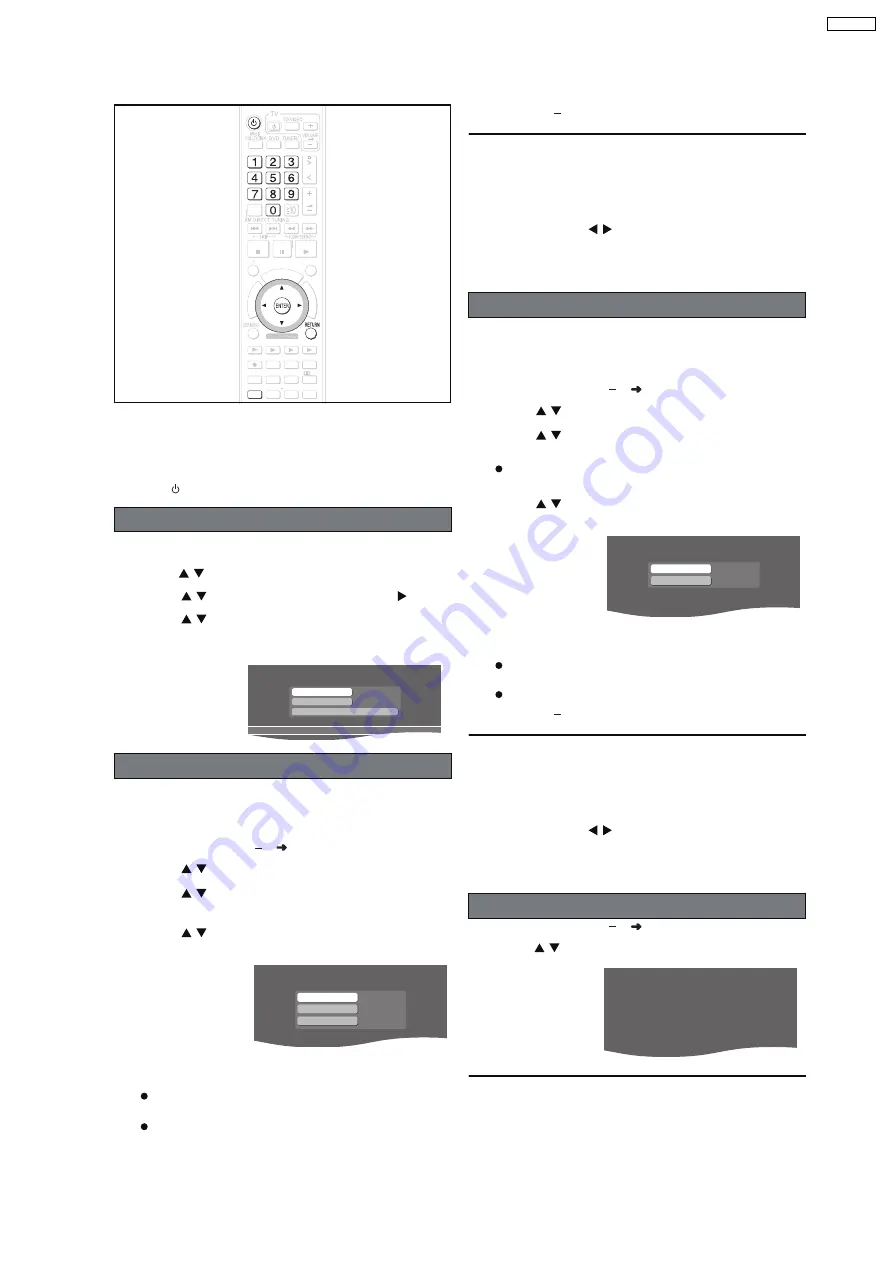
9.3.3. Changing the Network Settings
These settings are used if you will connect this unit to a
network.
Preparation
1 To display the picture turn on the television and select the
appropriate video input to suit the connections to this unit.
2 Press
[
].
1
Press [SETUP].
2
Press [
] to select "Other Setup" and press [ENTER].
3
Press [
] to select "Network" and press [
].
4
Press [
] to select "Network Settings" and press
[ENTER].
The network connection status is displayed.
In most cases, default settings can normally be used without
making any changes.
When connecting this unit to a network and assigning a fixed
IP address, perform the following settings.
After performing steps 1 4 (
above)
5
Press [
] to select "TCP/IP 1" and press [ENTER].
6
Press [
] to select "IP Manual Setting" and press
[ENTER].
7
Press [
] to select the item to be set and press
[ENTER].
8
Enter numbers with the numbered buttons and press
[ENTER].
After checking the specifications for your broadband
router, enter each number.
The numeric input range is between 0 and 255.
Repeat steps 7 8, and enter numbers for other items.
To return to the previous screen
Press [RETURN].
To exit the screen
Press [RETURN] several times.
If you made an input mistake
Move the cursor with [
] and make corrections with the
numbered buttons.
To delete settings and use default settings
Select "IP Auto Setting" in step 6 and press [ENTER].
In most cases, default settings can normally be used without
making any changes.
When setting an assigned DNS server from your ISP, perform
the following settings.
After performing steps 1 4 (
left)
5
Press [
] to select "TCP/IP 2" and press [ENTER].
6
Press [
] to select "DNS Manual Setting" and
press [ENTER].
If "TCP/IP 1" is set to "IP Manual Setting", the "DNS Auto
Setting" will not be displayed.
7
Press [
] to select the item to be set and press
[ENTER].
8
Enter numbers with the numbered buttons and press
[ENTER].
Follow the instructions given by your ISP and enter the
numbers.
The numeric input range is between 0 and 255.
Repeat steps 7 8, and enter numbers for other items.
To return to the previous screen
Press [RETURN].
To exit the screen
Press [RETURN] several times.
If you made an input mistake
Move the cursor with [
] and make corrections with the
numbered buttons.
To delete settings and use default settings
Select "DNS Auto Setting" in step 6 and press [ENTER].
After performing steps 1 4 (
left)
5
Press [
] to select "IP Address" and press [ENTER].
To return to the previous screen
Press [RETURN].
To exit the screen
Press [RETURN] several times.
Common procedures
Manually setting the IP address
HDD
BAND
FUNCTIONS
MENU PLAYLIST
CANCEL
SELECT
VOLUME
FAVORITE
PLAYMODE
HDDREC
ENERGETIC
RELAXING
MELLOW
MUTING
SELECT
SOUND
SLEEP
FL DISPLAY
VS
2ND
EMOTIONAL
REG
SELECT
PLAY
PAUSE
STOP
CH SELECT
SETUP
SETUP
ONE
TOUCH PLAY
S
TA
R
T
TO
P
M
E
N
U
TCP/IP 1
TCP/IP 2
IP Ad dress
Auto Settin g
Auto Settin g
Netw ork Settin gs
Connected to netw ork.
IP Ad dress
Subnet Mask
0. 0. 0. 0
0. 0. 0. 0
Gateway
0. 0. 0. 0
IP Manual Settin g
Manually setting the DNS server
To check the IP Address, etc.
Primar y DNS Ad dress
Secondar y DNS Ad dress
0. 0. 0. 0
0. 0. 0. 0
DNS Manual Settin g
[MAC Ad dress]
[IP Ad dress]
[Subnet Mask]
[Gate way]
[Primar y DNS Ad dress]
[Secondar y DNS Address]
00-00-00-00-00-00
---.---.---.---
---.---.---.---
---.---.---.---
---.---.---.---
---.---.---.---
IP Ad dress
45
SA-PTX7P
Содержание SA-PTX7P
Страница 12: ...12 SA PTX7P ...
Страница 29: ...RX RX RX RX CH2 AB CH2 AB CH1 CD B 1 1 1 Multi room Multi source 29 SA PTX7P ...
Страница 66: ...11 2 Main Components and P C B Locations 66 SA PTX7P ...
Страница 85: ...Step 3 Remove the middle chassis Step 4 Remove the traverse unit 85 SA PTX7P ...
Страница 94: ...Note Insulate AC Inlet P C B from other parts with insulating material eg plastic 94 SA PTX7P ...
Страница 97: ...97 SA PTX7P ...
Страница 116: ...116 SA PTX7P ...
Страница 118: ...SA PTX7P 118 ...
Страница 130: ...SA PTX7P 130 ...
Страница 132: ...132 SA PTX7P ...
Страница 172: ...SA PTX7P 172 ...
Страница 183: ...26 Exploded Views 183 SA PTX7P ...
Страница 184: ...184 SA PTX7P ...
Страница 185: ...26 1 Cabinet Parts Location SA PTX7P 185 ...
Страница 186: ...SA PTX7P 186 ...
Страница 187: ...SA PTX7P 187 ...
Страница 188: ...SA PTX7P 188 ...
Страница 189: ...26 2 Packaging SA PTX7P 189 ...


