
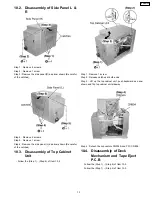


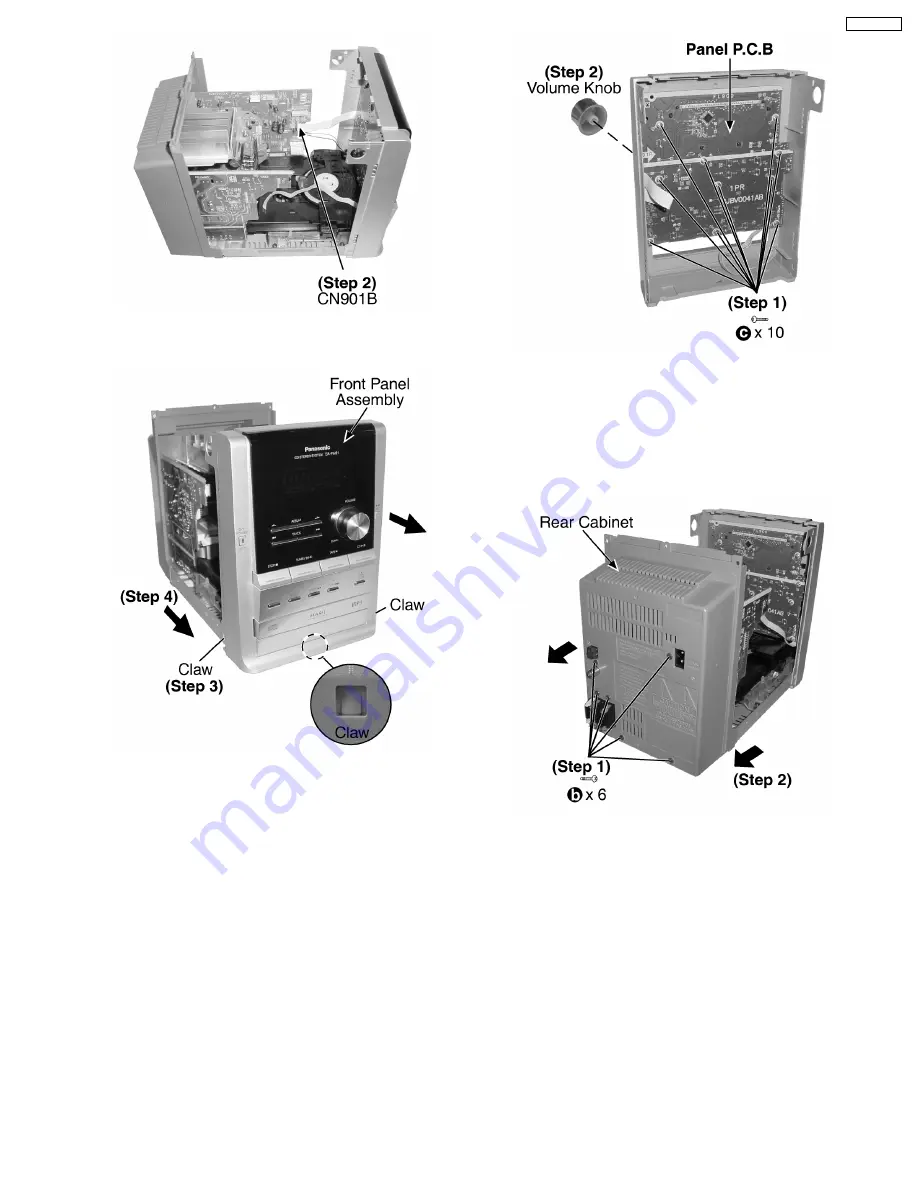
Step 2 : Detach the FFC CN901B.
Step 3 : Release 3 Claws.
Step 4 : Remove the front panel assembly as arrow shown.
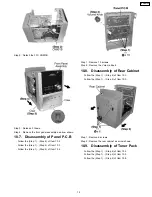
10.7. Disassembly of Panel P.C.B
·
Follow the (Step 1) - (Step 6) of Item 10.2.
·
Follow the (Step 1) - (Step 4) of Item 10.3.
·
Follow the (Step 1) - (Step 4) of Item 10.6.
Step 1 : Remove 10 screws.
Step 2 : Remove the Volume Knob.
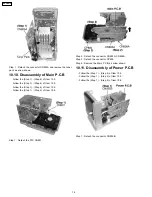
10.8. Disassembly of Rear Cabinet
·
Follow the (Step 1) - (Step 6) of Item 10.2.
·
Follow the (Step 1) - (Step 4) of Item 10.3.
Step 1 : Remove 6 screws.
Step 2 : Remove the rear cabinet as arrow shown.
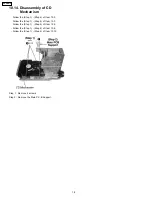
10.9. Disassembly of Tuner Pack
·
Follow the (Step 1) - (Step 6) of Item 10.2.
·
Follow the (Step 1) - (Step 4) of Item 10.3.
·
Follow the (Step 1) - (Step 2) of Item 10.8.
15
SA-PM21PC
Содержание SA-PM21PC
Страница 5: ...1 1 3 Caution for fuse replacement 5 SA PM21PC ...
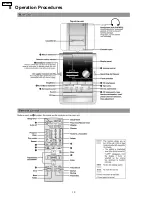
Страница 10: ...8 Operation Procedures 10 SA PM21PC ...
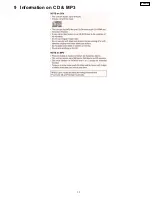
Страница 11: ...9 Information on CD MP3 11 SA PM21PC ...
Страница 20: ...20 SA PM21PC ...
Страница 21: ...21 SA PM21PC ...
Страница 26: ...26 SA PM21PC ...
Страница 28: ...28 SA PM21PC ...
Страница 38: ...Fig 7 38 SA PM21PC ...
Страница 76: ...23 Troubleshooting Flowchart CD Section Circuit 76 SA PM21PC ...
Страница 77: ...77 SA PM21PC ...
Страница 79: ...24 1 Deck Mechanism 24 1 1 Deck Mechanism Parts Location RAA4402 S 79 SA PM21PC ...
Страница 81: ...24 2 CD Loading Mechanism 24 2 1 CD Loading Mechanism Parts Location 81 SA PM21PC ...
Страница 83: ...24 3 Cabinet 24 3 1 Cabinet Parts Location 83 SA PM21PC ...
Страница 84: ...84 SA PM21PC ...


