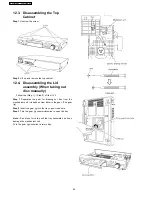
12.3. Disassembling the Top
Cabinet
Step 1
Unscrew the screw.
Step 2
Lift up and remove the top cabinet.
12.4. Disassembling the Lid
assembly (When taking out
disc manually)
·
Follow the (Step 1) - (Step 2) of Item 12.3.
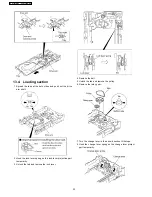
Step 1
Separates the gear for drawing out tray from the
mechanism unit. It inserts a screw driver in the gear. (The gear
jig)
Step 2
Insert the gear jig into the tray open/ close hole.
Step 3
Turn the gear jig counterclockwise to open the tray.
Note :
Do not use force to push the tray backwards as it can
damage the mechanism unit.
Turn the gear jig clockwise to return tray.
24
SA-HT885WGC / SA-HT885WGS
Содержание SA-HT885WGC
Страница 11: ...11 SA HT885WGC SA HT885WGS ...
Страница 19: ...10 Caution for AC Cord 19 SA HT885WGC SA HT885WGS ...
Страница 23: ...12 2 Main Components and P C B Locations 23 SA HT885WGC SA HT885WGS ...
Страница 39: ...39 SA HT885WGC SA HT885WGS ...
Страница 52: ...SA HT885WGC SA HT885WGS 52 ...
Страница 58: ...SA HT885WGC SA HT885WGS 58 ...
Страница 68: ...SA HT885WGC SA HT885WGS 68 ...
Страница 72: ...SA HT885WGC SA HT885WGS 72 ...
Страница 74: ...SA HT885WGC SA HT885WGS 74 ...
Страница 79: ...79 SA HT885WGC SA HT885WGS ...

