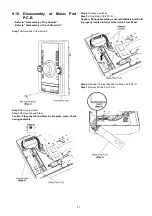


53
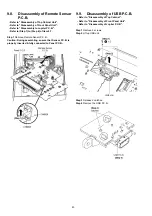
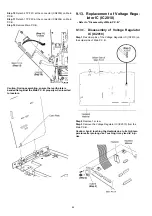
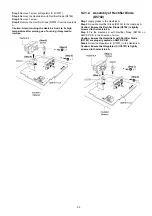
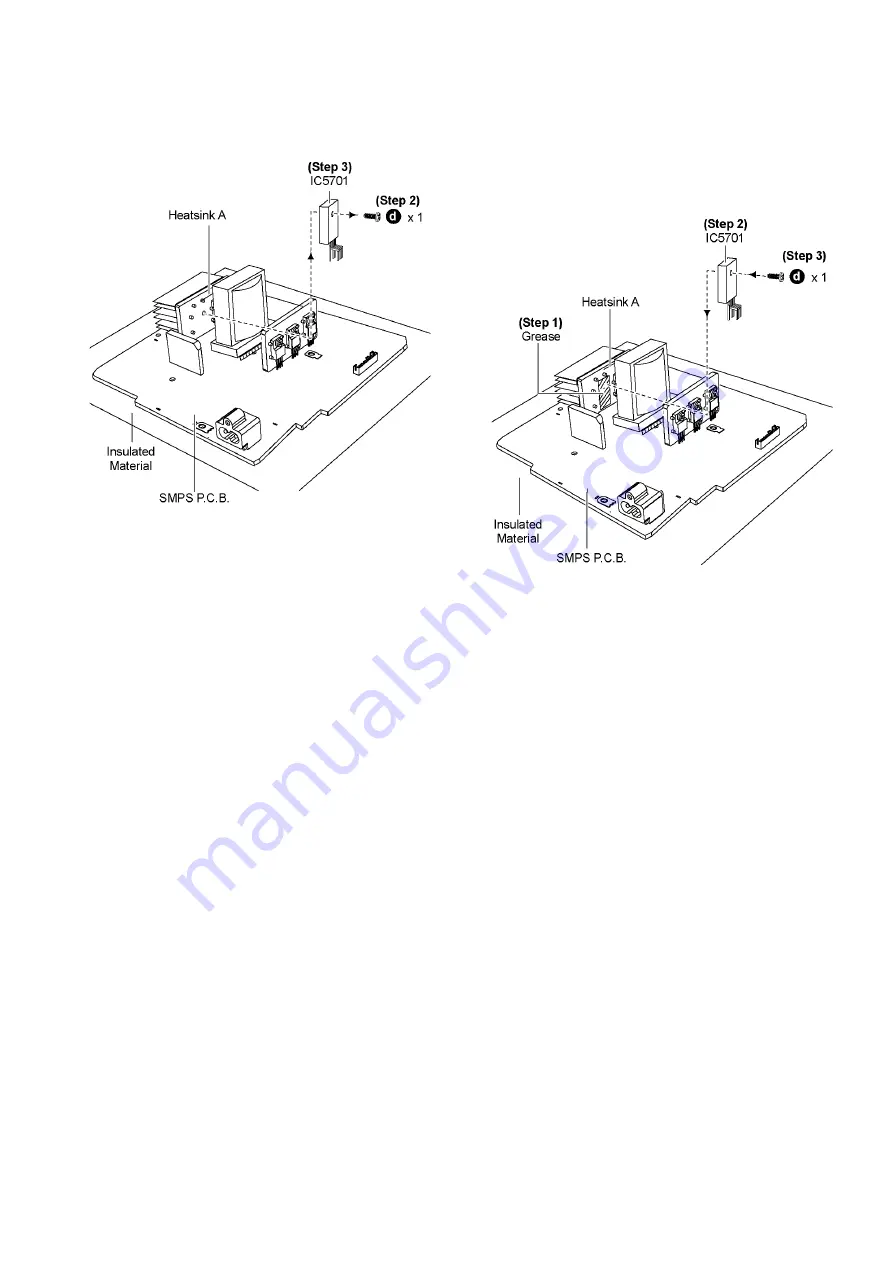
Step 2 Remove 1 screw.
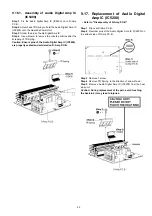
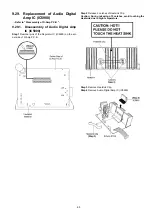
Step 3 Remove the Regulator IC (IC5701).
Caution: Avoid touching the Heatsink A due to its high
temperature after prolonged use. Touching it may lead to
injuries.
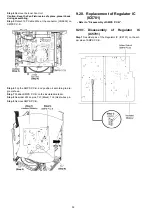
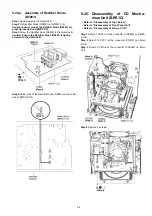
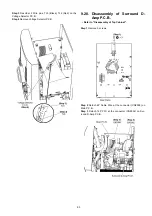
9.20.2.
Assembly of Regulator IC (IC5701)
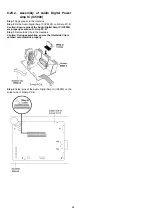
Step 1 Apply grease to the Heatsink A.
Step 2 Fix the Regulator IC (IC5701) to the SMPS P.C.B..
Caution: Ensure pins of the Regulator IC (IC5701) are prop-
erly inserted and soldered on SMPS P.C.B..
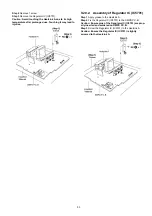
Step 3 Screw the Regulator IC (IC5701) to the Heatsink A.
Caution: Ensure the Regulator IC (IC5701) is tightly
screwed to the Heatsink A.
Содержание SA-AKX92PH
Страница 13: ...13 5 Location of Controls and Components 5 1 Main Unit Key Button Operation ...
Страница 14: ...14 5 2 Remote Control Key Button Operation ...
Страница 15: ...15 5 3 Media Information ...
Страница 25: ...25 7 2 2 Main P C B Fig 2 Main P C B Connector ZJ2007 Voltage Regulator IC IC2010 DC DC Converter IC IC2011 ...
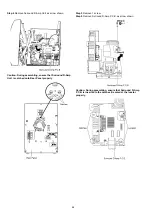
Страница 27: ...27 7 2 4 Surround D Amp P C B Fig 4 Surround D Amp P C B Audio Digital Amp IC IC5900 ...
Страница 33: ...33 9 2 Main Components and P C B Locations ...
Страница 73: ...73 Step 9 Ground the 24P FFC with a short pin ...
Страница 92: ...92 ...
Страница 93: ...93 14 Simplified Block Diagram 14 1 Overall Simplified Block Diagram ...
Страница 104: ...104 ...
Страница 140: ...140 ...
Страница 157: ...157 MMH1103 ...