55
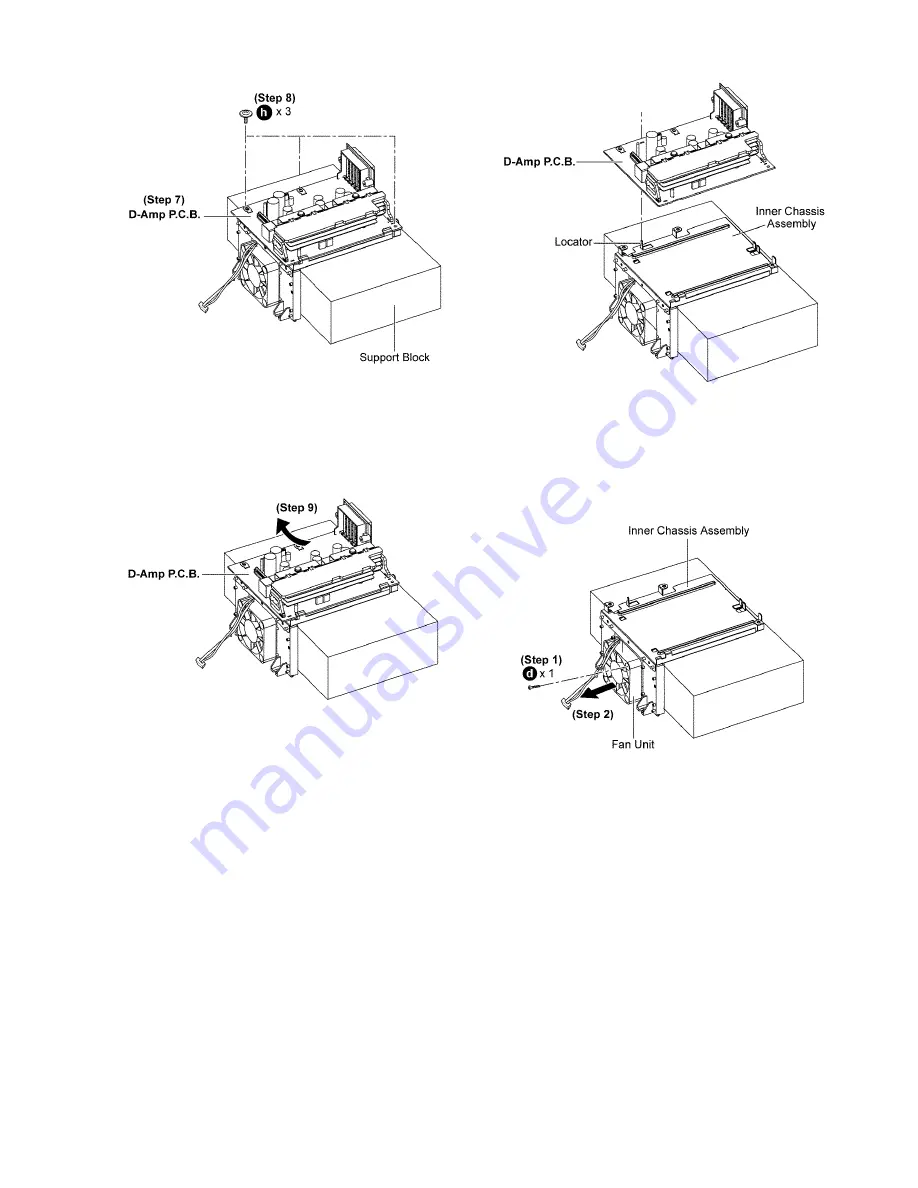
Step 7 :
Place the D-Amp P.C.B. on a support block.
Step 8 :
Remove 3 screws.
Step 9 :
Lift up to remove the D-Amp P.C.B..
Caution: During assembling, ensure the D-Amp P.C.B. is
seated properly on the locator of the Inner Chassis.
9.14.2. Disassembly of Fan Unit
Step 1 :
Remove 1 screw.
Step 2 :
Remove the Fan Unit.
Содержание SA-AK980
Страница 15: ...15 5 3 Disc Information ...
Страница 27: ...27 6 6 2 Error Code Table For Power Supply ...
Страница 28: ...28 7 Troubleshooting Guide 7 1 Jupiter USB ...
Страница 29: ...29 7 2 Troubleshooting Guide ...
Страница 30: ...30 ...
Страница 32: ...32 7 3 2 Troubleshooting Guide ...
Страница 38: ...38 ...
Страница 39: ...39 9 1 Disassembly Flow Chart ...
Страница 40: ...40 9 2 Main Components and P C B Locations ...


