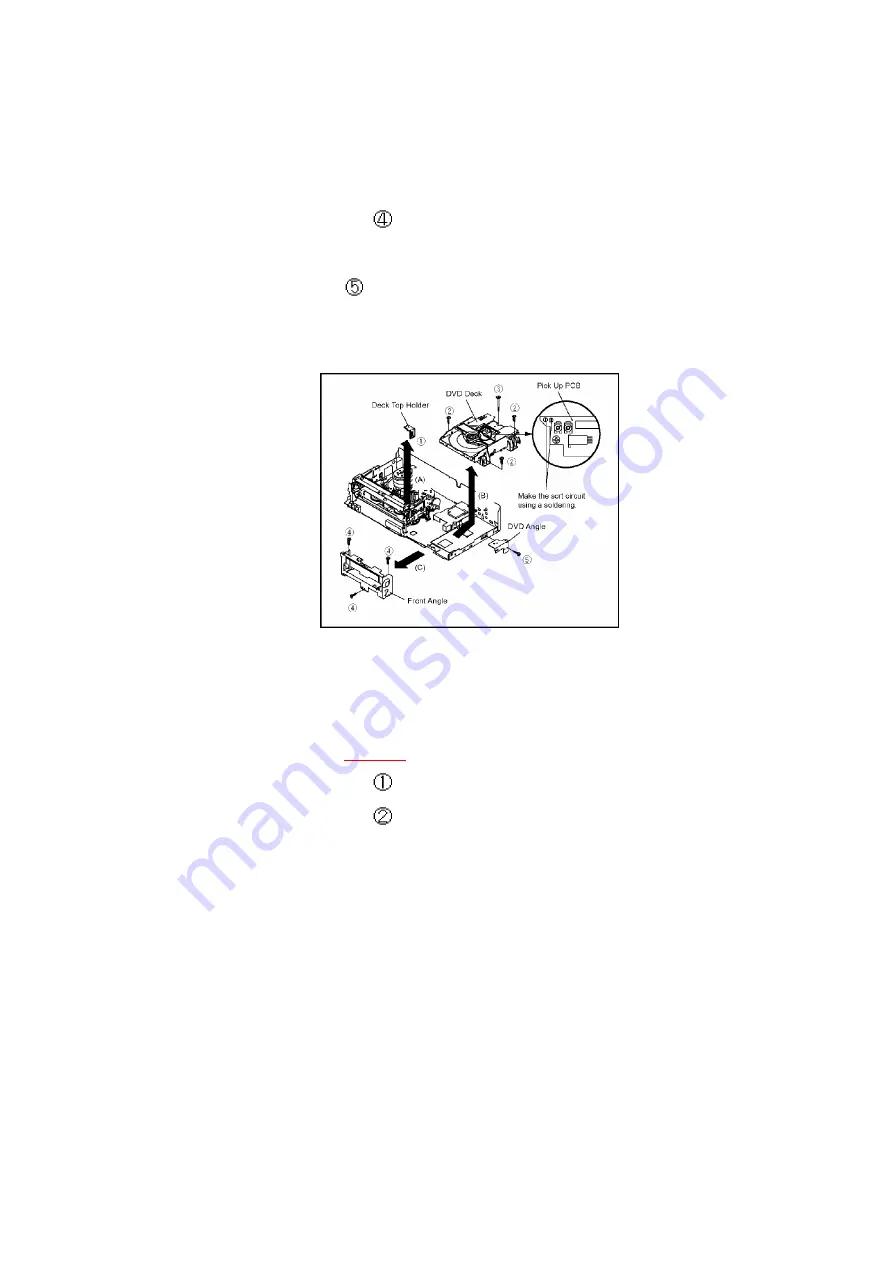
5. Disconnect the following connectors: (CP2601, CP2602, CP2603).
6. Remove the DVD Deck in the direction of arrow (B).
7. Remove the 3 screws .
8. Remove the Front Angle in the direction of arrow (C).
9. Remove the screw .
10. Remove the DVD Angle.
Fig. 1-3
NOTE
When the installation of the DVD Deck, remove all the soldering on the short circuit position after
the connection of Pick Up PCB and DVD PCB connector.
9.1.4. DVD PCB (Refer to
Fig. 1-4
)
1. Remove the 3 screws .
2. Remove the 4 screws .
3. Disconnect the following connectors: (CP4002 and CP8102).
4. Remove the DVD PCB in the direction of arrow.
Fig. 1-4
8
Содержание PVD734S - DVD/VCR DECK
Страница 46: ...22 2 CHASSIS EXPLODED VIEW TOP VIEW 46 ...
Страница 47: ...22 3 CHASSIS EXPLODED VIEW BOTTOM VIEW 47 ...
Страница 48: ...23 REPLACEMENT PARTS LISTS 23 1 MECHANICAL REPLACEMENT PARTS LIST 48 ...
Страница 54: ...R653 R002T4151J RC 150 OHM 1 4W 54 ...


