background image

Chapter 4

Settings — [DISPLAY OPTION] menu

128 - ENGLISH

Adjusting the waveform

Project the luminance adjustment signal of a commercial test disk (0 % (0 IRE or 7.5 IRE) – 100 % (100 IRE)) and 

adjust.

Signal level

Image displayable area

Image position

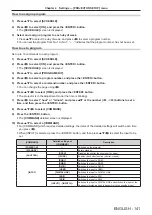
1)  Select “Select line (luminance)” on the waveform monitor.
2)  Adjust black level.


f

Use [BRIGHTNESS] in the on-screen menu [PICTURE] to adjust the black level 0 % of the video signal to 

the 0 % position of the waveform monitor.

3)  Adjust white level.


f

Use [CONTRAST] in the on-screen menu [PICTURE] to adjust the white level 100 % of the video signal to 

the 100 % position of the waveform monitor.

Adjusting red, green, and blue

1)  Set [COLOR TEMPERATURE] to [USER1] or [USER2] (

x

 page 86).

2)  Select “Select line (red)” on the waveform monitor.
3)  Adjust dark red areas.


f

Use [RED] in [WHITE BALANCE LOW] to adjust the black level 0 % of the video signal to the 0 % position 

of the waveform monitor.

4)  Adjust bright red areas.


f

Use [RED] in [WHITE BALANCE HIGH] to adjust the white level 100 % of the video signal to the 100 % 

position of the waveform monitor.

5)  Use the procedure for [RED] to adjust [GREEN] and [BLUE].

Note


f

For the DVI-D signal, the HDMI signal, the SDI signal, or the DIGITAL LINK signal, confirm that the setting for [SIGNAL LEVEL] is correct 

before the black level adjustment.

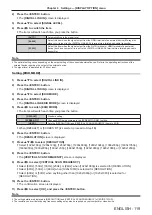
[CUT OFF]

Each red, green, and blue color component can be removed.

1)  Press 

as

 to select [CUT OFF].

2)  Press the <ENTER> button.


f

The 

[CUT OFF]

 screen is displayed.

3)  Press 

as

 to select [RED], [GREEN], or [BLUE].

4)  Press 

qw

 to switch the item.

[OFF]

Disables cutoff.

[ON]

Enables cutoff.

Note


f

When input is switched or a signal is switched, the cutoff setting returns to its original setting (off).

Содержание PT-RS11K

Страница 1: ...for India PT RZ12KD PT RS11KD z z for other countries or regions PT RZ12K PT RS11K Before operating this product please read the instructions carefully and save this manual for future use Before using...

Страница 2: ...example when using the contrast synchronization function shutter synchronization function 54 Chapter 3 Basic Operations Switching on off the projector 57 Connecting the power cord 57 Power indicator...

Страница 3: ...NS MESSAGE 109 3D SAFETY PRECAUTIONS 109 DISPLAY OPTION menu 110 COLOR MATCHING 110 LARGE SCREEN CORRECTION 111 SCREEN SETTING 111 AUTO SIGNAL 112 AUTO SETUP 112 BACKUP INPUT SETTING 113 SIMUL INPUT S...

Страница 4: ...TING 165 Art Net STATUS 166 Network connection 166 Connecting to a twisted pair cable transmitter 167 Accessing from the web browser 168 Chapter 5 Maintenance Light source temperature filter indicator...

Страница 5: ...ctrician Do not defeat the purpose of the earthing plug WARNING This equipment is compliant with Class A of CISPR32 In a residential environment this equipment may cause radio interference CAUTION To...

Страница 6: ...XPOSURE CLASS 3R LASER PRODUCT WAVE LENGTH 448 462nm MAXIMUM OUTPUT 333mW IEC 60825 1 2007 RAYONNEMENT LASER EXPOSITION DIRECTE DANGEREUSE POUR LES YEUX APPAREIL LASER DE CLASSE 3R LONGUEURS D ONDES 4...

Страница 7: ...on the power plug This plug will only fit a grounding type power outlet This is a safety feature If you are unable to insert the plug into the outlet contact an electrician Do not defeat the purpose o...

Страница 8: ...suant to part 15 of the FCC Rules These limits are designed to provide reasonable protection against harmful interference when the equipment is operated in a commercial environment This equipment gene...

Страница 9: ...any 13 amp socket If a new plug is to be fitted please observe the wiring code as shown below If in any doubt please consult a qualified electrician WARNING THIS APPLIANCE MUST BE EARTHED IMPORTANT T...

Страница 10: ...ion lens which the hazard distance exceeds 1 m 39 3 8 and is categorized as risk group 3 is as follows Projection lens Model No Risk group ET D75LE30 Risk group 3 1 ET D75LE40 ET D75LE8 1 When the pro...

Страница 11: ...follows Unit m Projection lens Model No HD 1 D1 2 D2 2 D3 2 D4 2 ET D75LE30 2 1 0 6 0 6 0 68 0 68 ET D75LE40 2 5 0 38 0 38 0 43 0 43 ET D75LE8 4 9 0 46 0 46 0 53 0 53 1 HD Hazard Distance 2 The value...

Страница 12: ...or wall outlets which are coming loose from the wall Do not handle the power plug and power connector with wet hands Failure to observe this will result in electric shocks Do not overload the wall ou...

Страница 13: ...fied technician If installation is not carried out and secured correctly it can cause injury or accidents such as electric shocks f f Be sure to use the wire provided with the ceiling mount bracket as...

Страница 14: ...l components to deteriorate or result in fire f f Take particular care in locations exposed to direct sunlight or near heaters Do not install the projector in a location where salt pollution or corros...

Страница 15: ...games or using a PC where two way interaction is possible take an appropriate break every 30 to 60 minutes Watching for long periods of time may cause eye fatigue When preparing contents use contents...

Страница 16: ...o remova o inv lucro nem amasse a bateria O g s liberado pela bateria pode irritar a garganta danificar o lacre do inv lucro ou o vazamento provocar calor ruptura da blindagem e produzir fogo devido...

Страница 17: ...tistic Licence Holdings Ltd f f DisplayPort is a trademark or registered trademark of the Video Electronics Standards Association f f Adobe Acrobat Flash Player and Reader are either registered tradem...

Страница 18: ...operation is reduced by the unique light source cooling control technology and improvement of the dust resistance Also it will contribute to the stable operation by implementation of the backup funct...

Страница 19: ...ENGLISH 19 Chapter 1 Preparation This chapter describes things you need to know or check before using the projector...

Страница 20: ...from the air conditioner does not blow toward the front of the projector f f Places with sharp temperature fluctuations such as near lights studio lamps Doing so may shorten the life of the light sou...

Страница 21: ...858 0 C 32 F to 45 C 113 F Altitude of 2 700 m 8 858 or higher to lower than 4 200 m 13 780 The projector cannot be used When the Smoke Cut Filter is used the operating environment temperature should...

Страница 22: ...w holes for ceiling mount M6 Adjustable feet Mount Positions of screw holes for ceiling mount and adjustable feet Adjustable feet f f Do not stack three or more projectors f f Do not stack two project...

Страница 23: ...rd directly Do not divulge your password in case you receive such inquiries f f The connecting network must be secured by a firewall etc f f Set a password for the web control and restrict the users w...

Страница 24: ...en to prevent outside light or light from indoor lamps from shining onto the screen r rDo not touch the surface of the projection lens with your bare hands If the surface of the projection lens become...

Страница 25: ...nit r rComputer and external device connections f f When connecting a computer or an external device read this manual carefully regarding the use of power cords and shielded cables as well r rViewing...

Страница 26: ...ote control unit Lens fixing screw 1 XYN4 J18FJ Attention f f After unpacking the projector discard the power cord cap and packaging material properly f f Do not use the supplied power cord for device...

Страница 27: ...mages such as company logos to be displayed when projection starts to the projector Optional accessories Optional accessories product name Model No Projection lens Zoom Lens ET D75LE6 ET D75LE8 ET D75...

Страница 28: ...will go off when the remote control operation goes idle for 10 seconds 11 INPUT MENU button Displays the input selection screen x page 74 12 Input selection buttons RGB1 RGB2 VIDEO S VIDEO Y C DIGITAL...

Страница 29: ...n label at the back of the remote control Note f f When operating the remote control by directly pointing the remote control signal receiver of the projector operate the remote control at a distance a...

Страница 30: ...nal temperature status 6 Filter indicator FILTER Indicates the status of the air filter unit 7 Adjustable feet Adjusts the projection angle 8 Air intake port 9 Remote control signal receiver rear 10 A...

Страница 31: ...eo signal is being input to the selected terminal and blinks when there is no video signal being input 10 AUTO SETUP button Automatically adjusts the image display position while the image is projecte...

Страница 32: ...s when using the projector in 3D systems 6 3D SYNC 2 OUT terminal This terminal is used to connect multiple projectors when balancing the contrast as a combined screen or synchronizing the effects usi...

Страница 33: ...ID number is assigned to each projector When using the projectors by setting the ID numbers set the ID number of the projector body after initial settings have been completed Then set the ID number of...

Страница 34: ...The remote control is effective even in places where an obstacle stands in the light path or where devices are susceptible to outside light Connecting terminals Connecting to a second projector M3 st...

Страница 35: ...ENGLISH 35 Chapter 2 Getting Started This chapter describes things you need to do before using the projector such as the setup and connections...

Страница 36: ...ting on the ceiling and projecting from rear Using the translucent screen Setting on a desk floor and projecting forward Menu item Setting value Menu item Setting value PROJECTION METHOD REAR CEILING...

Страница 37: ...an Projected image and throw distance Install the projector referring to the projected image size and projection distance Image size and image position can be adjusted in accordance with the screen si...

Страница 38: ...for calculating the projection distance per projection lens x page 46 Attention f f Before setting up read Precautions for use x page 20 Especially when the Fixed focus Lens Model No ET D75LE90 is use...

Страница 39: ...ORIZONTAL KEYSTONE viewed from above Screen Screen Vertical arc correction viewed from the side Horizontal arc correction viewed from above Screen Projection distance Arc radius Screen Projection dist...

Страница 40: ...ertical keystone correction angle Horizontal keystone correction angle Vertical keystone correction angle Horizontal keystone correction angle Min value of R2 L2 Min value of R3 L3 Min value of R2 L2...

Страница 41: ...19 12 70 500 6 731 10 770 10 01 11 99 14 12 18 25 18 09 26 29 26 11 50 68 50 05 79 88 79 37 149 08 15 24 600 8 077 12 923 12 03 14 40 16 96 21 92 21 73 31 58 31 35 60 85 60 09 95 89 95 32 178 96 17 7...

Страница 42: ...3 15 24 600 7 472 13 283 12 36 14 81 17 44 22 54 22 33 32 46 32 23 62 54 61 76 98 56 97 98 183 95 17 78 700 8 717 15 497 14 43 17 29 20 36 26 31 26 07 37 89 37 62 73 00 72 08 115 02 114 38 20 32 800 9...

Страница 43: ...15 24 600 9 144 12 192 13 62 16 32 19 21 24 83 24 61 35 76 35 51 68 91 68 05 108 58 107 96 202 65 17 78 700 10 668 14 224 15 90 19 05 22 43 28 99 28 72 41 74 41 45 80 42 79 41 126 70 126 02 20 32 800...

Страница 44: ...77 51 12 81 60 81 59 153 23 15 24 600 9 144 12 192 12 36 14 81 17 33 22 40 22 19 32 25 32 03 62 15 61 38 97 95 97 98 183 95 17 78 700 10 668 14 224 14 43 17 29 20 23 26 15 25 91 37 65 37 38 72 54 71...

Страница 45: ...5 15 24 600 7 472 13 283 13 47 16 14 18 88 24 41 24 18 35 15 34 90 67 72 66 88 106 71 106 77 200 41 17 78 700 8 717 15 497 15 73 18 84 22 04 28 49 28 23 41 02 40 73 79 04 78 05 124 52 124 63 20 32 800...

Страница 46: ...D 0 1085 ET D75LE20 1 7 2 4 1 16 10 1 4312 x SD 0 0832 2 0795 x SD 0 1162 1 7 2 4 1 16 9 1 4709 x SD 0 0832 2 1373 x SD 0 1162 2 0 2 9 1 4 3 1 6202 x SD 0 0832 2 3542 x SD 0 1162 ET D75LE30 2 4 4 7 1...

Страница 47: ...distance L1 formula Formula for distance between projector and screen A1 Min Max ET D75LE90 0 39 1 4 3 0 310 x SD 0 020 0 206 x SH 0 128 0 39 1 16 9 0 337 x SD 0 020 0 275 x SH 0 128 0 441 x SH 0 128...

Страница 48: ...r handling the lens are different for the Fixed focus Lens Model No ET D75LE90 For details refer to the Operating Instructions of ET D75LE90 Attaching the projection lens Attach the projection lens us...

Страница 49: ...rojection lens orange 2 Remove the projection lens by turning it counterclockwise while pressing the lens release button Fig 1 f f Turn the projection lens counterclockwise until the mark on the proje...

Страница 50: ...ideo signals from video equipment contain too much jitter the images on the screen may wobble In this case a time base corrector TBC must be connected f f The projector accepts video signals Y C signa...

Страница 51: ...image may be distorted In such a case connect the time base corrector TBC between the projector and the external devices Note f f When entering DVI D it may be necessary to switch the setting using t...

Страница 52: ...in signal detection may occur In such a case use the PICTURE menu SYSTEM SELECTOR to switch to a system that matches the signal format Connecting example Computers Control computer Computer Computer...

Страница 53: ...AT5e or higher using tools such as a cable tester or cable analyzer When a relay connector is used include it in the measurement f f Do not use a hub between the twisted pair cable transmitter and the...

Страница 54: ...ojector as follows g g Set MULTI PROJECTOR SYNC MODE to anything other than OFF Set MODE to MASTER only on one projector that is synchronized Set MODE to SLAVE for all other projectors g g Set MULTI P...

Страница 55: ...function refer to the PROJECTOR SETUP menu MULTI PROJECTOR SYNC x page 142 f f The menu items in the PROJECTOR SETUP menu MULTI PROJECTOR SYNC is the same as the following setting items g g The PICTUR...

Страница 56: ...56 ENGLISH Chapter 3 Basic Operations This chapter describes basic operations to start with...

Страница 57: ...e power cord Lock button 1 Confirm that the MAIN POWER switch on the side of the projector is on the OFF side and remove the power plug from the outlet 2 Remove the power cord connector from the AC IN...

Страница 58: ...ower indicator ON G STANDBY R lights in red and the projector enters the standby mode 4 Press the power on b button f f The power indicator ON G STANDBY R lights in green and the image is soon project...

Страница 59: ...AL SETTING screen is displayed you can go back to the previous screen Focus adjustment Adjust the focus to display the menu screen clearly You may also need to adjust the zoom and shift Refer to How t...

Страница 60: ...LIGHT OUTPUT LEVEL f f For the relationship between the luminance and the runtime refer to Interrelation of luminance and runtime x page 62 f f For details on each setting item refer to the PROJECTOR...

Страница 61: ...rection by the brightness sensor on one projector without synchronizing with the other projectors The duration that the constant brightness is kept will become longer by setting the value of LIGHT OUT...

Страница 62: ...00 0 47 0 5 600 35 000 100 0 100 0 44 0 5 300 40 000 100 0 100 0 41 0 4 900 r r To set the projector based on luminance Luminance lm When CONSTANT MODE is set to OFF When CONSTANT MODE is set to AUTO...

Страница 63: ...standby mode The factory default setting is NORMAL which allows you to use the network function during standby mode To keep power consumption low during standby mode set this function to ECO After co...

Страница 64: ...et TIME ZONE in accordance with the country or region where you use the projector After completed the initial setting you can change the setting from the PROJECTOR SETUP menu DATE AND TIME The current...

Страница 65: ...uously for at least 30 minutes before the focus is adjusted 1 8 5 6 3 7 9 3 2 4 1 5 7 8 9 2 6 1 Press the FOCUS button to roughly adjust the focus of the image x page 67 2 Change the setting of the PR...

Страница 66: ...r indicator ON G STANDBY R on the projector body lights in orange The fan keeps running 3 Wait for a few seconds until the power indicator ON G STANDBY R of the projector body lights up in red fan is...

Страница 67: ...the remote control 1 Press the lens buttons FOCUS ZOOM SHIFT on the remote control f f FOCUS button Adjusts focus f f ZOOM button Adjusts zoom f f SHIFT button Adjusts shift 2 Select each item and pr...

Страница 68: ...y 1 Move the lens to the ET D75LE90 lens standard position f f While the shift adjustment screen is displayed press the DEFAULT button on the remote control to display the HOME POSITION screen Select...

Страница 69: ...ition of the lens is used when the lens is being replaced or when the projector is being stored and it is not the optical center of the screen f f You can also display the HOME POSITION screen by pres...

Страница 70: ...ide screen side of the projection lens downwards in the direction of the dotted arrow line the upper side of the screen focus surface will tilt inwards and the lower side will tilt outwards as shown i...

Страница 71: ...c Rotate counterclockwise Rotate counterclockwise 1 Press the FOCUS button on the remote control or the LENS button on the control panel to display the focus adjustment screen 2 Press s to shift the...

Страница 72: ...reset the screen position of the projected image on the screen surface back to an optimal state 7 Perform focus adjustment again near the center of the screen and if it is still not enough fine tune...

Страница 73: ...projection can be switched by directly specifying it 1 Press the input selection button RGB1 RGB2 VIDEO S VIDEO Y C DIGITAL LINK DVI D HDMI SDI f f This operation can be also performed using the butto...

Страница 74: ...d device Model No ET YFB100G ET YFB200G is connected to the projector the input selection menu for the DIGITAL LINK output supported device is displayed when the ENTER button is pressed while the DIGI...

Страница 75: ...n on the control panel Note f f The clock phase may shift even if it has completed without any incident In such cases adjust the POSITION menu CLOCK PHASE x page 95 f f If an image with blurred edges...

Страница 76: ...ss the TEST PATTERN button 2 Press qw to select the test pattern Note f f Setting is also available from the TEST PATTERN x page 154 menu f f Settings of position size and other factors will not be re...

Страница 77: ...is assigned to each projector After setting the ID number of the projector set same ID number on the remote control The factory default ID number of the projector is set to ALL When using a single pro...

Страница 78: ...78 ENGLISH Chapter 4 Settings This chapter describes the settings and adjustments you can make using the on screen menu...

Страница 79: ...DISPLAY OPTION 3D SETTINGS PROJECTOR SETUP TEST PATTERN SIGNAL LIST SECURITY NETWORK MENU SELECT SUB MENU P IN P ENTER 2 Press as to select an item from the main menu f f The selected item is highlig...

Страница 80: ...ends on the settings of the DISPLAY OPTION menu ON SCREEN DISPLAY OSD DESIGN The selected item is displayed with the yellow cursor by the factory default f f In the portrait setting the on screen menu...

Страница 81: ...Page PICTURE MODE STANDARD 1 85 CONTRAST 0 2 85 BRIGHTNESS 0 2 86 COLOR 2 2 86 TINT 2 2 86 COLOR TEMPERATURE DEFAULT 2 86 GAMMA DEFAULT 2 88 SYSTEM DAYLIGHT VIEW OFF 2 89 SHARPNESS 8 2 89 NOISE REDUC...

Страница 82: ...106 LEFT RIGHT SWAP NORMAL 106 3D COLOR MATCHING SHARED 2D 3D 107 3D PICTURE BALANCE 107 DARK TIME SETTING 1 5ms 107 3D FRAME DELAY 0us 108 3D TEST MODE NORMAL 108 3D TEST PATTERN 108 SAFETY PRECAUTI...

Страница 83: ...ORY 139 STARTUP INPUT SELECT LAST USED 139 DATE AND TIME 139 SCHEDULE OFF 140 MULTI PROJECTOR SYNC 142 RS 232C 144 REMOTE2 MODE DEFAULT 146 FUNCTION BUTTON 146 LENS CALIBRATION 146 LENS MEMORY 147 STA...

Страница 84: ...ITAL LINK MENU 165 Art Net SETUP OFF 165 Art Net CHANNEL SETTING 2 165 Art Net STATUS 166 Note f f Some items may not be adjusted or used for certain signal formats to be input to the projector When t...

Страница 85: ...reviation of Digital Imaging and COmmunication in Medicine and is a standard for medical imaging devices Although the DICOM name is used the projector is not a medical device and should not be used fo...

Страница 86: ...reen is displayed 3 Press qw to adjust the level Operation Adjustment Range of adjustment Press w Deepens colors 31 31 Press q Weakens colors TINT You can adjust the skin tone in the projected image 1...

Страница 87: ...TE BALANCE HIGH screen or the WHITE BALANCE LOW screen is displayed 9 Press as to select RED GREEN or BLUE 10 Press qw to adjust the level Item Operation Adjustment Range of adjustment RED Press w Dee...

Страница 88: ...RE individual adjustment screen is displayed 3 Press qw to select USER1 or USER2 4 Press the ENTER button f f The COLOR TEMPERATURE screen is displayed 5 Press as to select COLOR TEMPERATURE NAME CHAN...

Страница 89: ...te f f When a name is changed display of USER1 USER2 is also changed SYSTEM DAYLIGHT VIEW You can correct the image to the optimal vividness even if it is projected under a bright light 1 Press as to...

Страница 90: ...adjustment screen is displayed 3 Press qw to switch the item f f The items will switch each time you press the button OFF Disables the dynamic contrast function 1 Adjusts the light source and compensa...

Страница 91: ...T SIGNAL LEVEL g g When the input signal is gone g g When on screen display such as menu screen OSD or input guide a test pattern or a warning message is displayed g g When the operating environment t...

Страница 92: ...25p RGB 1080 30p RGB 1080 50i RGB or 1080 60i RGB For dual link Select AUTO 1080 24p RGB 2K 24p RGB 2K 24p XYZ 1080 24sF RGB 2K 24sF RGB 2K 24sF XYZ 1080 25p RGB 1080 30p RGB 1080 50i RGB 1080 60i RG...

Страница 93: ...ess asqw to adjust the position Orientation Operation Adjustment Vertical up and down adjustment Press a The image position moves up Press s The image position moves down Horizontal right and left adj...

Страница 94: ...range the images are displayed with the aspect ratio converted to that of the screen selected in SCREEN FORMAT 1 During video signals and Y C signal NTSC input only 2 During RGB signal 480i 480p inpu...

Страница 95: ...ess qw to adjust f f Adjustment value will change between 0 and 31 Adjust so that the amount of interference is at a minimum Note f f Some signals may not be adjusted f f Optimal value may not be achi...

Страница 96: ...RVED 3 Press the ENTER button f f The GEOMETRY KEYSTONE or GEOMETRY CURVED screen is displayed 4 Press as to select the item to adjust 5 Press qw to adjust KEYSTONE LENS THROW RATIO Set the throw rati...

Страница 97: ...button 5 Press asqw to adjust CORNER CORRECTION UPPER LEFT UPPER RIGHT LOWER LEFT LOWER RIGHT LINEARITY Horizontal direction Vertical direction Note f f The menu or logo may run off the screen when GE...

Страница 98: ...XED Vertical resolution will degrade f f DIGITAL CINEMA REALITY cannot be set when FRAME RESPONSE is set to FAST BLANKING You can adjust the blanking width if there are noises at the edge of the scree...

Страница 99: ...to the optimal point viewing the screen when there are vertical stripes or sections are missing from the screen Note f f Previously mentioned vertical banding will not occur with all white signal inpu...

Страница 100: ...Set LEFT to ON f f When joining at right Set RIGHT to ON 5 Press qw to switch to ON 6 Press as to select START or WIDTH 7 Press qw to adjust the starting position or correction width 8 Press as to se...

Страница 101: ...n that makes the increased brightness in black level of the overlapping image area difficult to notice when EDGE BLENDING is used to configure multiple screens The optimal point of correction is set b...

Страница 102: ...image or generation of noise f f FRAME CREATION is disabled and cannot be selected when FRAME RESPONSE is set to FAST f f FRAME CREATION is disabled and cannot be selected when the 3D SETTINGS menu 3...

Страница 103: ...allow the position of the image to move within the display area arbitrarily when the input image is not using the whole display area 1 Press as to select RASTER POSITION 2 Press the ENTER button f f...

Страница 104: ...the on screen display 1 Press as to select the display language and press the ENTER button ENTER DISPLAY LANGUAGE SELECT SET f f Various menus settings adjustment screens control button names etc are...

Страница 105: ...etting and confirm that the external devices to be connected are turned off f f Changing the 3D SYNC MODE setting while the cables are connected may result in malfunctions of the projector or the conn...

Страница 106: ...nals SIMULTANEOUS 2 Forcibly displays 3D images in simultaneous format regardless of input video signals SIDE BY SIDE Forcibly displays 3D images in side by side format regardless of input image signa...

Страница 107: ...LANCE HIGH BLUE Adjusts the blue color of the white balance high BRIGHTNESS Adjusts the dark black part of the projected image WHITE BALANCE LOW RED Adjusts the red color of the white balance low WHIT...

Страница 108: ...nd right eye images LEFT BLACK Displays the image of the left eye input signal for the left eye image and all black images for the right eye image BLACK RIGHT Displays all black images for the left ey...

Страница 109: ...for commercial use display the safety precautions message related to 3D viewing to notify viewers 3D SAFETY PRECAUTIONS Show the safety precautions message related to 3D viewing 1 Press as to select...

Страница 110: ...select RED GREEN or BLUE 7 Press qw to adjust f f The adjustment value changes between 0 and 2 048 Note f f Operation when correcting the adjustment color When the correction color same as the adjust...

Страница 111: ...RN to ON to automatically display a test pattern for use in adjusting the selected adjustment colors f f Before using a colorimeter or similar instrument to measure measurement data set PICTURE MODE t...

Страница 112: ...s are changed to unregistered signals during projection AUTO SETUP Set this when adjusting a special signal or horizontally long such as 16 9 signal Setting with MODE 1 Press as to select AUTO SETUP 2...

Страница 113: ...Press the ENTER button f f The BACKUP INPUT SETTING screen is displayed 3 Press as to select BACKUP INPUT MODE 4 Press qw to switch the item f f The items will switch each time you press the button OF...

Страница 114: ...e to disruption of the input signal BACKUP INPUT STATUS changes to INACTIVE In this case switching to the backup input signal is not possible until the original input signal is restored If the signal...

Страница 115: ...item when a video signal is input to the RGB 1 IN R PR VIDEO terminal Y C Select this item when a luminance signal and color signal are input to the RGB 1 IN G Y B PB C terminal Switching the slice le...

Страница 116: ...o the DVI D IN terminal of the projector and the image is not projected correctly 1 Press as to select DVI D IN 2 Press the ENTER button f f The DVI D IN screen is displayed 3 Press as to select EDID...

Страница 117: ...1080p is selected for RESOLUTION f f Select 60Hz 50Hz or 48Hz when 1920x1080i is selected for RESOLUTION f f Select 60Hz or 50Hz when anything other than 1920x1080p or 1920x1080i is selected for RESOL...

Страница 118: ...NCY items to EDID f f When DEFAULT or SCREEN FIT is selected proceed to Step 10 6 Press the ENTER button f f The RESOLUTION screen is displayed 7 Press asqw to select RESOLUTION f f Select 1024x768p 1...

Страница 119: ...The DIGITAL LINK EDID MODE screen is displayed 5 Press qw to switch EDID MODE f f The items will switch each time you press the button DEFAULT Standard setting SCREEN FIT Changes EDID data according...

Страница 120: ...ink Note f f SDI LINK cannot be set when BACKUP INPUT MODE is set to 2 f f When AUTO is set either single link or dual link will be automatically selected by reading the payload ID added to the input...

Страница 121: ...left of the screen 4 Sets to the top center of the screen 5 Sets to the center of the screen 6 Sets to the bottom center of the screen 7 Sets to the upper right of the screen 8 Sets to the center rig...

Страница 122: ...sition is not maintained even if OSD MEMORY is set to ON Setting INPUT GUIDE Set whether to display the input guide input terminal name signal name memory number and BACKUP INPUT STATUS currently sele...

Страница 123: ...P IN P f f The on screen display orientation does not change even when IMAGE ROTATION is set to other than OFF Set the DISPLAY OPTION menu ON SCREEN DISPLAY OSD ROTATION x page 121 as necessary BACK...

Страница 124: ...CORRECTION function the optional Upgrade Kit Model No ET UK20 is required To purchase the product consult your dealer 1 Press as to select UNIFORMITY 2 Press the ENTER button f f The UNIFORMITY scree...

Страница 125: ...ct SHUTTER SETTING 2 Press the ENTER button f f The SHUTTER SETTING screen is displayed 3 Press as to select FADE IN or FADE OUT 4 Press qw to switch the item Item Adjustment FADE IN FADE OUT OFF Does...

Страница 126: ...tion or the shutter synchronization function is used Set this item only on one of the linked projectors that becomes the synchronization source of the shutter operation SLAVE Select this item when the...

Страница 127: ...LAY OPTION menu SHUTTER SETTING MULTI PROJECTOR SYNC g g The PROJECTOR SETUP menu MULTI PROJECTOR SYNC FREEZE Pause the projected image temporarily regardless of the playback of the external device 1...

Страница 128: ...he waveform monitor 3 Adjust dark red areas f f Use RED in WHITE BALANCE LOW to adjust the black level 0 of the video signal to the 0 position of the waveform monitor 4 Adjust bright red areas f f Use...

Страница 129: ...er on the remote control PROJECTION METHOD Set the projection method in accordance with the installation status of the projector Change the projection method if the screen display is upside down or in...

Страница 130: ...f f If the runtime exceeds 20 000 hours replacement of the components inside the projector may be required Consult your dealer for details Setting MAX LIGHT OUTPUT LEVEL Adjust the maximum level to c...

Страница 131: ...When CONSTANT MODE is set to OFF When CONSTANT MODE is set to AUTO or PC MAX LIGHT OUTPUT LEVEL LIGHT OUTPUT Luminance lm MAX LIGHT OUTPUT LEVEL LIGHT OUTPUT Luminance lm 20 000 100 0 100 0 12 000 10...

Страница 132: ...nsor on one projector without synchronizing with the other projectors The duration that the constant brightness is kept will become longer by setting the value of LIGHT OUTPUT smaller GROUP A GROUP B...

Страница 133: ...to AUTO or PC the items of OPERATING MODE and LIGHT OUTPUT cannot be changed f f When CONSTANT MODE in BRIGHTNESS CONTROL SETUP is set to AUTO and LINK is set to OFF the brightness will be corrected...

Страница 134: ...ss of the projected image is automatically corrected PC Synchronizes nine or more projectors using a computer and the dedicated software Multi Monitoring Control Software 1 1 Multi Monitoring Control...

Страница 135: ...on the light source while CONSTANT MODE in BRIGHTNESS CONTROL SETUP is set to AUTO or PC the brightness and the color of the light source will be automatically measured approximately eight minutes af...

Страница 136: ...BRIGHTNESS CONTROL SETUP is set to AUTO and LINK is set from GROUP A to GROUP D The screen shows the status of the brightness control of synchronized projectors up to eight units including the projec...

Страница 137: ...er 1 Multi Monitoring Control Software is included in the supplied CD ROM Note f f If the synchronized projectors are not displayed in the list check the following g g Are there devices with the same...

Страница 138: ...is display appears on the control panel regardless of the STANDBY MODE settings x page 195 f f When ECO is set it may take approximately 10 seconds longer before the projector starts projecting after...

Страница 139: ...SELECT 2 Press the ENTER button f f The STARTUP INPUT SELECT screen is displayed 3 Press asqw to select the input and press the ENTER button LAST USED Keeps the input selected last RGB1 Sets the inpu...

Страница 140: ...zation with the NTP server fails just after NTP SYNCHRONIZATION is set to ON NTP SYNCHRONIZATION will return to OFF If NTP SYNCHRONIZATION is set to ON while the NTP server is not set NTP SYNCHRONIZAT...

Страница 141: ...e time is blinking 7 Press qw to select hour or minute and press as or the number 0 9 buttons to set a time and then press the ENTER button 8 Press asqw to select COMMAND 9 Press the ENTER button f f...

Страница 142: ...me will be the local time x page 139 f f If an operation is executed with the remote control or control panel of the projector or with a control command before the command set in SCHEDULE is executed...

Страница 143: ...nchronization function or the shutter synchronization function can be used NO LINK The projectors are not correctly connected or not correctly set Check the cable connection status and the projector s...

Страница 144: ...er projectors are set to SLAVE g g SHUTTER SYNC on the projectors to perform the shutter synchronization is set to ON f f It is possible to set SHUTTER SYNC to OFF for the projectors that are linked b...

Страница 145: ...s displayed 3 Press as to select RESPONSE ID ALL 4 Press qw to switch the item ON Returns the response when an ID is designated as ALL OFF Does not return the response when an ID is designated as ALL...

Страница 146: ...P Switches the P IN P setting OFF USER1 USER2 or USER3 x page 152 SUB MEMORY Displays the sub memory list x page 157 SYSTEM SELECTOR Switches the SYSTEM SELECTOR setting x page 91 SYSTEM DAYLIGHT VIE...

Страница 147: ...press asqw to select OK and press the ENTER button f f The registration completes and returns to the LENS MEMORY SAVE screen f f If you press asqw to select CANCEL and then press the ENTER button the...

Страница 148: ...een is displayed 8 Press asqw to select the text and press the ENTER button to enter the text 9 After the name is changed press asqw to select OK and press the ENTER button f f The registration comple...

Страница 149: ...IGNAL NAME Displays the input signal name SIGNAL FREQUENCY Displays the frequency of the input signal SYNC STATE Displays the synch polarity of the input signal V SYNC WIDTH Displays the vertical sync...

Страница 150: ...e various setting values saved as a backup in the built in memory of the projector 1 Press as to select LOAD ALL USER DATA 2 Press the ENTER button f f The SECURITY PASSWORD screen is displayed 3 Ente...

Страница 151: ...screen is displayed press qw to select OK and press the ENTER button Note f f Even when ALL USER DATA is executed the settings of UNIFORMITY OPERATING MODE MAX LIGHT OUTPUT LEVEL and STANDBY MODE are...

Страница 152: ...the ENTER button 4 Press as to select MAIN WINDOW or SUB WINDOW and press the ENTER button 5 Press as to select the input terminal to be displayed in the window and press the ENTER button 6 Press asto...

Страница 153: ...IN P f f The main window setting values are applied to image adjustment values such as PICTURE MODE GAMMA and COLOR TEMPERATURE f f While in the normal screen where no menu is displayed press qw to sw...

Страница 154: ...reen Window inversion Menu screen Color bar vertical Menu screen Color bar horizontal Menu screen 16 9 4 3 aspect frame Menu screen Focus Menu screen Input screen Displays the menu screen and input si...

Страница 155: ...f f If a menu is being displayed the new signals will be registered at the instant they are input Renaming the registered signal Registered signals can be renamed 1 Press asqw to select the signal of...

Страница 156: ...nding signal lock in range 1 Press asqw to select the signal to set 2 Press the ENTER button f f The REGISTERED SIGNAL STATUS screen is displayed 3 Press the ENTER button f f The REGISTERED SIGNAL SET...

Страница 157: ...reen is displayed if the sub memory is not registered Proceed to Step 3 f f A list of sub memories registered to the signal currently input is displayed f f The FUNCTION button on the remote control c...

Страница 158: ...FOCUS ZOOM SHIFT 1 Press as to select SECURITY PASSWORD 2 Press qw to switch the item f f The items will switch each time you press the button OFF Disables the security password entry ON Enables the s...

Страница 159: ...tton f f The CONTROL DEVICE SETUP screen is displayed 3 Press as to select CONTROL PANEL or REMOTE CONTROL CONTROL PANEL You can set the limitation on the control from the control panel REMOTE CONTROL...

Страница 160: ...etween SDI1 and SDI2 when the button is operated SDI1 Fixes to SDI1 SDI2 Fixes to SDI2 DISABLE Disables button operations f f Press the MENU button to return to the CONTROL PANEL screen or the REMOTE...

Страница 161: ...qw to select OK and press the ENTER button f f To cancel select CANCEL Attention f f The initial password is AAAA by the factory default or when ALL USER DATA in INITIALIZE x page 150 is executed f f...

Страница 162: ...rojector to the network directly Note f f The maximum transmission distance when connected with the long reach communication method is 150 m 492 2 However the signal that the projector can receive is...

Страница 163: ...as to select DIGITAL LINK STATUS 2 Press the ENTER button f f The DIGITAL LINK STATUS screen is displayed LINK STATUS Either NO LINK DIGITAL LINK LONG REACH or ETHERNET is displayed HDCP STATUS Either...

Страница 164: ...Set to ON to control with the SERIAL IN SERIAL OUT terminal control command format x page 208 Refer to Control commands via LAN x page 202 COMMAND PORT Set the port number used for command control Cr...

Страница 165: ...The Art Net SETUP screen is displayed 4 Press as to select an item and press qw to switch the setting NET Enter NET to be used when the projector processes Art Net SUB NET Enter SUB NET to be used wh...

Страница 166: ...rt Net STATUS Display the content of control assigned to each channel and the received data of that channel 1 Press as to select Art Net STATUS 2 Press the ENTER button f f The Art Net STATUS screen i...

Страница 167: ...the E mail can be used beforehand f f Use a LAN cable that is straight cable and compatible with category 5 or higher f f Use a LAN cable of 100 m 328 1 or shorter Connecting to a twisted pair cable...

Страница 168: ...the cables between the twisted pair cable transmitter and the projector without any loops f f Lay the cables between the twisted pair cable transmitter and the projector away from other cables partic...

Страница 169: ...age 172 Network status x page 173 Basic control x page 175 and Change password x page 183 only f f Access will be locked for few minutes when an incorrect password is entered three times consecutively...

Страница 170: ...splayed by clicking this item 3 Projector control The Projector control page is displayed by clicking this item 4 Detailed set up The Detailed set up page is displayed by clicking this item 5 Change p...

Страница 171: ...l status of the REMOTE 2 IN terminal 9 OSD Displays the status of the on screen display 10 AC VOLTAGE Displays the input supply voltage 11 LIGHT OUTPUT Displays the setting status of LIGHT OUTPUT 12 I...

Страница 172: ...The projector may be used in an environment where the temperature is high such as near a heating appliance Or the air exhaust port may be blocked LD1 TEMPERATURE The temperature of the light source i...

Страница 173: ...he exhaust air temperature is high The projector may be used in an environment where the temperature is high such as near a heating appliance Or the air exhaust port may be blocked LD1 TEMPERATURE The...

Страница 174: ...log page Click Status Mail error log E mail error log is displayed if periodic E mail sending has failed Note f f Access error log and Mail error log display the recent few thousand accesses requests...

Страница 175: ...rent depending on the model of the projector Detail control page Click Projector control Detail control 5 4 6 3 2 1 11 9 8 7 10 1 Control of the projector The projector is controlled by clicking the b...

Страница 176: ...ter the default gateway address when not using a DHCP server 6 DNS1 Enter the DNS1 server address Permissible characters for the entry of DNS1 server address primary Numbers 0 9 period Example 192 168...

Страница 177: ...set up 5 Date Enter the date to be changed 6 Time Enter the time to be changed 7 Submit Updates the date and time settings Note f f The replacement of the battery inside the projector is required whe...

Страница 178: ...l address of the projector Up to 63 characters in single byte 4 MEMO Enter information such as the location of the projector that notifies the sender of the E mail Up to 63 characters in single byte 5...

Страница 179: ...end E mail Select the conditions to send E mail MAIL CONTENTS Select either NORMAL or SIMPLE ERROR Send an E mail when an error occurred in the self diagnosis INTAKE AIR TEMPERATURE Send an E mail whe...

Страница 180: ...rnet service provider 2 SMTP Auth Set when the SMTP authentication is selected 3 POP server name Enter the POP server name Allowed characters Alphanumerics A Z a z 0 9 Minus sign and period 4 User nam...

Страница 181: ...UNIT OK AIR FILTER OK AC VOLTAGE OK Error code 00 00 00 00 00 00 00 00 00 00 00 00 00 00 00 00 Intake air temperature 30 degC 86 degF Optics module temperature 39 degC 102 degF Exhaust air temperature...

Страница 182: ...re 39 degC 102 degF Exhaust air temperature 32 degC 89 degF Around light1 temperature 34 degC 93 degF Around light2 temperature 34 degC 93 degF PROJECTOR RUNTIME 77 H POWER ON 1906 times LD1 1 ON 1906...

Страница 183: ...ng of the password Administrator account 1 3 2 4 1 Account Displays the account to change 2 Current User name Enter the user name before the change Password Enter the current password 3 New User name...

Страница 184: ...the desired new password again 4 OK Determines the change of password Note f f To change the account of the administrator you must enter the User name and Password in Current Crestron Connected TM pa...

Страница 185: ...freeze image quality 7 Back Returns to the previous page Tools page Click Tools in the operation page 1 2 3 4 5 1 Control System Set the information required for communicating with the controller to...

Страница 186: ...urs Displays the runtime of the light source 1 and the light source 2 4 Power Status Displays the status of the power 5 Source Displays the selected input 6 Error Status Displays the error status 7 Ex...

Страница 187: ...ENGLISH 187 Chapter 5 Maintenance This chapter describes methods of inspection when there are problems maintenance and replacement of the units...

Страница 188: ...ht source indicator LIGHT1 Light source indicator LIGHT2 Temperature indicator TEMP Filter indicator FILTER Light source indicators LIGHT1 LIGHT2 Indicator status Blinking in red 2 times Blinking in r...

Страница 189: ...moke Cut Filter is used it should be between 0 C 32 F and 40 C 104 F regardless of the altitude When OPERATING MODE in the PROJECTOR SETUP menu OPERATION SETTING is set to ECO LONG LIFE1 LONG LIFE2 or...

Страница 190: ...ive force when wiping may scratch its surface Handle with care Air filter unit Perform maintenance of the air filter unit in the following cases f f The air filter is clogged with dust causing the fil...

Страница 191: ...ace where there is little dust and is not exposed to direct sunlight f f Do not dry using drying devices such as dryers f f After the air filter is dried proceed to Attaching the air filter unit x pag...

Страница 192: ...off even after the unit is maintained it is time for the unit to be replaced The Replacement Filter Unit Model No ET EMF330 is an optional accessory To purchase the product consult your dealer Replaci...

Страница 193: ...f Is the REMOTE CONTROL setting in CONTROL DEVICE SETUP set to DISABLE 159 f f Is the REMOTE 2 IN terminal used for contact control 209 f f Is the ID number setting operation correct 77 Menu screen d...

Страница 194: ...to ETHERNET 162 f f Is a signal which is not compatible with a twisted pair cable transmitter being input 3D function is not working f f Is the 3D INPUT FORMAT setting of 3D SETTINGS correct 106 f f...

Страница 195: ...ment temperature is too high or the air exhaust port may be blocked Use the projector in an appropriate operating environment temperature 1 Or remove any objects that are blocking the air exhaust port...

Страница 196: ...onsult your dealer FA8 Light source 1 error FC8 Light source 2 error FE1 Radiator fan 1 error FE2 Radiator fan 2 error FE3 Radiator fan 3 error FE4 Radiator fan 4 error FE5 Radiator fan 5 error FE6 Ra...

Страница 197: ...ENGLISH 197 Chapter 6 Appendix This chapter describes specifications and after sales service for the projector...

Страница 198: ...status query 31 Shutter function enabled shutter closed ERST Error status query xxxxxx 1st byte Indicates fan errors and returns 0 2 f f 0 No error is detected f f 1 Warning f f 2 Error 2nd byte Indi...

Страница 199: ...channel are listed in the following table f f Channel assignment for USER is in factory default setting Assignment can be changed Channel Control details 2 USER 1 CHANNEL1 LIGHT OUTPUT LIGHT OUTPUT SH...

Страница 200: ...NS MEMORY 7 160 175 Load LENS MEMORY 8 176 191 Load LENS MEMORY 9 192 207 Load LENS MEMORY 10 208 223 No operation 224 255 LENS H SHIFT LENS V SHIFT LENS FOCUS LENS ZOOM Lens adjustment High speed 0 3...

Страница 201: ...EOMETRY OFF 0 15 255 KEYSTONE 16 31 CURVED 32 47 PC 1 48 63 PC 2 64 79 PC 3 80 95 CORNER CORRECTION 96 111 No operation 112 255 CUSTOM MASKING OFF 0 31 255 To use PC 1 PC 2 and PC 3 the optional Upgra...

Страница 202: ...e IP address and port number Initial set value 1024 of the projector and request a connection to the projector f f You can obtain both the IP address and the port number from the menu screen of the pr...

Страница 203: ...or response String Details Termination symbol Message ERR1 Undefined control command CR 0x0d ERR2 Out of parameter range ERR3 Busy state or no acceptable period ERR4 Timeout or no acceptable period ER...

Страница 204: ...acquisition command 00QPW CR r r Received data Header Data section Termination symbol Command example 0 0x30 0 0x30 Control command ASCII string CR 0x0d Data length 1 byte 1 byte Undefined length 1 b...

Страница 205: ...e Communication cable When connecting using DIGITAL LINK compatible device DIGITAL LINK compatible device Computer D Sub 9p female Projector connecting terminals DIGITAL LINK DIGITAL LINK D Sub 9p mal...

Страница 206: ...ion from the computer starts with STX then the ID command parameter and ETX are sent in this order Add parameters according to the details of control 2 bytes 2 ID characters 2 bytes Semi colon 1 byte...

Страница 207: ...imal is 02 and ETX shown in hexadecimal is 03 When multiple projectors are controlled When multiple projectors are all controlled When controlling multiple projectors together via RS 232C perform the...

Страница 208: ...us query 1 CLOSE VSE Aspect ratio switch 0 DEFAULT VID AUTO 1 4 3 2 16 9 5 THROUGH QSE Aspect ratio settings query 6 HV FIT 9 H FIT 10 V FIT OPP P IN P execution 0 OFF 1 USER1 QPP P IN P setting query...

Страница 209: ...TER OFF ON 9 ENABLE DISABLE Controlled by remote control Controlled by external contact Attention f f When controlling make sure to short circuit pins 1 and 9 f f When pins 1 and 9 are short circuited...

Страница 210: ...ge 2 Movie 3 Still image 2 Movie 3 RGB1 input Still image signal l l l l l l Movie signal 1 l a l a a a Y C signal l a l a a a a Video signal l a l a a a a RGB2 input Still image signal l l l l l l Mo...

Страница 211: ...Maximum of 40 1 Maximum of 45 1 Adjustment range of HORIZONTAL KEYSTONE Maximum of 15 1 Maximum of 40 1 Adjustment range of CURVED Vertical arc Maximum 50 1 Horizontal arc Maximum 50 1 Vertical arc Ma...

Страница 212: ...33 8 60 0 74 3 R Y D H S l l l 1125 1080 50i 1 920 x 1 080i 28 1 50 0 74 3 R Y D H S l l l 1125 1080 24p 1 920 x 1 080 27 0 24 0 74 3 R Y D H S l l l 1125 1080 24sF 1 920 x 1 080i 27 0 48 0 74 3 R Y D...

Страница 213: ...5 R D H 1280 x 800 1 280 x 800 41 3 50 0 68 0 R D H 1 280 x 800 49 7 59 8 83 5 R D H 1 280 x 800 8 49 3 59 9 71 0 R D H 1 280 x 800 62 8 74 9 106 5 R D H 1 280 x 800 71 6 84 9 122 5 R D H 1280 x 960 1...

Страница 214: ...To display images in 2D set 3D INPUT FORMAT to NATIVE 8 VESA CVT RB Reduced Blanking compliant 9 Samples the pixels in the image processing circuit and projects the image 10 Only for PT RZ12K Note f...

Страница 215: ...1 920 x 1 080 28 1 25 0 74 3 l l 1080 30p 1 920 x 1 080 33 8 30 0 74 3 l l 1080 60p 1 920 x 1 080 67 5 60 0 148 5 l l l l 1080 50p 1 920 x 1 080 56 3 50 0 148 5 l l l l 640 x 480 640 x 480 31 5 59 9 2...

Страница 216: ...1 920 x 1 080 28 1 25 0 74 3 l l l l l l l l 1080 30p 1 920 x 1 080 33 8 30 0 74 3 l l l l l l l l 1080 60p 1 920 x 1 080 67 5 60 0 148 5 l l l l l l l 1080 50p 1 920 x 1 080 56 3 50 0 148 5 l l l l l...

Страница 217: ...0 75 0 60 0 162 0 l 1 600 x 1 200 61 8 49 9 131 5 l 1680 x 1050 1 680 x 1 050 65 3 60 0 146 3 l 1 680 x 1 050 54 1 50 0 119 5 l 1920 x 1080 1 920 x 1 080 55 6 49 9 141 5 l 1 920 x 1 080 2 66 6 59 9 13...

Страница 218: ...ironment humidity 10 to 80 no condensation Remote control Power supply DC 3 V AA R6 LR6 battery x 2 Operating range Within approx 30 m 98 5 when operated directly in front of signal receiver Weight 15...

Страница 219: ...jector f f When using the projector at an altitude lower than 2 700 m 8 858 above sea level 35 C 95 F f f When using the projector at an altitude between 2 700 m 8 858 and 4 200 m 13 780 above sea lev...

Страница 220: ...576i 1 525p 480p 625p 576p 750 720 60p 750 720 50p 1125 1080 60i 1125 1080 50i 1125 1080 24p 1125 1080 24sF 1125 1080 25p 1125 1080 30p 1125 1080 60p 1125 1080 50p f f Displayable resolution 640 x 480...

Страница 221: ...259 compliant HD SDI signal SMPTE ST 292 compliant 3G SDI signal SMPTE ST 424 compliant Dual link HD SDI LINK A signal SMPTE ST 372 compliant Dual link 3G SDI Link 1 signal SMPTE ST 425 compliant SDI...

Страница 222: ...dix Dimensions 222 ENGLISH Dimensions Unit mm 242 9 17 32 289 11 3 8 578 22 3 4 637 25 3 32 484 19 1 16 53 5 2 3 32 142 5 19 32 270 10 5 8 15 19 32 725 28 17 32 Actual dimensions may differ depending...

Страница 223: ...tor resulting from use of the Ceiling Mount Bracket not manufactured by Panasonic or the inappropriate choice of location for installing the Ceiling Mount Bracket even if the warranty period of the pr...

Страница 224: ...LUTION 99 Input selection terminal indicator 31 Installation mode 36 L LARGE SCREEN CORRECTION 111 LEFT RIGHT SWAP 106 LENS button Projector body 31 67 LENS CALIBRATION 146 LENS MEMORY 147 LIGHT butto...

Страница 225: ...signal 73 SYSTEM DAYLIGHT VIEW 89 SYSTEM SELECTOR 91 T Temperature indicator 188 TEST PATTERN 83 154 TEST PATTERN button Remote control 28 76 TEXT CHANGE 159 TINT 86 Troubleshooting 193 Two window 210...

Страница 226: ...in the European Union If you wish to discard these items please contact your local authorities or dealer and ask for the correct method of disposal Product Information for Turkey only AEEE Y netmeli i...

Отзывы: