[POSITION] menu
76 - ENGLISH
Settings
[CLOCK PHASE]
You can adjust to achieve an optimal image when
there is a flickering image or smeared outlines.
1) Press
▲▼
to select [CLOCK PHASE].
2) Press
◀▶
or the <ENTER> button.
▶
z
The
[CLOCK PHASE]
individual adjustment
screen is displayed.
3) Press
◀▶
to adjust the level.
▶
z
Adjustment value will change between [0] and
[31]. Adjust so that the amount of interference is
at a minimum.
Note
z
Certain signals may not be adjustable.
z
Optimal value may not be achieved if the output
from the input computer is unstable.
z
Optimal value may not be achieved when there is a
shift in the total dot numbers.
z
[CLOCK PHASE] can be adjusted only when a
signal is input to the <RGB 1 IN> terminal or the
<RGB 2 IN> terminal.
z
[CLOCK PHASE] cannot be adjusted when a digital
signal is input.
z
If you press
▶
while the adjustment value is [31],
the value will become [0]. If you press
◀
while the
adjustment value is [0], the value will become [31].
[GEOMETRY]
(PT-DZ21KU and
PT-DS20KU only)
Correct various types of distortion in a projected
image.
Unique image processing technology enables
projection of a square image on a special screen
shape.
1) Press
▲▼
to select [GEOMETRY].
2) Press
◀▶
to switch the [GEOMETRY]
setting.
▶
z
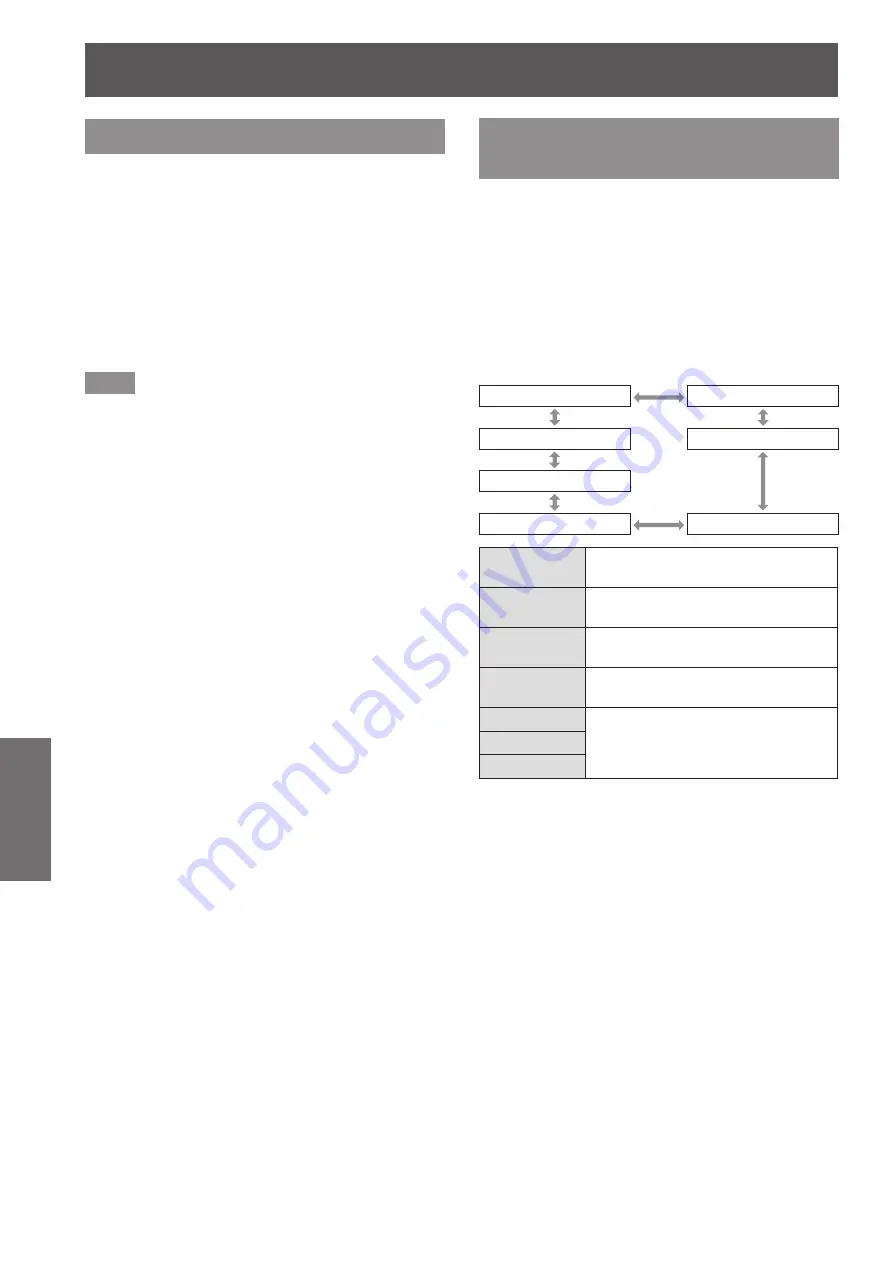
The setting will change as follows each time
you press the button.
[OFF]
[KEYSTONE]
[PC-3]
[CORNER CORRECTION]
[PC-2]
[PC-1]
[CURVED]
[OFF]
Does not perform geometric
adjustment.
[KEYSTONE]
Adjusts any trapezoidal distortion in
the projected image.
[CORNER
CORRECTION]
Adjusts any distortion in the four
corners of the projected image.
[CURVED]
Adjusts any curved distortion in the
projected image.
[PC-1]
*1
Uses the computer to perform
geometric adjustment.
[PC-2]
*1
[PC-3]
*1
*1: Advanced skills are necessary to use a computer to control
geometric adjustment. Consult your dealer. Up to three
geometric adjustments performed using the computer can
be saved.
▶
■
To set [KEYSTONE]
3) Select [KEYSTONE] in Step 2), and
press the <ENTER> button.
▶
z
The
[GEOMETRY:KEYSTONE]
screen is
displayed.
4) Press
▲▼
to select the item you want
to adjust, and press
◀▶
to adjust the
correction amount.
▶
z
The projected image can be corrected.


