background image

35

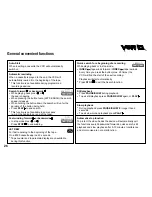
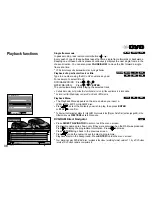
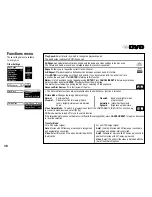
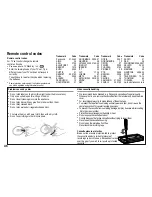
HighMAT

CD Text

Page 1/1

Sorted according 
to artist

Sorted according 
to sampler

Sorted according 
to category

Playlist


to select   


to exit


to play 

0 9

~

ENTER

RETURN

RETURN

1  
2  
3  

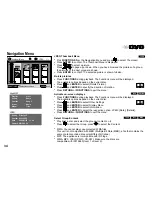
Sorted according to artist
Sorted according to sampler
Sorted according to category

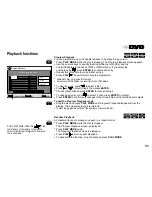
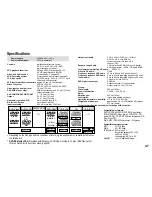
4.  Acapella

No.            Playlist title

Playlist

Group

Content

!

 Sorted according to artist

!

 Acapella

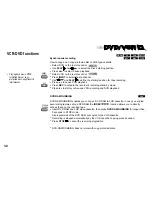
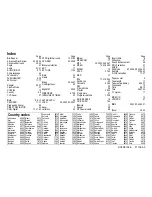
CD Text

1/11      2:53

1.  

 2.   Song

 3.   Song

4.  

5.  

 6.  

 7.  

 9.  

10.  

 Song


Disc Title

:

Disc Artist :

Track Title :

Track Artist :


to select and press  


to exit

ENTER

RETURN

RETURN

HighMAT

CD-Text

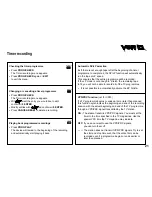
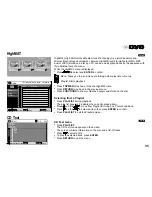
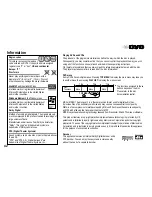
HighMAT (High Performance Media Access Technology) is a joint Panasonic and 
Microsoft technology development. Diverse HighMAT-level2 format data (WMA, MP3 
and/or JPEG) stored on a disc by a PC can be quickly played back by the appliance with 
the additional help of a menu. 

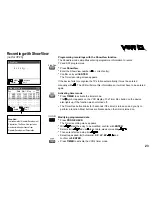
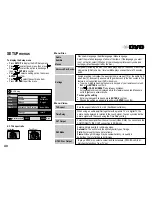
While the HighMAT menu is displayed:

!

Press 


 to select and 

ENTER 

to confirm.

Menu: Takes you to a sub-menu containing further play lists or menus.

Playlist: Starts playback

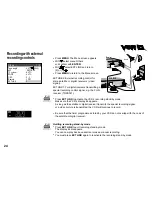
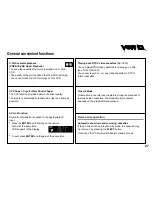
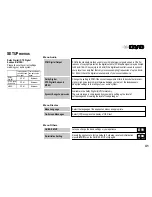
Selecting from a Playlist

!

Press 

PLAYLIST

 during playback. 

The play list appears (  indicates the currently playing item).

!

Press    and then  

 to move from Playlist to Group and Content and back.

!

Press    and then  

 to select an item, then press 

ENTER

 to confirm.

!

Press 

PLAYLIST

 to quit the Playlist screen.

!

Press 

TOP MENU

 to show or hide the HighMAT menu.

!

Press 

RETURN

 to go back to the previous menu.

!

Press 

FUNCTIONS

 to show or hide the background stored on the disc.

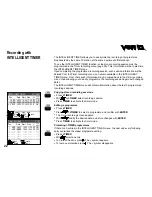
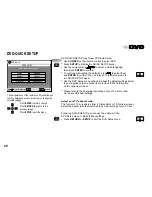
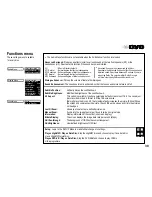
CD Text menu

!

Press 

PLAYLIST

.

The CD Text menu appears on the screen.
The screen contains information on the disc and a list of tracks.

!

Press  

 to select a title.

!

To play the selected track, press 

ENTER

.

!

Press 

RETURN

 to quit the menu.

Содержание NV-VP23

Страница 1: ...ghMAT CD Text 35 Functions menu 36 39 SETUP menus 40 41 Information 42 43 45 46 47 Index Country codes Last page Inserting Batteries Safety Precautions Panel Remote control Connecting with a 21 pin Scart cable with Audio Videocable External Devices onnectors menu control Manual Setup Creating a new station table Shipping condition factory defaults NICAM sound system Recording Timer recording Recor...

Страница 2: ...TRUCTTHE VENTILATION VENTS DO NOT OBSTRUCT THE UNIT S VENTILATION OPENINGS WITH NEWSPAPERS TABLECLOTHS CURTAINS AND SIMILAR ITEMS DO NOT PLACE SOURCES OF NAKED FLAMES SUCHAS LIGHTED CANDLES ONTHEUNIT DISPOSE OF BATTERIES IN AN ENVIRONMENTALLY FRIENDLY MANNER The socket outlet shall be installed near the equipment and easily accessible or the mains plug or an appliance coupler shall remain readily ...

Страница 3: ...ADVARSEL FOR Å REDUSERE FAREN FOR BRANN ELEKTRISK STØT ELLER SKADER PÅ PRODUKTET MÅ DETTE APPARATET IKKE UTSETTES FOR REGN FUKTIGHET VANNDRÅPER ELLER VANNSPRUT DET MÅ HELLER IKKE PLASSERES GJENSTANDER FYLT MED VANN SLIK SOM BLOMSTERVASER OPPÅ APPARATET ADVARSEL APPARATET MÅ IKKE PLASSERES I ENBOKHYLLE ET INNEBYGGETKABINETT ELLER ETANNET LUKKET STED HVOR VENTILASJONSFORHOLDENE ER UTILSTREKKELIGE SØ...

Страница 4: ...HS cassette 32 Video recording Activates the recording timer Channel selector Goes from Stop into Fast Forward or Fast Rewind mode Forward and backward search during playback Press PLAY to start playback A disc is in The logo is animated when a function such as playback or picture search is being performed A video cassette is in The logo is animated when a function such as playback or forward rewi...

Страница 5: ...tand by mode does not disconnect it from the mains Direct input via numeric key pad 18 1 8 DVD functions blue labels are enabled TV set AV input selection TV Stand by on To select the respective TV program memory location TV set volume control Quits a menu CANCEL RESET Undoes entries or selections To eject cassette or disc Press STOP for more than 3 seconds Channel selector Numeric keypad Press PL...

Страница 6: ... Stop into Fast Forward or Fast Rewind mode Forward and backward search during playback Tracking control of disturbed images during playback AV input select button Toggles between input A1 A2 A3 front or dc DVD internal For fast rewinding to the beginning of the tape Cinema Mode A To delete tagged station VCR functions Press STOP to stop recording playing back or winding Finding the start of a rec...

Страница 7: ...increases the speed of search at 5 steps Press PLAY to resume normal playback Search Press SEARCH during playback Keeping the button pressed increases the speed of search at 5 steps D VCDs do not support reverse slow motion playback Repeat Press REPEAT during playback There is no mode for repeatedly playing back entire discs Displays the main menu Displays the DVD RAM menu Stop playback Press STOP...

Страница 8: ...rt cable RF coaxial cable VCR Auto Setup with 21 pin Scart cable Automatic tuning D If the Country menu does not appear after turning the device on you may reset the device to its factory defaults page 16 Upon doing so the VCR Auto Setup will start again Turn on your television set and select the appropriate AV input With the Stand by on switch turn on the VCR DVD The Country menu appears With the...

Страница 9: ...g D If the Country menu does not appear after turning the device on you may reset the device to its factory defaults page 16 Upon doing so the VCR Auto Setup will start again Turn on your television set and select the appropriate AV input With the Stand by on switch turn on the VCR DVD The Country menu appears With the arrow buttons select the according country and confirm by pressing ENTER Automa...

Страница 10: ...nter Time and Date then store with ENTER 1 2 3 0 select access exit ENTER EXIT Timer recording QUICK ERASE Tuning Clock set Others Language English AUTO Time 12 00 00 Date 11 6 05 Automatic tuning not for VP23 If the device does not find a TV station broadcasting the time signal set Time and Date manually Manual tuning Clock set select access return exit ENTER MENU EXIT MANUAL Time 12 00 00 Date 1...

Страница 11: ...unit to the AC mains supply and switch them on Press MENU With select the Others menu and confirm with ENTER Set Top Box satellite receiver second recorder Select AV2 with and set to EXT with Decoder Select AV2 with and set to DECODER with Press MENU to return to the Menu screen When using a decoder switch channel to decoder Setting the channel to decoder Press MENU With select menu Tuning and con...

Страница 12: ...n amplifier with Dolby Pro Logic functionality Back of television set example COMPONENT VIDEO OUT Connection The COMPONENT VIDEO OUT connection outputs the color difference signals PB PR and the luminance difference signal Y separately thereby enabling a higher resolution and color trueness The description of the COMPONENT VIDEO IN connection can be different depending on the television set or mon...

Страница 13: ...nnel Dolby Digital Decoder for example Prerequisites for making recordings with an external digital recorder The original disc must not be copy protected The recorder must be able to process signals with a scanning frequency of 48 kHz 16 bit You cannot make MP3 WMA recordings D Adapt the Audio SETUP menu settings to the following PCM Digital Output Up to 48 kHz Dolby Digital DTS Digital Surround M...

Страница 14: ... change selected entries With select the entry you would like to change then confirm with ENTER Make your changes following the menu steps With MENU return to the previous menu Press EXIT to leave the menu Press MENU The menu screen appears With select the desired sub menu Press ENTER The selected menu appears D Not every model supports all of the functions 8 10 15 17 VCR menu control ENTER Tape l...

Страница 15: ...ame setting Channel setting Fine tuning of disturbed picture Switch stereo to mono TV system setup For reception of encrypted channels Pos Name Channel Fine tuning Decoder Video system Mono Audio mode PREM 97 AUTO PAL OFF BG ON 9 Changing the name of TV stations Press MENU The Menu screen appears With select the Tuning menu confirm with ENTER Confirm Manual with ENTER With select the name entry an...

Страница 16: ...s MENU The Menu screen appears With select the Tuning menu confirm with ENTER With select Auto Setup confirm with ENTER Press ENTER to confirm The Country menu appears Select country with and confirm with ENTER The Auto Setup menu will be displayed The Automatic Tuning will start Tuning Manual Auto Setup Shipping condition yes no ENTER ENTER ENTER ENTER ENTER ENTER ENTER ENTER EXIT EXIT EXIT EXIT ...

Страница 17: ... screens OFF No on screen displays The device and the remote control may be switched to alternative frequencies In the Menu select VCR1 or VCR2 to switch the device settings Then press and hold the ENTER and or keys of the remote control to switch it to the according device frequency If the remote control and the device are not set to the same frequency the VCR display shows the current setting of...

Страница 18: ...KABE 97 10 SRTL 98 delete move A A A A A A A A A A A A A A A A A A A A A A A A A A A A A A A A B 1 ARD 7 2 ZDF 4 3 N3 2 4 RTL 12 5 SAT1 13 access select return exit ENTER ENTER ENTER ENTER ENTER ENTER ENTER ENTER MENU MENU MENU MENU MENU MENU MENU MENU EXIT EXIT EXIT EXIT EXIT EXIT EXIT EXIT Press MENU Select Language Select Language Press EXIT to quit the Menu screen Menu Timer recording QUICK ER...

Страница 19: ...ity LP double recording time simple picture quality EP triple recording time reduced picture quality When playing back LP or EP recordings interferences may occur when using certain types of cassettes e g Type E 300 These are not indicative of a VCR malfunction Tape speed Prior to starting the recording session press to set the tape speed REC MODE INPUT REPEAT EP LP SP 19 20 22 23 24 Set the telev...

Страница 20: ...sette or make a manual recording Press TIMER again to reactivate the previously entered timer programme Press PROG CHECK and select a free storage position Confirm with ENTER Select a station and use to set date week or weekday Then enter start and stop time Hold buttons down to change time in 30 minute steps Select tape speed A Automatic SP LP EP The VPS PDC settings may be changed with does not ...

Страница 21: ...egins or ends earlier or later than planned this function synchronises the beginning and end of the recording session with the actual beginning and end of the TV programme through a VPS PDC signal transmitted by the TV station ON The station transmits VPS PDC signals You must set the timer to the time specified in the TV magazines Use the special VPS time the TV magazine may indicate OFF If you do...

Страница 22: ... setting Editing a programme Press I TIMER Press or I TIMER to select a programme and confirm with ENTER The Timer recording screen appears With modify the desired data and store changes with ENTER Press TIMER to activate the timer mode Copying stored recording sessions Press I TIMER With or I TIMER select recording session Press TIMER to activate the timer mode The INTELLIGENT TIMER allows you to...

Страница 23: ... programmes Press ShowView Enter the ShowView number to correct entry Confirm entry with ENTER The Timer recording screen appears If the device fails to recognise the TV station automatically it must be entered manually with The VCR will store this information so it will not have to be entered again Modifying programmed data Press PROG CHECK The Timer recording menu appears With select the entry t...

Страница 24: ...of the satellite or digital receiver Quitting recording stand by mode Press EXT LINK to quit recording stand by mode The display EL disappears You can now play back a cassette or make a manual recording You must press EXT LINK again to reactivate the recording stand by mode Press EXT LINK to activate the VCR s recording stand by mode Make sure the VCR s display EL appears As long as the satellite ...

Страница 25: ...t a VCR malfunction Optimising the playback picture quality Time limited recording or playback During recording playback or stop mode the device switches to stand by after a preset period of time Press the button repeatedly to increase this period from 30 to 60 120 180 or 240 minutes The set time appears in the VCR s display Press OFF TIMER Normal playback Turn on the VCR Be sure the TV set is tur...

Страница 26: ...time you press the button max 20 times the VCR will find the start of the next recording Playback will start automatically Press STOP to exit the Search function Search forward or backwards While playing back press or the search begins When pressing the button twice JET SEARCH the search speed increases When holding the button down the search will run for the duration of the button being held Pres...

Страница 27: ...ction provides a picture of perfect quality The picture is automatically rendered as clear and sharp as possible Automatic shut down and removing cassettes If the VCR is switched into stand by mode the cassette may be removed by pressing the EJECT button Once done the VCR will switch back to stand by mode 17 SP VCR AV Link function Switch from television reception to the appropriate AV input Press...

Страница 28: ...ish Deutsch Español Svenska Français Italiano Polski Nederlands 28 VHS DVD Select your TV s aspect ratio The format of TV screens is either 4 3 standard or 16 9 wide screen Select the aspect ratio that matches the screen setting of your TV set DVD QUICK SETUP may follow VCR Auto Setup Use VHS DVD on the remote control to select DVD Press SETUP to display the QUICK SETUP menu Use the navigator keys...

Страница 29: ... RC unit s numeric key pad Press REPEAT The display shows the REPEAT function DVD Video Off Chapter Title DVD RAM PG Off Program All DVD RAM PL Off Scene Playlist VCD CD Off Track All WMA MP3 Off Content Group JPEG Off Group Playback Press OPEN CLOSE to open the disc tray Place the disc on the disc tray Press PLAY The disc tray closes and disc playback starts automatically D The player may take so...

Страница 30: ... Menu Playback Menu All Total260 Picture Total260 Audio Total0 to select and press ENTER The Playback Menu appears on the screen when you insert a JPEG WMA MP3 or HighMAT disc Press to select the contents you wish to play then press ENTER or PLAY to confirm D To display the Navigation Menu for HighMAT Discs select the Play as Data Disc option page 39 in the Others menu via FUNCTIONS while in Stop ...

Страница 31: ...ss ENTER Choose Clear all and press ENTER to clear all entries To quit the Program Playback mode Stop the disc and press PLAY MODE until Program Playback disappears from the display The actual programme is retained D To clear the programme switch off the appliance or remove the disc WMA JPEG MP3 CD Video CD DVD Video Random Playback All chapters tracks are played once each in a random order Press ...

Страница 32: ...cassette Synchronous recording D Playing back music NTSC formatted films or copy protected discs might result in interferences DVD RAM DUBBING DVD RAM DUBBING enables you to copy a DVD RAM to VHS cassette In case you copied several programmes of one DVD RAM the INDEX function allows you to directly access these on the resulting tape Insert DVD RAM and VHS video cassette then press DVD RAM DUBBING ...

Страница 33: ... or the status indicator Navigation Menu Selection menu options The Group and Content panels are tiled vertically Press to move the cursor from Group to Content and back Shows the Content of the selected Group Displays a tree view of the groups Press and ENTER to select a Group The Group s contents are shown To find groups or content Press to enter the target word into the text box Press ENTER to ...

Страница 34: ...disc and select the group or content on it Press to select the Group press to select the Content D WMA You cannot play copy protected WMA files This unit is not compatible with MBR Multiple Bit Rate MBR a file that contains the same content encoded at several different bit rates D MP3 The appliance is incompatible with ID3 tags D WMA MP3 JPEG CD R CD RW Make sure the discs are compatible with ISO ...

Страница 35: ...uickly played back by the appliance with the additional help of a menu While the HighMAT menu is displayed Press to select and ENTER to confirm Menu Takes you to a sub menu containing further play lists or menus Playlist Starts playback Selecting from a Playlist Press PLAYLIST during playback The play list appears indicates the currently playing item Press and then to move from Playlist to Group a...

Страница 36: ...cer Off Play Menu Audio Menu Display Menu Other Menu Picture Menu DVD RAM menu illustration 0 07 Group 4 Content 41 Time CINEMA MODE QUICK OSD Advanced Disc Review 03 Title 3 40 F C O S UN TI N RAM DVD Video This function can be compromised depending on the type of disc DVD Only normal playback is possible for R RW media Press FUNCTIONS The Functions menu for the inserted disc appears The availabl...

Страница 37: ...red on the disc Playlist Search Directly select a Playlist stored on the disc Subtitle Language Selects the language of on screen subtitles Off No subtitles displayed D In the case of R RW media an undisplayed selection can be given in the menu Angle Change between camera angles of films recorded from various camera locations Time Display select playback time Alternative display of current or rema...

Страница 38: ...ttings are not available for every disc Functions menu Picture Mode Changes the image display settings INPUT REPEAT AV ENHANCER Normal Factory default Cinema2 Enhances brighter areas Cinema1 Cinema function for viewing in dark of dark scenes rooms Bright picture areas are dimmed Animation Intensifies the colours down Dynamic Brightens up the picture Picture Mode Normal Video Output Mode 625p Trans...

Страница 39: ...similar to surround sound at the two front speakers SP or the headphones HP Deactivate this function if the sound becomes distorted Dialogue Enhancer Puts up the volume of feature film dialogues 40 35 Setup Jump to the SETUP Menu to make further changes to settings Subtitle Position Vertically moves the subtitle shown Subtitle Brightness Modifies the brightness of the subtitle shown 4 3 Aspect Thi...

Страница 40: ...ough the image may be somewhat fuzzy its quality is better than that of a field based still image To change the setting Enter your password code and press ENTER to confirm Change the setting as appropriate and press ENTER to confirm Type in a 4 digit code using the numeric key pad of your remote control unit then press ENTER to confirm it Press or CANCEL RESET to delete any mistakes A closed padlo...

Страница 41: ...the digital output of PCM audio signals may be limited to 48 kHz 16 bit Choose Up to 48 kHz if the digital audio outlet is used to connect your player to an amplifier that only processes sampling frequencies of up to 48 kHz Change the setting to PCM if the connected equipment fails to decode the relevant signal High noise levels may otherwise damage your ears or the loudspeakers Adapt the settings...

Страница 42: ...end on the disc Please refer to the disc documentation leaflet MP3 or MPEG 1 Audio Layer 3 is a file compression format used for digital audio files It provides files of an extremely small size and may cause a consequential loss of quality WMA is a file compression format developed by Microsoft It achieves the same sound quality as MP3 with a file size that is smaller than that of MP3 MPEG Layer 3...

Страница 43: ...ut off at its left or right edge Check the Video menu s TV Aspect setting on the Setup screen Check that the player is directly plugged into the TV set s AV output and not to a video cassette recorder between the two units Check the Zoom setting There is no audio output and the sound is distorted Check the connections Deactivate the Advanced Surround effect 43 Before requesting service The remote ...

Страница 44: ...of the video cassette is still in Check Time and Date Check the start and stop time of the timer programme Check if the TIMER button has been pressed to put the device into timer mode after programming a recording Check the start and stop time of a VPS PDC recording not for VP23 Not all stations currently support the VPS PDC control times turn on off Bad picture or sound 44 Before requesting servi...

Страница 45: ...OSE OPEN CLOSE OPEN CLOSE OPEN CLOSE OPEN CLOSE OPEN CLOSE OPEN CLOSE OPEN CLOSE OPEN CLOSE OPEN CLOSE OPEN CLOSE OPEN CLOSE OPEN CLOSE OPEN CLOSE OPEN CLOSE OPEN CLOSE OPEN CLOSE OPEN CLOSE OPEN CLOSE OPEN CLOSE OPEN CLOSE OPEN CLOSE OPEN CLOSE OPEN CLOSE OPEN CLOSE OPEN CLOSE OPEN CLOSE OPEN CLOSE OPEN CLOSE OPEN CLOSE OPEN CLOSE OPEN CLOSE OPEN CLOSE OPEN CLOSE OPEN CLOSE OPEN CLOSE OPEN CLOSE ...

Страница 46: ...ak out the erasure protection tab to protect the cassette against accidental erasure of recordings you wish to keep Stick adhesive tape over the gap if you wish to re record a protected cassette Video cassette handling We recommend to use branded e g Panasonic cassettes of superior quality Whenever not in use remove the cassettes from the recorder and keep them in a cover For recordings always try...

Страница 47: ... Fi sound tracks Video and Audio heads 4 Video heads 2 heads Hi Fi Frequency response DVD audio 4 Hz to 22 kHz sampling frequency 48 kHz VCR Recording system 2 rotary heads helical scanning system linear audio 4 Hz to 44 kHz sampling frequency 96 kHz VCR tape speed SP 23 39 mm s 240 min LP 11 7 mm s CD audio 4 Hz to 20 kHz 480 min E 240 cassette DVD digital tone output COAXIAL VCR fast forward fas...

Страница 48: ...elic 7168 Tatar 8484 Xhosa 8872 Basque 6985 Danish 6865 Gujarati 7185 Korean 7579 Nauru 7865 Serbian 8382 Telugo 8469 Yiddish 7473 Bengali 6678 Dutch 7876 Hausa 7265 Kurdish 7585 Nepali 7869 Serbo Croat 8372 Thai 8472 Yoruba 8979 Bhutani 6890 English 6978 Hebrew 7387 Laotian 7679 Norwegian 7879 Shona 8378 Tibetan 6679 Zulu 9085 Index Page Page Page Page A B Repeat 38 Marker 38 Scart cable 8 DTS Di...

Отзывы: