


Record mode
29
LSQT1131
ª
To restore to the automatic
adjustment
Move the joystick left or right until the [
]
indication appears. Or, set the [AUTO/MANUAL/
FOCUS] switch to [AUTO].
≥
When the camera is turned on with the lens cap
fitted, the automatic white balance adjustment
may not function properly. Please turn the
camera on after removing the lens cap.
≥
When setting both the white balance and the
iris/gain, set the white balance first.
≥
Whenever recording conditions change, re-set
the white balance for correct adjustment.
ª
To set the white balance manually
Select [
] in Step 3. Then, while viewing a white
subject on the entire screen, move the joystick up
to select the [
] indication.
ª
About flashing of the
[
] indication
When the manual adjustment mode is
selected
≥
Flashing indicates that the white balance
previously adjusted is stored. This setting is
stored until the white balance is adjusted again.
When white balance cannot be set in the
manual adjustment mode
≥
White balance may not be adjusted properly in
the manual adjustment mode in dark places. If
so, use the auto white balance mode.
During setting in the manual adjustment mode
≥
When the setting is completed, it will keep lit.
ª
About the white balance sensor
The white balance sensor detects the type of light
source during recording.
≥
Do not cover the white balance sensor during
recording, or it may not function properly.
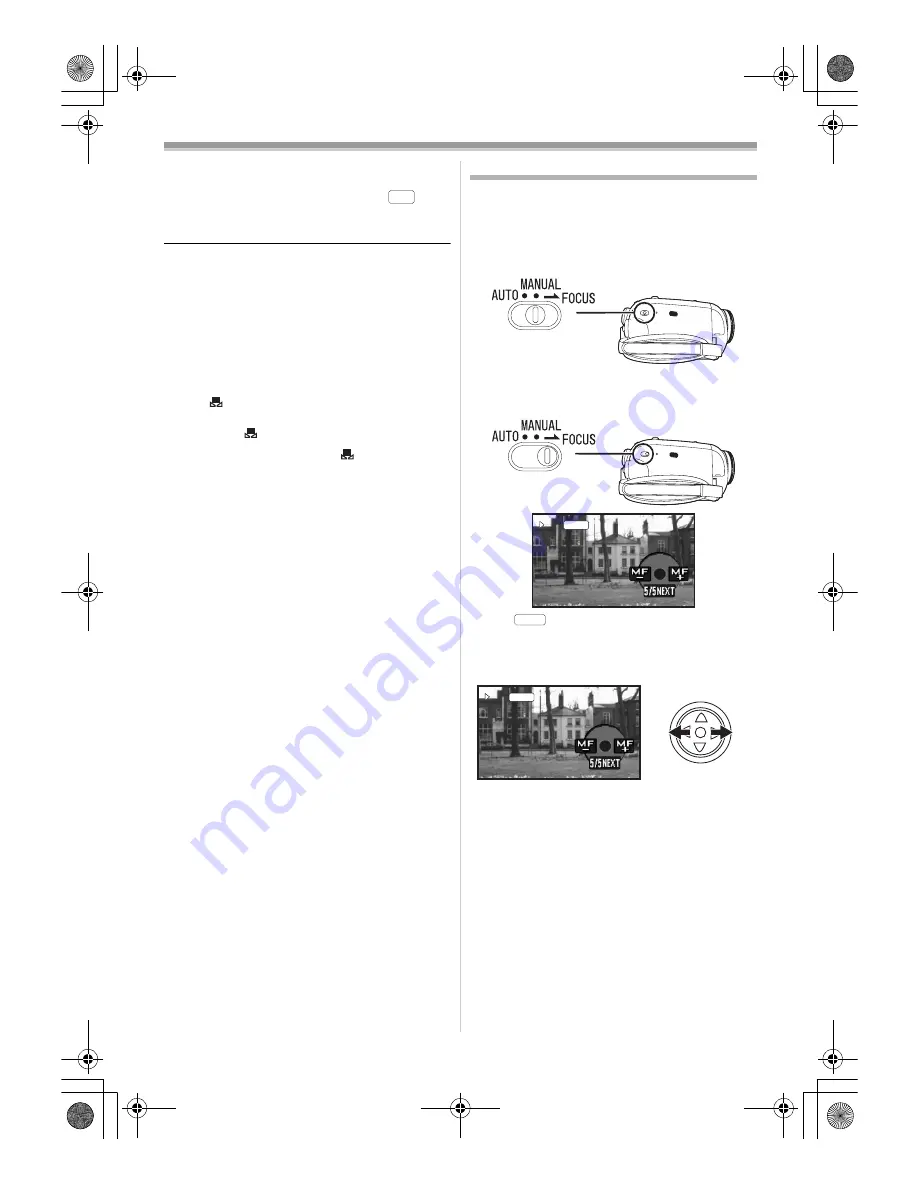
Manual focus adjustment
If auto focusing is difficult due to the conditions,
then manual focusing is available.
≥
Set to Tape Recording Mode.
1
Set the
[AUTO/MANUAL/FOCUS] switch to
[MANUAL].
2
Set the
[AUTO/MANUAL/FOCUS] switch to
[FOCUS].
≥
The [
] indication and the manual focus
[MF] indication is displayed.
3
Move the joystick left or right in order to
adjust the focus.
≥
When focused with a wide angle, the subject
may not be in focus when zoomed in. First,
zoom in on the subject, and then focus on it.
ª
To restore to the automatic
adjustment
Set the [AUTO/MANUAL/FOCUS] switch to
[AUTO] or [FOCUS].
AWB
MF
MF
MNL
MNL
MF
MF
MNL
LSQT1131_ENG.book 29 ページ 2007年1月11日 木曜日 午前9時5分


