background image

Record mode

27

LSQT1134

ª

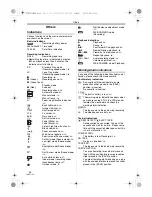
To cancel the scene mode function

Set [BASIC] >> [SCENE MODE] >> [OFF] or set 
the [AUTO/MANUAL/FOCUS] switch to [AUTO].

Sports mode

For playback pause of recorded pictures, this 
mode presents free of camera shakes.

During normal playback, the image 
movement may not look smooth.

Avoid recording under fluorescent light, 
mercury light or sodium light because the 
colour and brightness of the playback image 
may change.

If you record a subject illuminated with strong 
light or a highly reflective subject, vertical 
lines of light may appear.

If the brightness is insufficient, the sports 
mode does not function. The [

5

] indication 

flashes.

If this mode is used indoors, the screen may 
flicker.

Portrait mode

If this mode is used indoors, the screen may 
flicker. If so, change the scene mode setting 
to [OFF].

Low light mode

Extremely dark scenes may not be able to be 
recorded finely.

Spotlight mode

If the recording subject is extremely bright, 
the recorded image may become whitish and 
the periphery of the recorded image 
extremely dark.

Surf & snow mode

If the recording subject is extremely bright, 
the recorded image may become whitish.

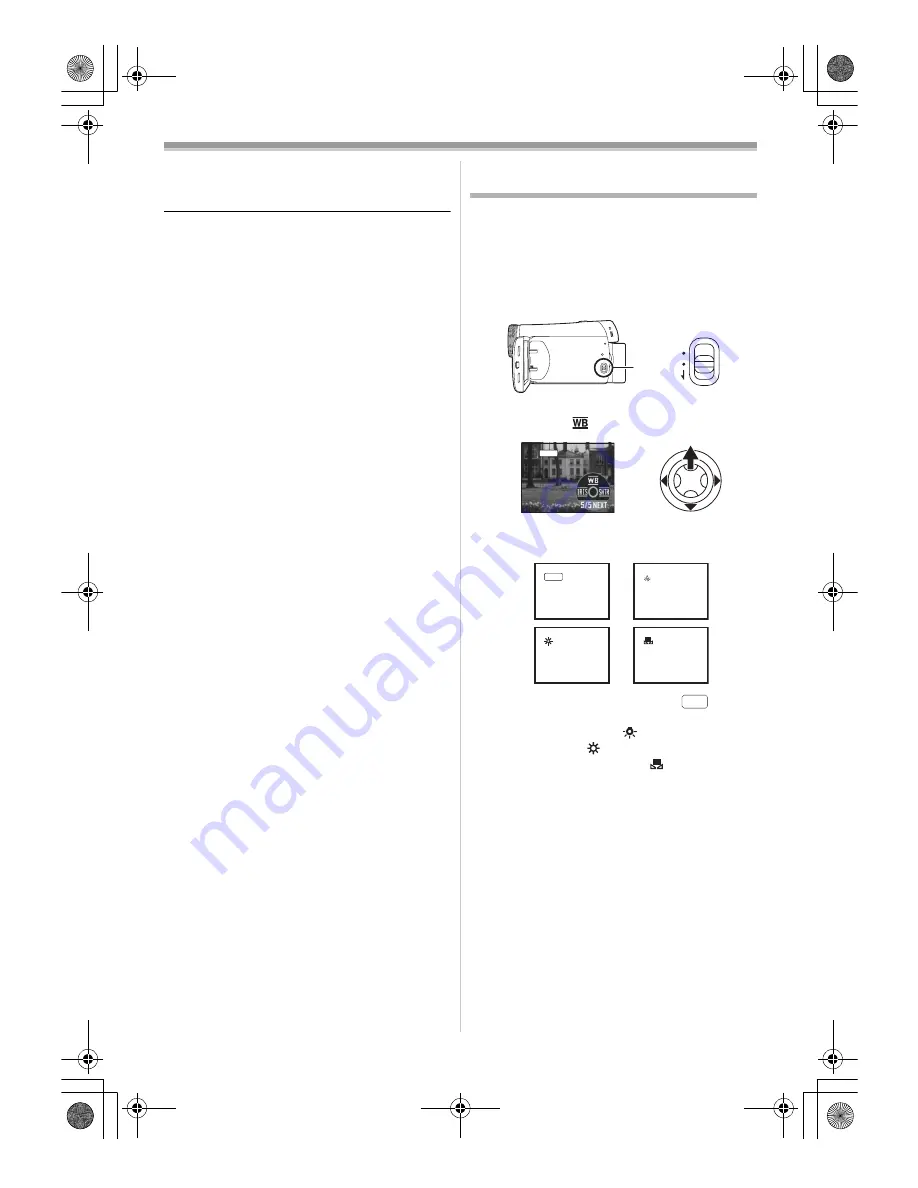
Recording in natural colours 
(White balance) 

The automatic white balance function may not 
reproduce natural colours depending on the 
scenes or lighting conditions. If so, you can adjust 
the white balance manually.

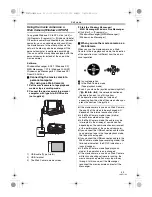
Set to Tape Recording Mode.

1

Set the


[AUTO/MANUAL/FOCUS] switch to 

[MANUAL].

2

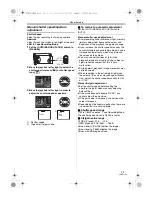
Move the joystick up to select the white 
balance icon [

].

3

Move the joystick left or right in order to 
select the white balance mode.

1) Auto white balance adjustment [

]

2) Indoor mode (for recording under 

incandescent lamps) [

]

3) Outdoor mode [

]

4) Manual adjustment mode [

]

AUTO

MANUAL

FOCUS

MNL

1

1

1

1

1)

3)

2)

4)

AWB

AWB

LSQT1134ENG.book  27 ページ  2007年1月17日 水曜日 午前11時49分

Содержание NV-GS60EB

Страница 1: ...Operating Instructions Digital Video Camera Model No NV GS60EB Before use please read these instructions completely LSQT1134 A LSQT1134ENG book 1 ページ 2007年1月17日 水曜日 午前11時49分 ...
Страница 2: ...ician IMPORTANT The wires in this mains lead are coloured in accordance with the following code Blue Neutral Brown Live As these colours may not correspond with the coloured markings identifying the terminals in your plug proceed as follows The wire which is coloured Blue must be connected to the terminal which is marked with the letter N or coloured Black or Blue The wire which is coloured Brown ...

Страница 3: ... modify the Movie Camera WARNING TO REDUCE THE RISK OF FIRE ELECTRIC SHOCK OR PRODUCT DAMAGE DO NOT EXPOSE THIS APPARATUS TO RAIN MOISTURE DRIPPING OR SPLASHING AND THAT NO OBJECTS FILLED WITH LIQUIDS SUCH AS VASES SHALL BE PLACED ON THE APPARATUS USE ONLY THE RECOMMENDED ACCESSORIES DO NOT REMOVE THE COVER OR BACK THERE ARE NO USER SERVICEABLE PARTS INSIDE REFER SERVICING TO QUALIFIED SERVICE PER...

Страница 4: ...aluable resources and prevent any potential negative effects on human health and the environment which could otherwise arise from inappropriate waste handling Please contact your local authority for further details of your nearest designated collection point Penalties may be applicable for incorrect disposal of this waste in accordance with national legislation For business users in the European U...

Страница 5: ... Night view function 23 Soft skin mode 24 Fade in fade out function 24 Wind noise reduction function 25 Recording images for wide screen TVs 25 Image stabilizer function 26 Recording in various situations Scene mode 26 Recording in natural colours White balance 27 Manual focus adjustment 28 Manual shutter speed aperture adjustment 29 Playback mode Playing back tape 30 Frame by frame playback 31 Pl...

Страница 6: ...or a wide range of finished products take a browse on our website for further details Interested in purchasing an extended guarantee Please call 0870 240 6284 or visit our website www panasonic co uk guarantee Accessories The followings are the accessories supplied with this product 1 AC adaptor DC input lead AC mains lead 9 2 Battery pack 9 The supplied battery pack is not available as spare part...

Страница 7: ...lder 9 13 Battery release lever BATTERY RELEASE 9 14 DC input terminal DC C C IN 9 15 Power switch OFF ON 10 16 Status indicator 10 17 Menu button MENU 17 18 Joystick 15 19 Mode dial 15 20 Recording start stop button 20 21 LCD monitor 12 44 22 LCD monitor open part OPEN 12 23 Reset button RESET 39 41 24 Mode select switch AUTO MANUAL FOCUS 19 26 28 29 1 3 4 5 2 DV 6 7 8 9 10 Due to limitations in ...

Страница 8: ... cap Fit the lens cap to protect the surface of the lens 1 The lens cap and lens cap cord comes preattached to the grip belt Pass the end of the lens cap cord through the attached eye on the lens cap Then pass the lens cap through the loop made by itself and pull tight When not using the lens cap pull the lens cap cord in the direction of the arrow 1 When you are not recording be sure to cover the...

Страница 9: ...tion when the AC adaptor is connected The primary circuit is always live as long as the AC adaptor is connected to an electrical outlet 1 Connect the AC mains lead to the AC adaptor and the AC mains socket 2 Connect the DC input lead to the AC adaptor 3 Connect the DC input lead to this product The output plug of the AC mains lead is not completely connected to the AC adaptor socket As shown in 1 ...

Страница 10: ...rging The main unit of the movie camera being used will also heat up This is normal Along with the reduction of the battery capacity the display will change If the battery discharges then will flash Turning the camera on When the camera is turned on with the lens cap fitted the automatic white balance adjustment may not function properly Please turn the camera on after removing the lens cap ª How ...

Страница 11: ...Do steps 2 and 3 below to set the date time If the screen shows the incorrect date time then adjust it Set to Tape Recording Mode 1 Set BASIC CLOCK SET YES 17 2 Move the joystick left or right in order to select the item to be set Then move the joystick up or down to set the desired value The year will change as follows 2000 2001 2089 2000 The 24 hour clock is used 3 Press the joystick to determin...

Страница 12: ...ards the lens and the viewfinder is extended when recording yourself the LCD monitor and the viewfinder simultaneously light Using the viewfinder ª Extending the viewfinder 1 Pull out the viewfinder Extend it by pinching the extension knob The viewfinder will be activated If the LCD monitor is opened the viewfinder will be deactivated ª Adjusting the field of view 1 Adjust the focus by sliding the...

Страница 13: ...after it is turned on ª To cancel Quick Start 1 Set SETUP QUICK START OFF 17 If the OFF ON switch is set to OFF while the unit is in quick start standby mode the power turns off If the standby continues for approx 30 minutes then the status indicator will go off and the camera will be completely turned off In the following cases quick start is cancelled and the power turns off When the Mode dial i...

Страница 14: ...d the cassette completely remove it and put it in a case Store the case in an upright position 44 If the indicator of the condensation does not display on the LCD monitor and or the viewfinder and you notice condensation on the lens or the main unit do not open the cassette cover otherwise condensation may be formed on the heads or the cassette tape 42 ª When the cassette holder does not come out ...

Страница 15: ...o set it ª Joystick and screen display Push the centre of the joystick and icons will be displayed on the screen Each time the joystick is moved down the indication changes In the Tape Playback Mode the icons will be automatically displayed on the screen 1 Tape Recording Mode AUTO MANUAL FOCUS switch is set to AUTO 1 is displayed while recording on a tape 1 Select by moving up 2 Select by moving d...

Страница 16: ...mode explains the operation icons displayed when the AUTO MANUAL FOCUS switch is set to AUTO in Tape Recording Mode 3 Move the joystick up left or right to select the desired icon An explanation of the selected icon is displayed on the screen Each time the joystick is moved down the indication changes ª To exit the Help mode Select EXIT or press the MENU button When the Help mode is used it is not...

Страница 17: ... MENU button The menu corresponding to the mode selected by the mode dial is displayed Do not switch the mode dial when the menu is displayed 2 Move the joystick up or down in order to select the top menu 3 Move the joystick right or press it to set the selection 4 Move the joystick up or down in order to select the sub menu 5 Move the joystick right or press it to set the selection MENU LSQT1134E...

Страница 18: ...er to select the item to be adjusted LCD SET Brightness of the LCD monitor Colour level of the LCD monitor EVF SET Brightness of the viewfinder 3 Move the joystick left or right to move the bar indication representing the brightness 4 Press the MENU button or the joystick to complete the settings When the LCD monitor is rotated by 180 towards the lens the brightness of the LCD monitor cannot be ad...

Страница 19: ...uto mode Set the AUTO MANUAL FOCUS switch to AUTO and colour balance white balance and focusing will be adjusted automatically Auto white balance 45 Auto focusing 45 Depending on the brightness of the subject etc the aperature and shutter speed are automatically adjusted for an optimum brightness When set to the Tape recording mode The shutter speed is adjusted to a maximum of 1 250 Colour balance...

Страница 20: ...n The remaining tape time is indicated in minutes When it reaches less than 3 minutes the indication starts flashing During a 15 seconds or shorter recording the remaining tape time indication may not be displayed or the remaining tape time may not be displayed correctly In some cases the remaining tape time indication may display remaining tape time that is 2 to 3 minutes shorter than the actual ...

Страница 21: ...1 second before the end of the last image recorded When you start recording at that point the image can be recorded seamlessly from the last image Recording a still picture on a tape Photoshot Still pictures can be recorded from the movie camera lens Set to Tape Recording Mode 1 Press the button in the recording pause mode The movie camera records a still picture for about 7 seconds and then switc...

Страница 22: ...ZOOM 50k or 1000k OFF Optical zoom only Up to 30k 50k Up to 50k 1000k Up to 1000k The larger the digital zoom magnification the more the image quality is degraded ª About the variable speed zoom function The zoom speed varies according to the amount of movement of the W T lever ª To use the zoom microphone function Interlocked with the zooming operation the microphone will collect sounds clearly f...

Страница 23: ... Recorded scene is seen as if frames were missed Colour night view function You can record dark locations brightly in colour Set to Tape Recording Mode 1 Press the joystick to display the icon Move the joystick down until icon 1 appears 2 Move the joystick up to select the colour night view icon The COLOUR NIGHT VIEW ON indication appears on the screen of the movie camera Each upward press switche...

Страница 24: ...ally disappear Set to Tape Recording Mode 1 Press the joystick to display the icon Move the joystick down until icon 1 appears 2 Move the joystick left to select the fade icon The FADE ON indication appears on the screen of the movie camera 3 Press the recording start stop button Start recording fade in When you start recording the image audio disappeared completely and the image audio gradually a...

Страница 25: ...reen TVs Cinema Function Images are recorded with a black belt appearing along the top and bottom of the screen so that they look like theatre movies Set to Tape Recording Mode 1 Set BASIC CINEMA ON ª To cancel the Cinema function Set BASIC CINEMA OFF Images played back vary depending on the TV connected Please refer to the operating instructions for your TV This function does not widen the record...

Страница 26: ... When recording is done in an extremely dark place When the camera is shaken greatly When you record a moving subject while tracking it Recording in various situations Scene mode When you record images in different situations this mode automatically sets optimum shutter speeds and apertures Set to Tape Recording Mode 1 Set the AUTO MANUAL FOCUS switch to MANUAL 2 Set BASIC SCENE MODE select the de...

Страница 27: ...mode setting to OFF Low light mode Extremely dark scenes may not be able to be recorded finely Spotlight mode If the recording subject is extremely bright the recorded image may become whitish and the periphery of the recorded image extremely dark Surf snow mode If the recording subject is extremely bright the recorded image may become whitish Recording in natural colours White balance The automat...

Страница 28: ...anual adjustment mode White balance may not be adjusted properly in the manual adjustment mode in dark places If so use the auto white balance mode During setting in the manual adjustment mode When the setting is completed it will keep lit ª About the white balance sensor The white balance sensor detects the type of light source during recording Do not cover the white balance sensor during recordi...

Страница 29: ...lines of light in the playback image of a brightly shining subject or highly reflective subject but this is not a malfunction During normal playback image movement may not look smooth When recording in the extremely bright place the colour of the screen may change or flickers If so adjust the shutter speed manually to 1 50 or 1 100 Manual iris gain adjustment Set the shutter speed before setting t...

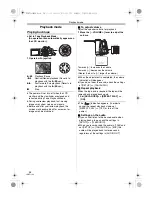
Страница 30: ...k 1 Move the sVOLUMEr lever to adjust the volume Towards r increases the volume Towards s decreases the volume Nearer the bar to r larger the volume When the adjustment is completed the volume indication will disappear If you do not hear the sound check the settings of SETUP 12bit AUDIO ª Repeat playback When the tape end is reached the tape will be rewound and played back again 1 Set ADVANCED REP...

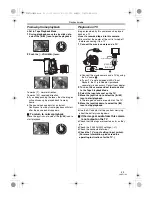
Страница 31: ...he movie camera and a TV Connect the movie camera and a TV by using the AV cable 1 If your TV is not equipped with AV Input Sockets the 21 pin Adaptor purchase separately is necessary Consult your dealer 2 Turn on this camera and set the mode dial to the Tape Playback Mode 3 Select the input channel on the TV 4 Move the joystick up to select the 1 icon to start playback The image and audio are out...

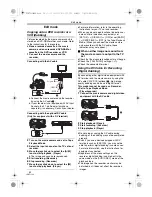
Страница 32: ...OFF in the Tape Playback Mode When you connect the movie camera and a recorder with the DV cable these indications may not appear ª When neither image nor sound from the movie camera is output to the TV set Check that the plugs are inserted as far as they go Check the 12bit AUDIO settings 37 Check the connected terminal Using the DV Cable for Recording Digital Dubbing By connecting other digital v...

Страница 33: ...ck mode the indication of the operation icon is different from the one in usual operation 1 In usual operation 2 In the Web Camera mode Tape playback mode Even if you move the joystick up down right left 5 6 the selected direction on the operation icon is not lit in yellow The operation icon blinks on instead of appearing from the side of the screen when you press the centre of the joystick If the...

Страница 34: ...ademarks or trademarks of Apple Computer Inc in the United States and or other countries All other names company names product names etc in these instructions are the trademarks or registered trademarks of their respective corporations Microsoft product screen shot s reprinted with permission from Microsoft Corporation The names of the products you are using may differ from the names given in the ...

Страница 35: ...5 CLOCK SET 11 2 ADVANCED SIS 26 FADE COLOUR 24 AUDIO REC 36 D ZOOM 22 ZOOM MIC 22 SHTR EFFECT 21 3 SETUP DISPLAY 36 DATE TIME 36 POWER SAVE 36 QUICK START 13 BEEP SOUND 36 LCD SET 18 EVF SET 18 INITIAL SET 37 DEMO MODE 37 4 LANGUAGE 17 ª TAPE PLAYBACK MENU 1 BASIC DATE TIME 36 2 ADVANCED REPEAT PLAY 30 3 SETUP 12bit AUDIO 37 AUDIO OUT 37 DISPLAY 36 LCD SET 18 EVF SET 18 POWER SAVE 36 4 LANGUAGE 1...

Страница 36: ... on the power When the unit goes from quick start standby mode to recording pause 2 Beeps When you pause recording When you turn off the power When the unit goes into quick start standby mode 2 Beeps for 4 times When a cassette with its erasure prevention tab set to SAVE is inserted condensation occurs 42 and at other times Check the sentence displayed on the screen 38 ª POWER SAVE OFF When about ...

Страница 37: ...sound main sound and sub sound L Left channel sound main sound R Right channel sound sub sound Other menus ª INITIAL SET When there is a menu that cannot be selected depending on a combination of functions set to YES for changing the menu settings back to the initial shipping condition Language setting cannot be back to the initial shipping condition ª DEMO MODE If you set to DEMO MODE ON without ...

Страница 38: ... Playback 30 Pause 30 5 Fast forward Cue playback 30 6 Rewind Review playback 30 1 2 Frame by frame playback 31 Repeat playback 30 12bit 16bit Audio recording mode 36 Volume adjustment 30 WEB CAMERA mode Playback Warning alarm indications If any one of the following indications lights up or flashes please check the movie camera Confirmatory indications Y A cassette with the accidental erasure prev...

Страница 39: ... REVERSE THE LCD MONITOR When the LCD monitor is rotated by 180 towards the lens the brightness of the LCD monitor cannot be adjusted CANCEL NIGHT VIEW MODE You are attempting to select an item other than OFF in SCENE MODE during night view mode Functions cannot be used simultaneously Some functions in the movie camera are disabled or cannot be selected due to its specifications The table below sh...

Страница 40: ...ending on the usage the battery has worn out and can no longer be used 5 The movie camera cannot be operated though powered up The movie camera does not operate normally The movie camera cannot be operated unless you open the LCD monitor or extend the viewfinder Remove the cassette and then press the RESET button 41 If normal conditions are not restored yet turn off the power Then about 1 minute l...

Страница 41: ...ing cue or review playback This phenomenon is characteristic of digital video systems It is not a malfunction 2 Horizontal stripes appear on images during cue and review playback Horizontal stripes may appear depending on the scene but this is not a malfunction 3 Although the movie camera is correctly connected to a TV playback images cannot be seen Have you selected video input on the TV Please r...

Страница 42: ...ing disappears naturally ª About dirty heads If video heads the parts that closely contact with the tape become dirty normal recording and playback are not properly performed Clean the heads with the digital video head cleaner Insert the head cleaner into the movie camera set it to the Tape Playback Mode and play it back for about 10 seconds If you do not stop the playback it automatically stops a...

Страница 43: ...er and wipe the movie camera with it Afterwards wipe it with a dry cloth When you use a chemical dust cloth follow the instructions Do not use this movie camera for surveillance purposes or other business use If you use the movie camera for a long time the internal temperature increases and consequently this may cause malfunction This movie camera is not intended for business use When you are not ...

Страница 44: ... months wind the tape to the end and then rewind it to the beginning If the cassette is left for 1 year or longer without winding or rewinding the tape may be deformed by expansion or shrinkage attributable to temperature and humidity The wound tape may stick to itself Dust direct sunlight ultraviolet rays and humidity may damage the tape Such usage may cause damage to the movie camera and the hea...

Страница 45: ...ance among the other colours Since white colour is the reference of all colours light the movie camera can record pictures in a natural hue if it can recognise the reference white colour ª Auto focus Auto focus automatically moves the focusing lens forward and backward inside the movie camera to bring the subject into focus Auto focus has the following characteristics Adjusts so that the vertical ...

Страница 46: ...inimum required illumination 2 lx Colour Night View Mode Video output level 1 0 Vp p 75 h Audio output level Line 316 mV 600 h USB No copyright protection support Digital interface DV output terminal IEEE1394 4 pin Dimensions 82 0 mm W k69 0 mm H k120 0 mm D excluding the projecting parts Mass Approx 410 g without supplied battery DV cassette and lens cap Approx 480 g with supplied battery DV cass...

Страница 47: ...frame playback 31 ª L LCD Monitor 44 Low Light Mode 26 ª M Manual Focus 28 Mode Dial 15 ª P Portrait Mode 26 ª R Recording Speed 19 Remaining Tape Time 38 Repeat Playback 30 ª S Scene mode 26 Self Recording 22 Shutter Speed 29 Soft Skin Mode 24 Sound Volume 30 SP LP Mode 19 Sports Mode 26 Spotlight Mode 26 Surf Snow Mode 26 ª V Video Head Clogging 42 Viewfinder 44 ª W White Balance 27 ª Z Zoom 22 ...

Страница 48: ...B LSQT1134 A F0107Ke0 4000 A C Matsushita Electric Industrial Co Ltd Web site http panasonic net LSQT1134ENG book 48 ページ 2007年1月17日 水曜日 午前11時49分 ...
Отзывы: