


263
10. Using the Wi-Fi/Bluetooth function
When [Wi-Fi Password] is set to [ON], you can enhance security by using manual entry or
a QR code for password authentication.
Preparations:
(On the camera) Set [Wi-Fi Password] to [ON].
∫
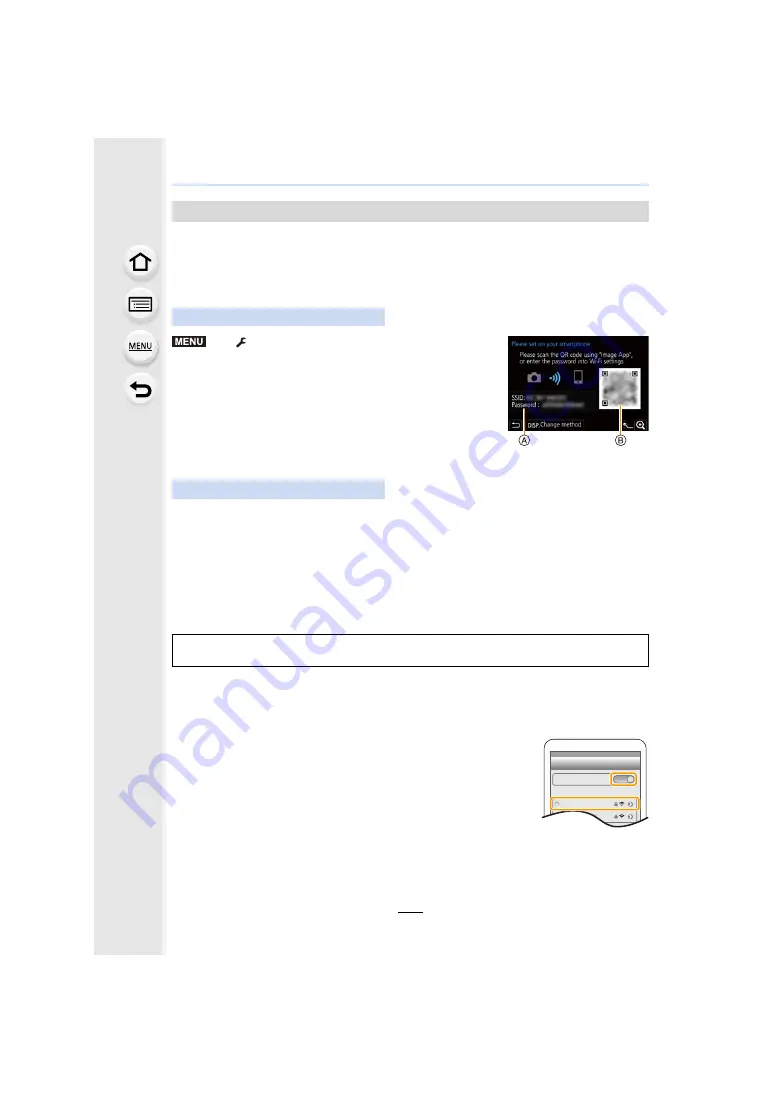
Scanning QR code to connect
A
SSID and password
B
QR code
• The information (QR Code, SSID and Password) required for
directly connecting your smartphone to the camera is displayed.
• You can also display the information by pressing [Wi-Fi] on the
camera.
1
Start “Image App”.
2
Select [QR code].
• When the smartphone is connected to a wireless access point, it may take time to display
[QR code].
• (For iOS devices) A confirmation screen will be displayed. Select [OK] to proceed.
3
Use the “Image App” to scan the QR code displayed on the screen of the
camera.
• To enlarge the QR code, press [MENU/SET] on the camera.
4
Install the profile.
• If a pass code is set on the smartphone, you need to enter it.
5
Press the home button to close the browser.
6
Turn on the Wi-Fi function in the smartphone’s setting menu.
7
On the Wi-Fi setting screen, select the SSID displayed on
the camera.
8
Start “Image App”.
• (iOS devices) Steps
1
through
5
are not required from the second time
on.
Using Password Authentication to Connect
On the camera
>
[Setup]
>
[Wi-Fi]
>
[Wi-Fi Function]
>
[New Connection]
>
[Remote Shooting &
View]
On your smartphone
If you are using an Android device, follow the steps up to here to complete the setup.
Proceed to the steps below only if you are using an iOS device (iPhone/iPod touch/iPad).
MENU
Wi-Fi
0123456789ABC


