Panasonic KX-MC6260E Скачать руководство пользователя страница 1

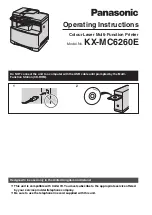
Operating Instructions

Colour Laser Multi-Function Printer

Model No.


KX-MC6260E

Do NOT connect the unit to a computer with the USB cable until prompted by the Multi-
Function Station (CD-ROM).

1

2

Designed to be used only in the United Kingdom and Ireland.

L

This unit is compatible with Caller ID. You must subscribe to the appropriate service offered 
by your service provider/telephone company.

L

Be sure to use the telephone line cord supplied with this unit.

Содержание KX-MC6260E

Страница 1: ...USB cable until prompted by the Multi Function Station CD ROM 1 2 Designed to be used only in the United Kingdom and Ireland L This unit is compatible with Caller ID You must subscribe to the appropriate service offered by your service provider telephone company L Be sure to use the telephone line cord supplied with this unit ...

Страница 2: ...r other countries L 3M is a trademark or registered trademark of 3M Company L Avery is a registered trademark of Avery Dennison Corporation L PCL is a trademark of Hewlett Packard Company L SD and the SD logo are trademarks L SDHC and the SDHC logo are trademarks L miniSD and the miniSD logo are trademarks L miniSDHC and the miniSDHC logo are trademarks L microSD and the microSD logo are trademark...

Страница 3: ...mediately after printing Leave the power turned ON for a minimum of 30 minutes after printing Location L To avoid malfunction do not position the unit near appliances such as TVs or speakers which generate an intense magnetic field Static electricity L To prevent static electricity damage to the interface connectors or other electrical components inside the unit touch a grounded metal surface befo...

Страница 4: ...ain documents Copying certain documents may be illegal in your country Penalties of fines and or imprisonment may be imposed on those found guilty The following are examples of items that may be illegal to copy in your country Currency Bank notes and cheques Bank and government bonds and securities Passports and identification cards Copyright material or trademarks without the consent of the owner...

Страница 5: ...sing navigator directory 46 6 4 Broadcast transmission 46 6 5 Sending a computer document as a fax message from your computer 48 Receiving Faxes 6 6 Selecting the way to use your unit 48 6 7 Receiving a fax automatically Auto answer ON 49 6 8 Receiving a fax manually Auto answer OFF 50 6 9 Displaying a received fax document 51 6 10 Using the unit with an answering machine 53 6 11 Receive polling r...

Страница 6: ...nt feeder 104 12 Cleaning Cleaning 12 1 Cleaning the white plates and glass 105 12 2 Cleaning the document feeder rollers 106 12 3 Cleaning the paper chute 107 13 General Information Printed Reports 13 1 Reference lists and reports 108 Specifications 13 2 Specifications 109 Copyrights 13 3 Information of copyrights and licences 112 14 Index 14 1 Index 122 ...

Страница 7: ...ct take care of the power plug cap and or packing materials appropriately L Do not remove the drum cartridges and toner cartridges from the unit when repacking the unit for shipping and transportation 1 Toner cartridge starter Cyan Magenta Yellow Black 1 2 Colour drum cartridge KX FADC510X 2 3 Monochrome drum cartridge KX FADK511X 2 4 Waste toner cartridge pre installed inside the unit KX FAW505X ...

Страница 8: ...cepted L All enquires transactions and distribution facilities are provided directly by Panasonic UK Ltd L It couldn t be simpler L Also available through our Internet is direct shopping for a wide range of finished products take a browse on our website for further details Replacement accessories Toner cartridge L Prints about 2 000 sheets of A4 size pages with a 5 coverage using KX FATC501X KX FA...

Страница 9: ... page 22 L To search for a stored item page 46 M Caller ID L To use Caller ID features page 56 N Monitor L To initiate dialling When you press Monitor while receiving a call you will be able to hear the other party but the other party will not be able to hear you O Black L To copy a document in monochrome page 39 L To scan a document in monochrome push scan page 35 L To print a document in monochr...

Страница 10: ...onding operations Note L The displayed menu items may be different depending on the operation To select a menu item not shown on the current page scroll up or down by using navigator key 1 4 1 Display and buttons The following buttons can be used to navigate through operations or to select items shown on the display A Advance L To change the display between basic and advanced feature modes L To ch...

Страница 11: ...Shipping tape positions are subject to change without notice 1 ADF Automatic Document Feeder cover 2 Document guides 3 Document tray 4 Document tray extender 5 Document cover 6 Document exit 7 Document entrance 8 Power switch 9 SD card slot j Left cover k Left cover open lever l Standard input tray m Front cover n Recording paper exit 1 o Waste toner cartridge pre installed inside the unit 2 1 2 7...

Страница 12: ...green drum surface at the bottom of the drum cartridge Do not place the drum cartridge near dust or dirt or in a high humidity area Do not expose the drum cartridge to direct sunlight L Do not leave the toner cartridge out of the protection bag for a long time It will decrease the toner life L We cannot be responsible for any damage to the unit or degradation of print quality which may occur from ...

Страница 13: ...tion bag before installing the colour drum cartridge in step 8 L When holding the colour drum cartridge be sure to handle it over a table to prevent damage caused by dropping it from a high position 6 Detach the protective caps 6 then detach the upper seal cover by holding the tab 7 7 Firmly grip the colour drum cartridge 8 and remove the protective tray 9 by sliding it toward you L Do not touch o...

Страница 14: ...cartridge from the protection bag L Remove the shipping tape 10 Detach the protective cap o then detach the upper seal cover by holding the tab p 11 Firmly grip the monochrome drum cartridge q and remove the protective tray r by sliding it toward you L Do not touch or scratch the green drum surface s at the bottom of the drum cartridge 12 Insert the monochrome drum cartridge t into the right side ...

Страница 15: ...Insert each toner cartridge y in the appropriate colour slot From left to right yellow magenta cyan black L Make sure that the arrows z match to insert the toner cartridge correctly L Do not touch the toner cartridge shutter at the bottom of the toner cartridge The toner may spill out of the toner cartridge 17 Lift the drum cartridge cover a and push down on the levers b to close L Push the levers...

Страница 16: ...ge 110 for information on toner life and drum life Waste disposal method Waste material should be disposed of under conditions which meet all national and local environmental regulations Toner save feature If you want to reduce toner consumption set the toner save setting to ON feature 482 on page 61 The toner cartridge will last approximately 40 longer This feature may lower the print quality 1 7...

Страница 17: ...e sure that the recording paper guides 6 are at the paper size mark and the recording paper is under the paper limit mark 7 The paper should not be loaded over the tab 8 5 Insert the standard input tray to the unit lifting the front part of the tray Then push it completely into the unit Note L If the paper is not loaded correctly re adjust the paper guides or the paper may jam L If the standard in...

Страница 18: ...drop the standard input tray L Hold the standard input tray with both hands when removing or installing The standard input tray weighs approximately 2 9 kg when the recording paper is fully loaded Do not touch the plate 1 on the left side of the standard input tray Approx 2 9 kg 1 ...

Страница 19: ... network hub L We recommend using network routers network hubs 6 under secure network environments Consult your network administrator for firewall settings etc L The warranty does not cover damage due to security problems or any disadvantages relating to it 1 Mains lead L Connect to Household Mains Supply 220 240 V 50 Hz 2 Telephone line cord L Connect to telephone network 3 EXT socket L You can c...

Страница 20: ...de when using the unit as a scanner page 35 Copy Select this mode when using the unit as a copier page 39 Fax Select this mode when using the unit as a fax machine page 44 Print Select this mode when using the unit as a printer page 31 Note L The default operation mode is the copy mode L You can change the default operation mode feature 463 on page 61 and the timer before returning to the default ...

Страница 21: ...canner glass L Check that any ink paste or correction fluid has dried completely L Remove clips staples or other fasteners L Do not insert the following types of documents Make a copy of the document using the scanner glass and set the copy instead Chemically treated paper such as carbon or carbonless duplicating paper Electrostatically charged paper Badly curled creased or torn paper Paper with a...

Страница 22: ...de to fax mode If the Fax light is OFF turn it ON by pressing Fax Ringer volume 1 Press V or repeatedly to select Ringer Volume 2 Press or To turn the ringer OFF 1 Press V or repeatedly to select Ringer Volume 2 Press repeatedly to display Ringer Off in the status bar L The unit will not ring L To turn the ringer back ON press Monitor volume 1 While using the monitor press V or repeatedly to selec...

Страница 23: ... date and time on the top of each page you send according to your unit s date and time setting To correct a mistake Press or to move the cursor to the incorrect number and make the correction If you have subscribed to a Caller ID service The date and time will be automatically set according to the received caller information L If the time has not previously been set Caller ID will not adjust the c...

Страница 24: ... Dynamic Host Configuration Protocol server it will automatically assign an IP Internet Protocol address subnet mask and default gateway to the unit 1 After connecting the LAN cable to the unit and the computer turn the power switch ON L The IP address subnet mask and default gateway will be set automatically 2 Install Multi Function Station on the computer that you want to use it with See page 25...

Страница 25: ...sparencies labels envelopes and card stock Scanning documents and converting an image into text with Readiris OCR software Scanning from other applications for Microsoft Windows that support TWAIN scanning and WIA scanning Windows XP Windows Vista USB connection only Storing editing or erasing items in directories using your computer Programming the features using your computer Sending receiving f...

Страница 26: ... starts follow the on screen instructions L Readiris OCR software page 36 and Device Monitor page 79 will also be installed 5 The Connect Type dialogue box appears For USB connection 1 Connect directly with a USB cable i Next L The Connect Device dialogue box will appear 2 Connect the unit to a computer with the USB cable 1 then click Next L If the unit is connected to your computer the model name...

Страница 27: ...w the on screen instructions To uninstall the software For Windows 2000 Windows XP and Windows Vista users you must be logged in as an administrator in order to uninstall Multi Function Station Start i All Programs or Programs i Panasonic i the unit s name i Uninstall Then follow the on screen instructions 2 11 Starting Multi Function Station Start i All Programs or Programs i Panasonic i the unit...

Страница 28: ...yed on the unit Scan Save to To select the folder where the scanned image or the received fax document will be saved Viewer File E Mail OCR Custom To change scanning settings for Multi Function scan application Note L Assign a unique name for the PC name to avoid overlapping or the scanned image may be sent to an undesired computer To select the default E mail software The default E mail software ...

Страница 29: ...ting error occurs the Device Monitor page 79 will start automatically and display the error information Setting the printer properties You can change the printer setting in step 3 We recommend that you test paper especially special sizes and types of paper on the unit before purchasing large quantities You can change or display the settings on the following tabs Basic Paper size media type pages p...

Страница 30: ...d Labels that do not completely cover the backing sheet as follows To print on envelopes Use envelopes designed for laser printing We recommend the following High quality envelopes of 90 g m2 paper Envelopes that have thin sharply creased leading edges Envelopes that have diagonal seams and Envelopes with a moisture content of 4 to 6 by weight L Load envelopes with the sealing flap FACE DOWN L Do ...

Страница 31: ...ect printing from an SD card You can directly print a file stored on an SD card without using your computer 1 Insert the SD card in the SD card slot of the unit page 81 L An SD card is not supplied 2 Print 3 Press V or repeatedly to select SD Card i Set L The printable files stored on the SD card will be displayed 4 Press V or repeatedly to select the desired file i Set L To select a file inside a...

Страница 32: ...epeatedly to select Nin1 Page Border 3 Press or repeatedly to select the desired setting None For printing without a line Solid Line For printing with a line 4 Set i Advance To select duplex print Connecting the optional automatic duplex unit allows duplex printing page 82 You can also select the type of binding 1 Advance 2 Press V or repeatedly to select Duplex 3 Press or repeatedly to select the...

Страница 33: ...TP server i Set L The printable files on the FTP server will be displayed 4 Press V or repeatedly to select the desired file i Set L To select a file inside a folder press V or and then press Set Repeat this until the desired file is selected L You can select up to 40 files To select multiple files repeat this step L If you press Stop or Back you will return to step 3 and the selection will be can...

Страница 34: ...ample 4 1 5 Scan to e mail server LAN connection only page 36 B E mail is sent via the Internet e mail server C Receiving unit prints attached files 1 Start Multi Function Station 2 Utilities i Configuration Web Page i Network Configuration 3 Type root as the user name then enter the password feature 155 on page 59 i OK 4 Click the Scan to E Mail Print tab 5 Set each item To activate this feature ...

Страница 35: ...e the scanning settings Press V or repeatedly to select the desired setting then press or i Set 7 Black Colour L The scanned image will be displayed in the Multi Function Viewer window after scanning However when you select PDF as a file format the software that is associated to open PDF file will start Note L To stop scanning see page 80 L You can save the images in TIFF JPEG BMP or PDF formats L...

Страница 36: ...tedly to select the desired setting then press or i Set 7 Black Colour L The scanned image will be displayed in the OCR window after scanning Note L To stop scanning see page 80 L You can save the images in TIFF JPEG or BMP formats L For detailed instructions about OCR select Help L You can set the desired scan mode for scanning to your computer beforehand feature 493 on page 71 L The scanned imag...

Страница 37: ...l Scan Note L When scanning a document we recommend using the scanner glass rather than the automatic document feeder for better results L Do not open the document cover when scanning a document with the automatic document feeder 4 2 1 Using Multi Function scan application By clicking an application icon the selected application starts automatically after scanning 1 Set the original page 21 2 Star...

Страница 38: ...ions that support TWAIN or WIA scanning For scanning example proceed as follows 1 Set the original page 21 2 Start an application that supports TWAIN or WIA scanning 3 For TWAIN scanning Select Acquire Image from the File menu For WIA scanning Select From Scanner or Camera from the File menu L The unit s name dialogue box will appear 4 If necessary change the scanning settings on your computer i S...

Страница 39: ...olution 1 Press V or repeatedly to select Resolution 2 Press or repeatedly to select the desired resolution Text Photo For both text and photographs Text For text only Photo For photographs shaded drawings etc 3 Set Note L You can change the default resolution feature 461 on page 67 To select zoom rate enlargement reduction 1 Press V or repeatedly to select Zoom 2 Press or repeatedly to select the...

Страница 40: ...hange the copy settings according to the type of document L To change the number of copies see page 39 L To select the contrast see page 39 L To select the resolution see page 39 L To select the zoom rate see page 39 4 Black Colour L The unit will start copying 5 After you finish copying press Stop to reset the settings you set in step 3 Note L To stop copying see page 80 Original document Enlarge...

Страница 41: ...ou expected If the copy is correct press Black Colour to continue copying If the copy is not correct press Stop and start again from the beginning 5 2 2 Quick ID copy feature Easy repeat feature Scanner glass only Quick ID copy feature To copy 2 sided documents onto one page Easy repeat feature To copy a single document repeatedly onto one page Note L The copied documents will not be reduced to fi...

Страница 42: ...ortrait 4 in 1 Landscape 8 in 1 Portrait 8 in 1 Landscape 5 Set 6 If necessary enter the number of copies page 39 L Other copy settings are also available See page 39 for details 7 When using the scanner glass 1 Black Colour L The unit will scan 1 page 2 Place the next document on the scanner glass and press Set Repeat this until all the documents are scanned L The unit will start copying L You ca...

Страница 43: ...make copies and then fold them in half to create booklets The documents will be reduced to fit the recording paper 1 Set the original page 21 2 Press V or repeatedly to select Page Layout i 3 Press V or repeatedly to select Booklet i Set 4 Press V or repeatedly to select the desired binding direction and pages Left Binding 1 Left Binding All Right Binding 1 Right Binding All L 1 To print 4 documen...

Страница 44: ... Resolution 2 Press or repeatedly to select the desired resolution i Set Standard For normal sized characters Fine For small sized characters Super Fine For very small sized characters Photo For photographs shaded drawings etc L Using the Fine Super Fine and Photo settings will increase transmission time To select the contrast Adjust this setting depending on the darkness or lightness of the docum...

Страница 45: ... Enter the fax number 2 Set the original page 21 i Black Sending from memory Quick scan feature 1 Set the original page 21 2 Enter the fax number 3 Press V or repeatedly to select Quick Scan then press or repeatedly to select On i Black 6 2 Storing items for the navigator directory The unit provides a navigator directory 300 items 6 2 1 Storing navigator directory items 1 Menu 2 Press V or repeate...

Страница 46: ...on page 44 and the desired contrast page 44 4 Black 6 4 Broadcast transmission You can send the same document to multiple parties up to 20 To use this feature store the fax numbers into broadcast memory using the navigator directory page 45 Your programmed items will remain in the broadcast memory allowing frequent re use 6 4 1 Programming items into the broadcast memory 1 Menu 2 Press V or repeat...

Страница 47: ...the original page 21 2 Press or to initiate the navigator directory 3 Press V or repeatedly to select the desired broadcast memory location i Set 4 If necessary change the resolution page 44 and the contrast page 44 i Black L To send a single page go to step 6 L To send multiple pages go to the next step 5 Place the next page i Set L To send more pages repeat this step 6 Black Note L To stop sendi...

Страница 48: ... see the help file by selecting p from Multi Function Station L Click Select to change the active unit Receiving Faxes 6 6 Selecting the way to use your unit Depending on your situation select the way you prefer to use your unit Use only as a fax FAX ONLY mode Use mostly as a telephone TEL mode Use as a telephone and or fax TEL FAX mode Use with answering machine 6 6 1 Use only as a fax FAX ONLY m...

Страница 49: ...e Your situation You want to use the unit with an answering machine Setup Connect an external telephone answering machine and set the ring count of the answering machine to less than 4 L Set the ring count in FAX ONLY mode of the unit to more than 4 if you use with auto answer ON How to receive calls When receiving phone calls the answering machine will record voice messages 6 7 Receiving a fax au...

Страница 50: ...e remote fax activation is turned ON feature 434 on page 64 beforehand The default setting is ON 6 8 2 Activating TEL FAX mode 1 Make sure feature 404 is set to Tel Fax beforehand page 62 2 Press Fax Auto Answer repeatedly to display Tel Fax Mode L The Fax Auto Answer light turns OFF 3 The ringer volume setting should be ON page 22 How phone calls and faxes are received 1 Incoming Call will be dis...

Страница 51: ...one is detected 6 9 Displaying a received fax document You can display a received fax document on the unit You can print or save the necessary document after you confirm the image Make sure the fax preview mode setting is turned ON beforehand feature 448 on page 65 L Make sure that the Fax light is ON L Make sure that the unit is idle Important L You can only receive faxes in monochrome 6 9 1 View...

Страница 52: ...to select the destination e mail address i Set L To enter the e mail address using the dial keypad select Temporary Address L The fax document will be sent as an attachment via an e mail server Saving in a folder on an FTP server 1 Press V or repeatedly to select FTP Server i Set 2 Press V or repeatedly to select the desired FTP server i Set L The fax document will be saved in the folder on the FT...

Страница 53: ...de for the answering machine see the operating instructions of the answering machine Receiving a voice message and fax document in one call The caller can leave a voice message and send a fax document during the same call Inform the caller of the following procedure beforehand 1 The caller calls your unit L The answering machine will answer the call 2 The caller can leave a message after the greet...

Страница 54: ...nce 2 Press V or repeatedly to select Junk Fax Prohibitor i Set 3 Press V or repeatedly to select Junk List Set i Set 4 Press V or repeatedly to display the party you do not want to receive faxes from i Set L If you have programmed the wrong item press Set again to remove and cancel the item 5 Back i Advance To display the junk fax prohibitor list 1 Advance 2 Press V or repeatedly to select Junk F...

Страница 55: ...n a fax call is received your computer will receive a document through the unit Note L You can view print or transfer the received document using your computer Viewing a received document 1 Select PC FAX from Multi Function Station 2 Select Received Log in Communication Log 3 Click the item you want to view 4 Click File in the menu bar then select View or click the View icon in the toolbar L The r...

Страница 56: ...rmation may not be received properly Consult your PBX supplier L If the unit cannot receive caller information the following will be displayed Out of Area The caller dialled from an area which does not provide Caller ID service Private Caller The caller requested not to send caller information Long Distance The caller made a long distance call To confirm caller information by printing the Caller I...

Страница 57: ...will be displayed L To cancel erasing press Stop then press Menu 3 Set 4 Press Menu to exit 7 4 2 Erasing specific caller information 1 Caller ID 2 Press V or repeatedly to select the desired item i i Set i Stop 7 5 Storing caller information 1 Caller ID 2 Press V or repeatedly to select the desired item 3 Set 4 Edit the name if necessary i Set i V 5 Edit the telephone number if necessary i Set i ...

Страница 58: ...uration Web Page L You can also access the unit by entering its IP address on the web browser 2 Select the desired category from the menu bar Device Configuration features of the unit Advance Configuration advanced features for each mode Network Configuration network features 3 Type root as the user name then enter the password feature 155 on page 59 i OK 4 Select the desired feature tab at the to...

Страница 59: ... remote operation 1 5 5 1 Menu i 1 5 5 i Set 2 Enter the current password i Set L The default password is 1234 3 Enter a new 4 digit password using 0 9 i Set 4 Enter the new password again i Set i Menu Note L It is recommended that you change this password from the default password L This password is also used for feature programming via a web browser Setting the toner maintenance time 1 5 8 The u...

Страница 60: ... 105 g m2 paper 2 Thin Paper 60 g m2 to 74 g m2 paper 3 Thick Paper 106 g m2 to 165 g m2 paper Note L This setting is valid for both the standard input tray and the optional input tray L Thick Paper will be displayed only when 1 is selected for the following Paper input tray setting for fax feature 440 on page 64 Paper input tray setting for copy feature 460 on page 67 Paper input tray in PCL feat...

Страница 61: ...e 1 On The toner cartridge will last longer Note L This feature may lower the print quality by reducing toner consumption Changing the colour calibration for all colours cyan magenta yellow and black 4 8 5 Change the colour calibration if colour printing is too dark or too light See page 80 for details Changing the colour calibration for cyan 4 8 6 Change the colour calibration if colour printing ...

Страница 62: ...ransmissions and receptions 1 On default The unit will print a journal report automatically after every 30 new fax transmissions and receptions page 45 Changing the receiving mode in the manual answer setting 4 0 4 1 Tel default Telephone mode page 50 2 Tel Fax Telephone Fax mode page 50 Sending documents overseas 4 1 1 If you cannot send a fax overseas even if the number is correct and the line i...

Страница 63: ...ll be fed into the unit and scanned into memory The unit will then send the data at the specified time You cannot use this feature for another fax transmission until the former sending is completed Note L To cancel this setting after programming press Stop while the unit is idle and then press Set Setting the Error Correction Mode ECM 4 1 3 This feature is available when the sending receiving fax ...

Страница 64: ...50 for details Setting the memory reception alert 4 3 7 To alert you with a beeping sound when a received fax document is stored into memory due to some existing problem 0 Off Deactivates this feature 1 On default You will hear a beeping sound Note L The slow beeps will continue until you solve the printing problem and make sure the unit is supplied with enough paper to print the stored document S...

Страница 65: ...Fax Legal size documents can be sent for the next fax transmission using the scanner glass After transmission this setting will turn OFF automatically 2 Always Legal size documents can be sent using the scanner glass anytime Setting the fax preview mode 4 4 8 If you wish to display the received fax document activate this feature 0 Off default Deactivates this feature 1 On The unit will store the r...

Страница 66: ...nit through the web browser interface in advance 1 Start Multi Function Station 2 Utilities i Configuration Web Page i Network Configuration 3 Type root as the user name then enter the password feature 155 on page 59 i OK 4 Select the E Mail Feature tab 5 Click Edit next to Send User 6 Click Edit next to the desired e mail user 7 Enter the name and e mail address i Submit 8 Close the web browser S...

Страница 67: ... default For documents containing both text and photographs 2 Text For documents containing only text 3 Photo For documents containing photographs shaded drawings etc Holding the previous page layout setting 4 6 7 0 Disabled default Deactivates this feature 1 Enabled The unit will hold the previous setting Holding the previous zoom setting 4 6 8 0 Disabled default Deactivates this feature 1 Enable...

Страница 68: ... will be automatically reduced when the data size is too large to print Note L This feature may lower the print quality by reducing the resolution Setting the recording paper direction in PCL 7 6 5 1 Portrait default The document will be printed in portrait direction 2 Landscape The document will be printed in landscape direction Setting the A4 wide feature in PCL 7 6 6 You can change the margin a...

Страница 69: ...et the length of time before the unit recovers if a memory overflow occurs 1 Off default Deactivates this feature 2 20s 20 seconds 3 30s 30 seconds 4 60s 60 seconds 5 90s 90 seconds 6 120s 120 seconds Changing the data timeout setting 7 7 4 The unit will automatically print the remaining data in memory when the computer does not send data to the unit during the set time 1 Menu i 7 7 4 i Set 2 Ente...

Страница 70: ...ual A4 letter print 7 7 6 This feature allows printing in A4 size even if letter size recording paper is installed and vice versa 0 Off Deactivates this feature 1 On default Printing is possible between A4 letter size Feature Code Selection ...

Страница 71: ...terface When you send scanned files via an e mail server you need to program the e mail server and SMTP server settings beforehand Consult your service provider or network administrator for details 1 Start Multi Function Station 2 Utilities i Configuration Web Page i Advance Configuration 3 Type root as the user name then enter the password feature 155 on page 59 i OK 4 Select the Scan Feature tab...

Страница 72: ...face 1 Start Multi Function Station 2 Utilities i Configuration Web Page i Advance Configuration 3 Type root as the user name then enter the password feature 155 on page 59 i OK 4 Select the Scan Feature tab 5 Click Edit next to FTP Server 6 Click Edit next to the desired FTP server 7 Enter the server name IP address folder directory etc i Submit 8 Close the web browser Note L If you do not enter ...

Страница 73: ...i Set 2 Enter the default gateway of the network on the LAN using the dial keypad i Set i Menu Setting the primary DNS server for the LAN connection 5 0 4 This feature is available when feature 500 is deactivated 1 Menu i 5 0 4 i Set 2 Enter the primary DNS server of the network on the LAN using the dial keypad i Set i Menu Setting the secondary DNS server for the LAN connection 5 0 5 This feature...

Страница 74: ...l be allocated automatically without using a DHCP Dynamic Host Configuration Protocol server Setting HTTPD for the LAN connection 5 3 4 0 Disabled Denies access to the web browser 1 Enabled default Allows access to the web browser IPv6 protocol 5 3 5 0 Disabled default Deactivates this feature 1 Enabled IPv6 protocol can be used After installing the printer driver be sure to change the port to IPv...

Страница 75: ... will increase display time Setting the display mode for direct printing from an SD card 6 7 3 1 File List default The file name for each file will be displayed 2 Thumbnail A thumbnail image of each file will be displayed Note L Using the Thumbnail setting will increase display time Setting the information for direct printing from an FTP server LAN connection only L This feature can be programmed ...

Страница 76: ...lt your service provider or network administrator for details Setting the FTP server information FTP Feature Enter the FTP server information to carry out the following functions Printing a file stored on an FTP server page 33 Sending scanned images to a folder on an FTP server page 37 Saving the fax document in a folder on an FTP server page 52 Setting the e mail server information E Mail Feature...

Страница 77: ...l attachments that it receives Disabled default Deactivates this feature See page 34 for details Setting the e mail checking interval for the scan to e mail print feature Scan to E Mail Print Enter the desired e mail checking interval Setting the header print option for the scan to e mail print feature Scan to E Mail Print Enabled default The unit will print the header information along with the r...

Страница 78: ...characters using V or Instead of pressing the dial keys you can select characters using V or 1 Press V repeatedly to display the desired character Characters will be displayed in the following order 1 Uppercase letters 2 Numbers 3 Symbols 4 Lowercase letters L If you press the order will be reversed 2 Press to insert the displayed character 3 Return to step 1 to enter the next character Keypad Cha...

Страница 79: ... sure the unit is not currently being used for the same function 9 2 2 Using Device Monitor You can confirm the setting information and current status of the unit from your computer 1 Start Multi Function Station 2 Utilities i Device Monitor L The Device Monitor window will appear 3 Confirm the status of the unit Status Current status of the unit Note L Additional information toner and recording p...

Страница 80: ... colour printing is too dark or too light change the colour calibration 1 Select the desired colour to change the calibration L To change the colour density for cyan magenta yellow and black press Menu i 4 8 5 L To change the colour calibration for cyan press Menu i 4 8 6 L To change the colour calibration for magenta press Menu i 4 8 7 L To change the colour calibration for yellow press Menu i 4 ...

Страница 81: ...e reading or writing data to avoid damage to the data L Be sure to make a backup copy of the data L We are not responsible for any damages incurred to your SD card resulting from corrupted or lost data L When the write protect switch is in the lock position it is not possible to write data to the card Be sure that the switch is unlocked 1 to ensure correct operation Note L Confirm the SD card icon...

Страница 82: ...o 470 sheets of 80 g m2 paper Up to 410 sheets of 90 g m2 paper Up to 360 sheets of 105 g m2 paper L The unit is set for printing A4 size plain paper by default To use letter or legal size paper change the recording paper size setting feature 382 on page 60 To use thin paper change the recording paper type setting feature 383 on page 60 Important L Before starting installation of the optional inpu...

Страница 83: ...ows Me Windows 2000 Settings i Printers For Windows XP Professional Printers and Faxes For Windows XP Home Control Panel i Printers and Other Hardware i Printers and Faxes For Windows Vista Control Panel i Printers 3 Select the unit s name 4 For Windows 98 Windows Me Windows 2000 Windows XP Select Properties from the File menu L The printer properties window will appear For Windows Vista Select Pr...

Страница 84: ...ption Memory Full L The memory is full of received documents due to a lack of recording paper or a recording paper jam Install paper page 16 or remove the jammed paper page 99 L If feature 442 is set to Always page 65 check the connection between the computer and the unit L If feature 448 is set to On page 65 the memory is full of received documents View print or save the documents and then erase ...

Страница 85: ...ife is near its end Replace the waste toner cartridge as soon as possible Check Document L The document was not fed into the unit properly Remove the document and then press Stop to clear the message Re insert the document If misfeeding occurs frequently clean the document feeder rollers page 106 and try again Check Install Input Tray 1 L The paper input tray is not installed correctly Pull out th...

Страница 86: ...ayed message instructions to print out the document For fax memory capacity see page 109 L If feature 442 page 65 is set to Always check the connection between the computer and the unit check the computer is turned ON L If feature 448 page 65 is set to On view print or save the received fax documents page 51 and then erase the unnecessary documents page 52 turn the setting to Off The fax documents...

Страница 87: ...rased Not Support Media L The inserted SD card could not be read Use a supported SD card page 81 Out of Paper Input Tray 1 L Recording paper is not installed or the paper input tray has run out of paper Install paper page 16 30 L Recording paper was not fed into the unit properly Reinstall the paper page 16 30 Note L 1 Standard input tray L 2 Optional input tray L 1 2 Standard input tray and optio...

Страница 88: ...L There is something wrong with the scanner position Turn the power switch OFF then ON If the problem cannot be solved contact our service personnel SD Card is pulled out L The SD card has been removed from the unit Reinsert it page 81 SD Card not installed L There is no SD card inserted in the unit Insert one page 81 SD Card Write Protection L The write protect switch of the SD card is in the loc...

Страница 89: ...le for the version of Windows installed on your computer See the Microsoft web site for details L If you have any other multifunction software installed on your computer uninstall it L Check that your computer has enough memory and hard disk space If your computer warns that there is insufficient memory close other applications If there is not enough space on the hard disk delete unnecessary files...

Страница 90: ...server settings are not registered Program the FTP server settings beforehand page 75 L The file is too large or is in an unsupported format Use a supported file format page 33 Colour printing is too dark or too light L Change the colour calibration page 80 Vertical white lines appear on the printed documents L The drum cartridge may be the cause Print the colour test then the printer test pages t...

Страница 91: ...l the optional automatic duplex unit page 82 Problem Cause Solution I cannot scan L When scanning at a high resolution a large amount of available memory is required If your computer warns that there is insufficient memory close other applications and try again L The unit is in use Try again later L There is not enough space on the hard disk Delete unnecessary files and try again L Check the conne...

Страница 92: ... copy of the document using Text resolution page 39 Problem Cause Solution I cannot send documents L The telephone line cord is connected to the EXT socket on the unit Connect to the LINE socket page 19 L The other party s fax machine is busy or has run out of recording paper Try again L The other party s machine is not a fax machine Check with the other party L The other party s fax machine faile...

Страница 93: ...her party may have sent a faint document or there may be something wrong with the other party s machine Ask them to send a clearer copy of the document or to check their fax machine L If documents can not be copied properly refer to 10 3 2 Printing problems page 90 The other party complains that they cannot send a document L The memory is full of received documents due to a lack of recording paper...

Страница 94: ...e is obtained the last number dialled will be redialled I cannot receive a fax document on the computer L Make sure the following features are set beforehand PC fax reception feature 442 on page 65 Computer setting for the PC fax reception feature 443 on page 25 I cannot display a received fax document L You must set the fax preview mode to ON feature 448 on page 65 beforehand L You cannot display...

Страница 95: ...space to save new files on the SD card Delete unnecessary files and try again I cannot print a file saved on the SD card L There is no SD card inserted in the unit Insert a supported SD card page 81 L You tried to print different file formats onto 1 page Activate the continuous print setting page 32 L The file may be broken Try viewing the file on your computer L The file is too large or is in an ...

Страница 96: ... 10 255 255 254 Class B 255 255 0 0 172 xx 0 1 172 xx 255 254 1 Class C 255 255 255 0 192 168 xx 1 192 168 xx 254 2 1 xx should be the same value for the unit and for the computer as shown in the following example Example 172 16 0 1 172 16 255 254 The available range of xx is 16 31 2 xx should be the same value for the unit and for the computer as shown in the following example Example 192 168 0 1...

Страница 97: ...ialogue box appears and asks if I want to block PCCMFLPD and I cannot operate the following functions after installing the Microsoft Windows XP Service Pack 2 PC printing Scanning Remote Control PC FAX Device Monitor L Click Keep Blocking and run the Windows Firewall Setting Tool to allow the data transmission for Multi Function Station page 97 Problem Cause Solution I cannot receive documents aut...

Страница 98: ...e box will appear 4 Continue 5 Click the Exceptions tab 6 Confirm that Panasonic Trap Monitor Service PCMFSMLM and PCCMFLPD are displayed and checked on the Program or port list 10 3 11 Notice for KX MB200 KX MB700 KX FLB880 series users If you have already installed KX MB200 KX MB700 KX FLB880 series Multi Function Station on your computer the instructions for modifying or adding printer driver c...

Страница 99: ...11 1 1 When the recording paper has jammed inside of the unit The display will show the following Paper Jammed Open Left Cover Hot Caution Paper Jammed b Open Left Cover Hot Caution 1 Push the left cover open lever 1 upward then pull open the left cover 2 Note L Do not touch the rollers 4 Caution L During or immediately after printing the fuser unit 3 gets hot Wait until the fuser unit cools down ...

Страница 100: ...the rollers 1 Remove the jammed paper 5 carefully by pulling it toward you 2 Close the left cover Case 2 When the recording paper has jammed near the fuser unit 1 Lift both green levers 6 until they stop 2 Remove the jammed paper 7 carefully by pulling it toward you Example 1 Example 2 5 6 7 7 ...

Страница 101: ...Case 3 When the recording paper has jammed inside of the optional automatic duplex unit 1 Close the left cover 2 Open the automatic duplex unit cover 9 3 When the document has jammed near the roller Hold the automatic duplex unit cover and remove the jammed paper j carefully by pulling it upward 8 9 j ...

Страница 102: ...ed paper k carefully by pulling it toward you 4 Close the automatic duplex unit cover 11 1 2 When the recording paper has jammed near the optional input tray The display will show the following Paper Jammed Open Tray 2 Left Cover Paper Jammed b Open Tray 2 Left Cover 1 Open the cover 1 at the left side of the optional input tray 2 Remove the jammed paper 2 k 1 2 ...

Страница 103: ...paper input tray until it clicks into place then pull it completely out lifting the front part of the tray Remove the recording paper and straighten 2 Re load the recording paper Standard input tray Optional input tray 3 Insert the paper input tray to the unit lifting the front part of the tray Then push it completely into the unit Note L If the error message is still displayed check the recording...

Страница 104: ...e jammed document forcibly before lifting the ADF cover 1 Open the ADF cover 1 while holding the document cover 2 2 Remove the jammed document 3 carefully When the document has jammed near the document entrance When the document has jammed near the document exit 3 Close the ADF cover 1 2 3 3 ...

Страница 105: ...tern appears on your recording paper the original document the scanned data or the fax document received by the other party Caution L Do not use paper products such as paper towels or tissues for cleaning 1 Open the document cover 1 2 Hold the document cover 2 while cleaning the white plates 3 and the scanner glass 4 3 Close the document cover 5 1 2 4 3 5 ...

Страница 106: ...on L Do not use paper products such as paper towels or tissues for cleaning 1 Turn the power switch OFF 2 Open the ADF cover 1 while holding the document cover 2 3 Clean the document feeder rollers 3 with a cloth moistened with water and let all parts dry thoroughly 4 Close the ADF cover 5 Turn the power switch ON 1 2 3 ...

Страница 107: ...t cover open lever 1 upward then pull open the left cover 2 Note L Do not touch the rollers 4 3 Clean the paper chute 5 with a dry paper towel or tissue Note L Do not touch the black belt 6 or rub it strongly 4 Close the left cover 5 Turn the power switch ON Caution L During or immediately after printing the fuser unit 3 gets hot Wait until the fuser unit cools down before cleaning the paper chute...

Страница 108: ... 1 Cleaning the drum cartridge Important L This solution uses at least 3 pages of recording paper Make sure there is enough recording paper installed in the standard input tray beforehand 1 Menu i 4 8 0 2 Select the colour which has vertical white lines in the colour test page 1 Black default 2 Cyan 3 Magenta 4 Yellow 3 Set L The drum cartridge will be cleaned automatically by printing out 3 pages...

Страница 109: ...lback Operating environment 10 C 32 5 C 20 80 RH Relative Humidity Dimensions Approx width 520 mm depth 438 mm height 546 mm Mass Weight Approx 30 kg Power consumption Standby Approx 20 W Preheat Approx 40 W Copy Approx 550 W Maximum Approx 1 100 W When the fuser lamp turns on Power supply 220 240 V AC 50 Hz Memory capacity for operation and storing memory 192 MB Fax memory capacity 10 MB in total...

Страница 110: ... Your logo 2 8 Your fax number 3 Copy Copying3 1 Using the unit as a copy machine 3 2 Making a copy 3 3 More copying features 4 PC Operations Setup 4 1 Connecting to a computer 4 2 Installing Multi Function Station 4 3 Starting Multi Function Station Printing 4 4 Using the unit as a printer Scanning 4 5 Using the unit as a scannerRemote Control 4 6 Operating the unit from your computer 4 7 Fax sen...

Страница 111: ...led we cannot guarantee a minimum number of sheets that will be printed by your drum Note L The continuous use of an old drum cartridge may cause malfunction To prevent this when the drum life is finished the unit will stop printing after a while and printing will not be possible until a new drum cartridge is installed Waste toner cartridge life The waste toner cartridge needs to be replaced regul...

Страница 112: ... ANY DIRECT INDIRECT INCIDENTAL SPECIAL EXEMPLARY OR CONSEQUENTIAL DAMAGES INCLUDING BUT NOT LIMITED TO PROCUREMENT OF SUBSTITUTE GOODS OR SERVICES LOSS OF USE DATA OR PROFITS OR BUSINESS INTERRUPTION HOWEVER CAUSED AND ON ANY THEORY OF LIABILITY WHETHER IN CONTRACT STRICT LIABILITY OR TORT INCLUDING NEGLIGENCE OR OTHERWISE ARISING IN ANY WAY OUT OF THE USE OF THIS SOFTWARE EVEN IF ADVISED OF THE ...

Страница 113: ...y of California All rights reserved Copyright c 1988 Stephen Deering Copyright c 1988 University of Utah Copyright c 1988 1989 1993 The Regents of the University of California All rights reserved Copyright c 1988 1991 1993 The Regents of the University of California All rights reserved Copyright c 1988 1992 1993 The Regents of the University of California All rights reserved Copyright c 1988 1993 ...

Страница 114: ...ndation Inc All rights reserved Copyright c 1998 1999 2000 2001 The NetBSD Foundation Inc All rights reserved Copyright c 1998 2000 The NetBSD Foundation Inc All rights reserved Copyright c 1998 2000 2001 The NetBSD Foundation Inc All rights reserved Copyright c 1999 The NetBSD Foundation Inc All rights reserved Copyright C 1999 WIDE Project All rights reserved Copyright c 1999 2000 Jason L Wright...

Страница 115: ...RE Part 2 Networks Associates Technology Inc copyright notice BSD Copyright c 2001 2003 Networks Associates Technology Inc All rights reserved Redistribution and use in source and binary forms with or without modification are permitted provided that the following conditions are met Redistributions of source code must retain the above copyright notice this list of conditions and the following discl...

Страница 116: ...T STRICT LIABILITY OR TORT INCLUDING NEGLIGENCE OR OTHERWISE ARISING IN ANY WAY OUT OF THE USE OF THIS SOFTWARE EVEN IF ADVISED OF THE POSSIBILITY OF SUCH DAMAGE Part 4 Sun Microsystems Inc copyright notice BSD Copyright 2003 Sun Microsystems Inc 4150 Network Circle Santa Clara California 95054 U S A All rights reserved Use is subject to licence terms below This distribution may include materials ...

Страница 117: ...R PROFITS WHETHER IN AN ACTION OF CONTRACT NEGLIGENCE OR OTHER TORTIOUS ACTION ARISING OUT OF OR IN CONNECTION WITH THE USE OR PERFORMANCE OF THIS SOFTWARE Copyright c 1990 The Regents of the University of California All rights reserved This code is derived from software contributed to Berkeley by Chris Torek Redistribution and use in source and binary forms with or without modification are permit...

Страница 118: ...EMPLARY OR CONSEQUENTIAL DAMAGES INCLUDING BUT NOT LIMITED TO PROCUREMENT OF SUBSTITUTE GOODS OR SERVICES LOSS OF USE DATA OR PROFITS OR BUSINESS INTERRUPTION HOWEVER CAUSED AND ON ANY THEORY OF LIABILITY WHETHER IN CONTRACT STRICT LIABILITY OR TORT INCLUDING NEGLIGENCE OR OTHERWISE ARISING IN ANY WAY OUT OF THE USE OF THIS SOFTWARE EVEN IF ADVISED OF THE POSSIBILITY OF SUCH DAMAGE Copyright c 198...

Страница 119: ...DISCLAIMED IN NO EVENT SHALL THE REGENTS OR CONTRIBUTORS BE LIABLE FOR ANY DIRECT INDIRECT INCIDENTAL SPECIAL EXEMPLARY OR CONSEQUENTIAL DAMAGES INCLUDING BUT NOT LIMITED TO PROCUREMENT OF SUBSTITUTE GOODS OR SERVICES LOSS OF USE DATA OR PROFITS OR BUSINESS INTERRUPTION HOWEVER CAUSED AND ON ANY THEORY OF LIABILITY WHETHER IN CONTRACT STRICT LIABILITY OR TORT INCLUDING NEGLIGENCE OR OTHERWISE ARIS...

Страница 120: ...D AND ON ANY THEORY OF LIABILITY WHETHER IN CONTRACT STRICT LIABILITY OR TORT INCLUDING NEGLIGENCE OR OTHERWISE ARISING IN ANY WAY OUT OF THE USE OF THIS SOFTWARE EVEN IF ADVISED OF THE POSSIBILITY OF SUCH DAMAGE Copyright c 1990 The Regents of the University of California All rights reserved This code is derived from software contributed to Berkeley by Chris Torek Redistribution and use in source...

Страница 121: ...eatures or use of this software must display the following acknowledgement This product includes software developed by the University of California Berkeley and its contributors 4 Neither the name of the University nor the names of its contributors may be used to endorse or promote products derived from this software without specific prior written permission THIS SOFTWARE IS PROVIDED BY THE REGENT...

Страница 122: ...or black 80 493 Scan mode 71 494 Scan parameter hold 71 495 Monochrome scan type 71 500 DHCP mode 73 501 IP address 73 502 Subnet mask 73 503 Default gateway 73 504 DNS server 1 73 505 DNS server 2 73 507 Machine name 73 508 MAC address 73 532 IP filtering 74 533 Auto IP 74 534 HTTPD 74 535 IPv6 protocol 74 565 Paper input tray setting for the scan to e mail print feature 74 669 Paper input tray s...

Страница 123: ...5 74 J Jams Document 104 Recording paper 99 Journal report Feature 402 45 62 Junk fax prohibitor 54 L Label 30 LAN features 73 Legal size fax send Feature 445 65 Logo Feature 102 23 M MAC address Feature 508 73 Machine name Feature 507 73 Maintenance time Feature 158 59 Manual answer mode Feature 404 62 Maximum fax speed Feature 418 63 Memory reception alert Feature 437 64 Mode timer Feature 464 6...

Страница 124: ...down 97 Printer test 108 Sending 45 62 Setup 108 Telephone number 108 Reset fax features Feature 459 65 Resolution 39 44 Ring count FAX ONLY Feature 210 60 Silent fax Feature 436 64 TEL FAX Feature 212 62 Ringer pattern Feature 161 59 S Scan features 71 Scan mode Feature 493 71 Scanner glass 21 39 44 Scan parameter hold Feature 494 71 Scan to e mail print 34 SD card 81 Inserting 81 Printing 31 Sav...

Страница 125: ...125 Notes ...

Страница 126: ...126 Notes ...

Страница 127: ...127 Notes ...

Страница 128: ...PNQX1513ZA CM0908SY0 CD ...

Отзывы: