background image

71

Operations

For fax advantage assistance, call 1-800-435-7329.

Copying

The unit does not make a copy.

● 

You cannot make a copy during
programming. Make the copy after
programming or stop programming.

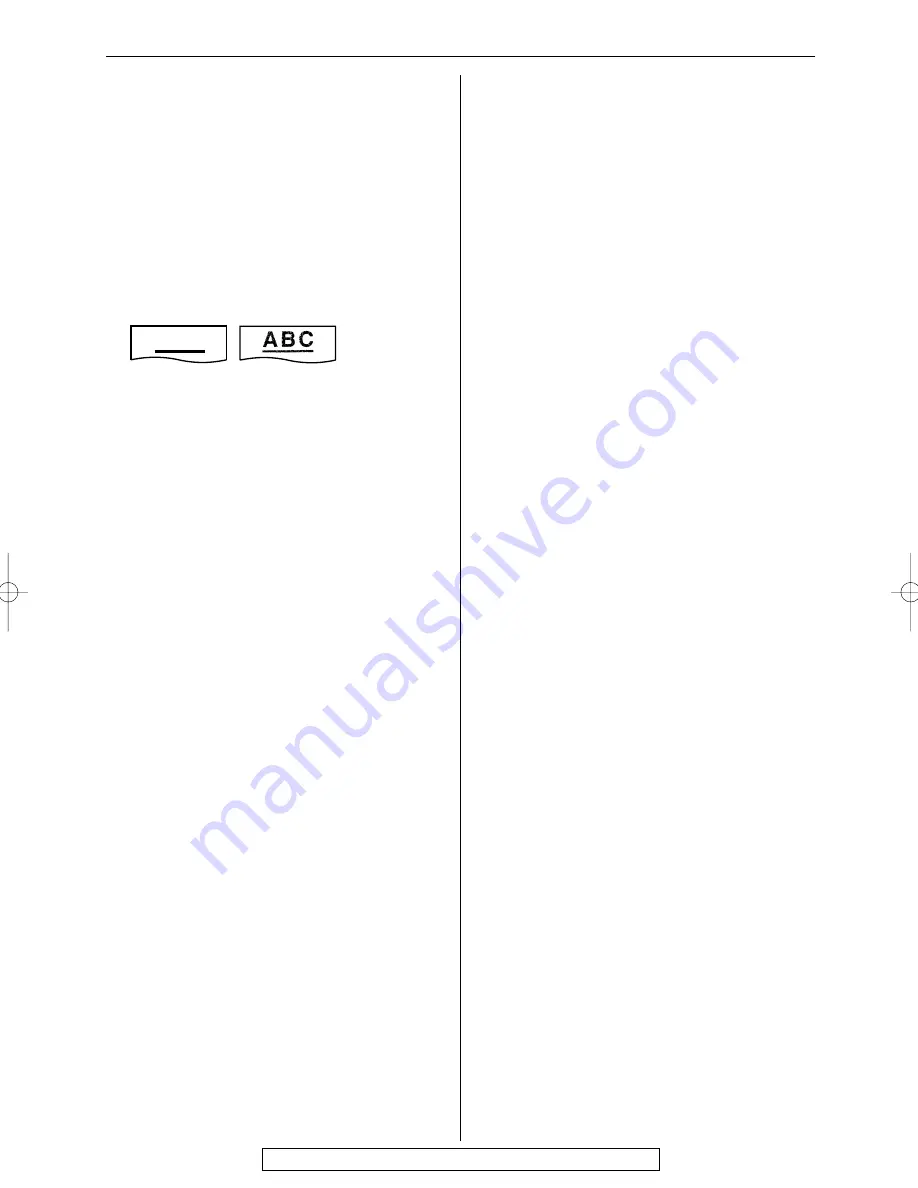
A black line, a white line or a dirty pattern
appears on the copied document.

● 

The white plate, scanner glass or lower
glass are dirty. Clean them (p. 77–79).

The printing quality is poor.

● 

Some paper has instructions
recommending which side to print on. Try
turning the paper over. 

● 

You may have used paper with a cotton
and/or fiber content that is over 20%, such
as letterhead or resume paper. 

● 

The remaining toner is low. Replace the
toner cartridge (p. 73).

● 

We recommend you replace the drum unit
every third time you replace the toner
cartridge (p. 73). To check the drum life
and quality, please print the printer test list
(p. 80).

● 

The toner save mode of feature #79 is on
(p. 65).

● 

When you make a copy from
transparencies, be sure to use the scanner
glass. Place a blank sheet of paper on top
of the transparency, and leave the
document cover open during copying 
(p. 48).

Using an answering
machine

I cannot receive documents automatically.

● 

Your greeting message on the answering
machine is too long. Shorten the message
(to less than 10 seconds).

● 

The answering machine rings too many
times. Set to 1 or 2 rings.

I cannot receive voice messages.

● 

Check if the answering machine is turned
on and connected to the fax machine
properly (p. 44).

● 

Set the number of rings on the answering
machine to 1 or 2.

(continued)

I cannot retrieve recorded voice messages
on the answering machine from a remote
location.

● 

You did not program your remote access
code into your fax machine correctly.
Program the same code that is
programmed on the answering machine
on the fax machine with feature #12 
(p. 62).

I pressed the remote access code to
access the answering machine remotely,
but the line was disconnected.

● 

The code may include “#” which is used
for certain features provided by telephone
companies. Change the code on the
answering machine to another code which
does not include “#”. Also change the code
of the fax machine with feature #12 (p.
62).

Callers complain that they cannot send a
document.

● 

Your answering machine has run out of
recording tape. Rewind the tape to record
messages.

● 

You set the answering machine to only
give a greeting message.

Multi-Function Station

I cannot open a TIFF file.

● 

You must change the compression format
of the file. 
Example: To convert an image using
Imaging for Windows.

1. 

Click

[Start]

, point to 

[Programs]

[Accessories]

, then click 

[Imaging]

.

2. 

Open the TIFF file that you cannot open
in 

[Multi-Function Viewer]

.

3. 

Select 

[Properties]

from the 

[Page]

menu.
— The 

[Page Properties] 

dialog box

will appear.

4. 

Click the 

[Compression]

tab, then

select 

[CCITT Group 3 (1d) Modified

Huffman] 

from the drop-down list.

5. 

Click

[OK]

.

— The compression format of the file is

now changed.

[Launcher] disappears.

● 

Look in the tool bar. If you do not find the

[Launcher]

icon, it is closed. If you do find

the icon, it is just minimized. Click the icon
in the tool bar.

A B C

Original

Copy

(continued)

KX-FLB756 (066-072)  03.4.14  9:17 PM  Page 71

Содержание KX-FLB756

Страница 1: ...e used only in the U S A FOR FAX ADVANTAGE ASSISTANCE VOICE CALL 1 800 HELP FAX 1 800 435 7329 E MAIL TO consumerproducts panasonic com for customers in the U S A or Puerto Rico REFER TO www panasonic com for customers in the U S A or Puerto Rico Flat Bed Multi Function Laser Fax Operating Instructions Model No KX FLB756 ...

Страница 2: ...ntity or person s sending the facsimile and telephone number of the business entity or person s To program this information into your unit complete all the instructions on pages 18 to 21 Do not rub or use an eraser on the printed side of recording paper as the print may smear Energy Star As an ENERGY STAR Partner Panasonic has determined that this product meets the ENERGY STAR guidelines for energ...

Страница 3: ...d Install the unit where no one can step or trip on the cord 10 Do not overload wall outlets and extension cords This can result in the risk of fire or electric shock 11 Never push any objects through slots in this unit This may result in the risk of fire or electric shock Never spill any liquid on the unit 12 To reduce the risk of electric shock do not disassemble this unit Take the unit to an au...

Страница 4: ...designed for wet locations Never touch uninsulated telephone wires or terminals unless the telephone line has been disconnected at the network interface Use caution when installing or modifying telephone lines WARNING To prevent the risk of fire or electrical shock do not expose this product to rain or any type of moisture OTHER INFORMATION Keep the unit away from electrical noise generating devic...

Страница 5: ... of the drum unit After you have read them open the drum unit protection bag The drum unit contains a photosensitive drum Exposing it to light may damage the drum Once you have opened the protection bag Do not expose the drum unit to light for more than 5 minutes Do not touch or scratch the green drum surface Do not place the drum unit near dust or dirt or in a high humidity area Do not expose the...

Страница 6: ...y 25 Making a phone call using one touch dial and navigator directory 26 Caller ID Caller ID service from your phone company 27 Viewing and calling back using caller information 28 Erasing caller information 29 Storing caller information into one touch dial and navigator directory 30 Fax Sending Faxes Sending a fax manually 31 Documents you can send 33 Sending a fax using one touch dial and naviga...

Страница 7: ...rmation 81 Information Warranty Limited Warranty 82 Customer Customer Services directory 83 Services Specifications Technical data about this product 84 Index Program index 86 Index 87 Features Programming 60 Summary Basic features 61 Advanced features 63 Multi Function Station software Help Setup PC Connecting to a computer 50 Installing Multi Function Station software 51 Activating Multi Functio...

Страница 8: ... 85 Specifications Accessory information KX FA76 Model No Toner cartridge Item Usage KX FA77D Drum unit For replacement see page 73 If any items are missing or damaged check with the place of purchase Save the original carton and packing materials for future shipping and transportation of the unit The part numbers listed above are subject to change without notice To order see below DO NOT purchase...

Страница 9: ... sending receiving faxes 5 How to use the copier function 6 Frequently asked questions and answers 7 Explanation of error messages shown on the display 8 List of available reports 9 How to use the Caller ID service 3 Press w PRINTING CALLER ID PRESS SET REPORTS PRESS SET ERRORS PRESS SET Q and A PRESS SET COPIER PRESS SET FAX SND RCV PRESS SET DIRECTORY PRESS SET FEATURE LIST PRESS SET QUICK SET U...

Страница 10: ...trance Recording paper exit Document cover Paper stacker Document guides ADF Auto Document Feeder cover Paper stacker extender Printer cover Document exit Front view The paper stacker may not be shown in all illustrations Rear view ADF Auto Document Feeder cable External telephone jack Telephone line jack USB interface connector Parallel interface connector Power inlet Speaker ...

Страница 11: ...arily during dialing when your line has rotary pulse services To access special telephone services such as call waiting or for transferring extension calls To dial without lifting the handset To select stations 7 12 for one touch dial p 23 26 34 To use one touch dial p 23 26 34 To transmit a document to multiple entries p 36 39 To adjust volume p 22 To search for a stored name p 26 34 To select fe...

Страница 12: ...wn the printer cover open button then open the printer cover Printer cover Printer cover open button 2 Slide the shipping lock down to unlock it The label for unlocking the shipping lock is attached to the unit Remove and read it 3 Close the printer cover by pushing down on both sides until locked Printer cover Unlocking the shipping lock Shipping lock Unlocked position Caution Whenever transporti...

Страница 13: ...sunlight Do not leave the toner cartridge out of the protection bag for a long time It will decrease the toner life 4 Slide the tab on the toner cartridge into the slot of the drum unit Tab Slot 5a Firmly press down on the right side of the toner cartridge to snap into position and Toner cartridge Red arrows Drum unit Hold here Green drum surface 2 Remove the toner cartridge and drum unit from the...

Страница 14: ...e toner cartridge will last approx 40 longer This feature may lower the print quality 7 Press down the printer cover open button then open the printer cover Printer cover Printer cover open button 8 Install the drum and toner unit by holding the tabs If the lower glass is dirty clean it with a soft and dry cloth Drum and toner unit 9 Close the printer cover by pushing down on both sides until lock...

Страница 15: ... Paper stacker and paper tray Insert the paper tray into the slot on the back of the unit Paper tray Slot Line up the slots in the paper stacker with the pegs on the bottom of the unit then slide until locked Open the paper stacker extender when using legal size paper The paper stacker can hold up to approx 100 sheets of printed paper Remove the printed paper before the paper stacker becomes full ...

Страница 16: ...aper entrance Side to be printed face down Tab Tab Stack of paper Correct Incorrect Adding paper 1 Remove all of the paper 2 Add paper to the stack of paper you removed and straighten 3 Follow steps 1 to 4 above Letter legal or A4 size recording paper can be used for fax messages The unit can hold up to 150 sheets of 60 g m2 to 75 g m2 16 lb to 20 lb paper or 120 sheets of 90 g m2 24 lb paper See ...

Страница 17: ... shows the following unlock the shipping lock p 12 Display RELEASE SHIPPING LOCK CARRIAGE ERROR Caution When you operate this product the power outlet should be near the product and easily accessible To use the fax machine and a computer modem on the same telephone line We recommend connecting the fax and computer to separate telephone wall jacks when possible When the fax and modem are not connec...

Страница 18: ...ng 2 digits for each using the dial keypad Example August 10 2003 Press 08 10 03 5 Enter the correct hour minute by selecting 2 digits for each using the dial keypad Press to select AM or PM Example 3 15PM 1 Press 03 15 2 Press until PM is displayed M 08 D 10 Y 03 TIME 03 15PM M 08 D 10 Y 03 TIME 03 15AM M 08 D 10 Y 03 TIME 12 00AM M 01 D 01 Y 03 TIME 12 00AM SET DATE TIME PRESS SET SYSTEM SET UP ...

Страница 19: ...TEM SET UP PRESS NAVI I H Setting your logo To correct a mistake Press or to move the cursor to the incorrect character and make the correction To delete a character Move the cursor to the character you want to delete and press To insert a character 1 Press or to move the cursor to the position to the right of where you want to insert the character 2 Press FG to insert a space and enter the charac...

Страница 20: ...e f 3 G H I g h i 4 J K L j k l 5 M N O m n o 6 P Q R S p q r s 7 T U V t u v 8 W X Y Z w x y z 9 To select characters with the dial keypad Pressing the dial keys will select a character as shown below To select characters using or Instead of pressing the dial keys you can select characters using or 1 Press or until the desired character is displayed 2 Press to move the cursor to the next space Th...

Страница 21: ... FAX NO PRESS SET SYSTEM SET UP PRESS NAVI I H STOP SET MENU Display Hyphen FLASH Delete Note You can enter your facsimile telephone number by pressing or in step 4 In this case press to move the cursor The button replaces the digit with a and the button replaces it with a space Example using the dial keypad 234 5678 Press 234 5678 To enter a hyphen in a telephone number press k To correct a mista...

Страница 22: ...lume is set to off When a call is received the unit will not ring and will display the following INCOMING CALL RINGER OFF RINGER OFF OK YES SET NO STOP SET Display Ringer pattern You can select one of three ringer patterns Change the setting feature 17 on page 62 The ringer pattern you selected will sound when the unit receives a call Handset receiver volume 5 levels high to low are available Whil...

Страница 23: ... Example If you want to enter a hyphen press k 6 Press w To program other entries repeat steps 2 to 6 7 Press to exit the program DIRECTORY SET PRESS NAVI I H DIRECTORY SET PRESS STATION OR REGISTERED S01 1114497 S01 NAME John STORE PRESS SET STATION 1 DIAL MODE DIRECTORY SET PRESS NAVI I H DIRECTORY SET PRESS STATION OR Helpful hint You can confirm the stored entries on the telephone number list ...

Страница 24: ...elp function p 9 call using this entry p 26 If unnecessary you can erase it p 25 You can confirm the stored entries on the telephone number list p 80 1 Press p repeatedly until the following is displayed Display 2 Press or 3 Enter the name up to 10 characters see page 20 for instructions Example 4 Press w 5 Enter the telephone number up to 30 digits using the dial keypad Example If you want to ent...

Страница 25: ...ter 9876543 DIRECTORY 5 Edit the name see page 20 for instructions 6 Press w Example If you do not need to edit the telephone number skip to step 8 7 Edit the telephone number For further details see page 24 8 Press w REGISTERED S02 0123456 You can erase an entry stored in one touch dial and navigator directory Editing a stored entry You can edit a name or number that is stored in one touch dial a...

Страница 26: ...S NAVI I H TEL PRESS STATION OR Using the directory 1 Press or Display 2 Press or until the desired entry is displayed Example If the desired name has not been stored press and dial the number manually 3 Press q or lift the handset The unit will start dialing automatically Lisa SEND PRESS SET Lisa EDIT PRESS MENU Lisa 2233445 DIRECTORY To search for a name by initial Example Lisa 1 Press or 2 Pres...

Страница 27: ...n area which does not provide Caller ID service The caller requested not to send caller information The caller made a long distance call LONG DISTANCE PRIVATE CALLER OUT OF AREA The calling party s name or telephone number will be displayed after the first ring You then have the option of whether or not to answer the call depending on the caller The unit will automatically store the caller informa...

Страница 28: ...D MONITOR Viewing and calling back using caller information You can easily view caller information and call back Important Calling back will not be possible in the following cases The telephone number includes data other than numbers i e or The caller information does not include a telephone number To edit the telephone number for calling back Press repeatedly after step 2 Each time you press the ...

Страница 29: ...ntil the following is displayed Display 2 Press w 3 Press w To cancel erasing press then p 4 Press w 5 Press to exit the program ERASE COMPLETED ALL ERASE OK YES SET NO STOP CALL LIST ERASE PRESS SET CALLER SET UP PRESS SET Erasing caller information ...

Страница 30: ...ress o then press the desired station key Example Press w Example S09 134567890 NAME SAM LEE STORE PRESS SET S04 134567890 NAME SAM LEE STORE PRESS SET S01 134567890 NAME SAM LEE STORE PRESS SET STATION 1 DIAL MODE SAM LEE PRESS NAVI I H SAM LEE PRESS STATION OR SAM LEE Apr 14 11 50AM 2 NEW CALLS PRESS NAVI Note You can confirm the stored entries on the telephone number list p 80 The unit can only...

Страница 31: ... and replace the handset CONNECTING STANDARD TEL 5678901 TEL PRESS NAVI I H TEL PRESS STATION OR STANDARD To transmit more than 15 pages at a time Insert the first 15 pages of the document Add the other pages up to 15 at a time before the last page feeds into the unit Convenient way to send a fax You can dial the fax number first before inserting the document This is convenient if the other party ...

Страница 32: ...booklets or small sized paper that cannot be sent with the auto document feeder Confirm that there are no documents in the auto document feeder Document cover Scanner glass FAX START RESOLUTION SCAN STOP TOP To stop transmission Press Sending report for confirmation This report will provide you with a printed record of transmission results To use this feature activate feature 04 p 61 For the commu...

Страница 33: ...P TOP Note Remove clips staples or other similar fasteners Do not send the following types of documents Use the scanner glass for fax transmission Chemically treated paper such as carbon or carbonless duplicating paper Electrostatically charged paper Badly curled creased or torn paper Paper with a coated surface Documents you can send Using the auto document feeder 600 mm 23 5 8 Document width 216...

Страница 34: ...etting p 31 4 Enter the fax number Using stations 1 6 Press the desired station key Using stations 7 12 Press o then press the desired station key Using navigator directory Press or then press or to display the desired entry For further details about using the directory see page 26 5 Press i STANDARD F A C E D O W N Document guides Station keys LOWER RESOLUTION SCAN FAX START STOP Before using thi...

Страница 35: ...ges repeat steps 5 and 6 7 Press i Fax auto redial If the line is busy or if there is no answer the unit will automatically redial the number up to 2 times This feature is also available for delayed transmission feature 25 on page 63 During redial the following will be displayed Display To cancel redialing press If your unit does not send a fax Confirm the stored telephone number on the display an...

Страница 36: ...o program other entries repeat this step up to 20 entries 5 Press w after programming all of the desired entries To program another broadcast key repeat steps 2 to 5 6 Press to exit the program DIRECTORY SET PRESS NAVI I H DIRECTORY SET PRESS STATION OR REGISTERED DIR 3456789 01 NAVI SET DIR 3456789 1 Press p repeatedly until the following is displayed Display 2 For BROADCAST 1 2 Press the desired...

Страница 37: ...il the desired entry you want to add is displayed Example Navigator Example Station 2 6 Press w Example To add other entries repeat steps 5 and 6 up to 20 entries 7 Press to exit the program Nikki 1 385 217 9365 REGISTERED Peter S02 1 926 553 2168 Mary 1 584 372 4123 BROADCAST1 ADD DELETE BROADCAST1 SEND PRESS SET BROADCAST1 EDIT PRESS MENU DIRECTORY STOP SET MENU STOP SET MENU ...

Страница 38: ...red entry you want to erase is displayed Example Navigator Example Station 3 To cancel erasing press 6 Press w 7 Press w Example To erase other entries repeat steps 5 to 7 8 Press to exit the program Bob 0123456 DELETED DELETE OK YES SET NO STOP Sam S03 1 987 654 3210 Dick 1 328 143 2968 BROADCAST1 ADD DELETE BROADCAST1 SEND PRESS SET BROADCAST1 EDIT PRESS MENU DIRECTORY STOP SET STOP SET MENU ...

Страница 39: ...ncel the broadcast setting 1 Press while the unit displays the following Display The display will show the following 2 Press w SEND CANCELED YES SET NO STOP BROADCASTING To send the same document using the scanner glass Confirm that there are no documents in the auto document feeder 1 Open the document cover 2 Place the document FACE DOWN then close the document cover 3 Press the desired a 1 2 or ...

Страница 40: ...xternal telephone answering machine and change the ring setting of the answering machine to less than 4 Change the ring setting in FAX ONLY mode of the fax machine to 5EXT TAM if you use with AUTO ANSWER on When receiving phone calls The answering machine will record voice messages When receiving faxes The fax machine will disconnect the answering machine and receive documents External telephone a...

Страница 41: ...rn AUTO ANSWER off by pressing PQ When receiving calls You have to answer all calls manually To receive a fax document press i for each fax you are receiving Ring Ring Ring Mostly phone calls When the fax machine detects a call matching the Distinctive Ring pattern The fax machine will activate the fax function When the fax machine detects other ring patterns You have to answer calls manually Remo...

Страница 42: ... feature 37 to off p 64 TEL mode answering all calls manually If the FAX ON light is on turn it off by pressing PQ Display TEL MODE Note If you do not answer the call within 10 rings the unit will temporarily switch to fax reception The other party can then send a fax Fax reception in memory When a printing problem is detected the unit will temporarily store the received document into memory While...

Страница 43: ...it will automatically answer all calls and only receive fax documents FAX ONLY MODE 3 RINGS Line 1 Phone calls Line 2 Faxes Only a fax machine is connected Activating FAX ONLY mode Note If the FAX ON light is already on and you wish to change the ring setting turn it off once then on again by pressing PQ and follow the instructions in step 2 This mode should not be used with a telephone line which...

Страница 44: ... fax machine to the desired receiving mode p 42 43 If you set to FAX ONLY mode change the ring setting in FAX ONLY mode to 5EXT TAM feature 06 on page 61 Using FAX ONLY mode will allow you to receive faxes if the answering machine is full 6 Check the remote access code of the answering machine and program the same code into the remote operation ID of the fax machine See feature 12 on page 62 Telep...

Страница 45: ...ation code can be changed in feature 41 p 64 Extension telephone To the EXT jack or the same line Extension telephone Note You can change the fax activation code in feature 41 p 64 If you use the fax machine with an extension telephone you can receive fax documents using the extension telephone You do not have to press i on the fax machine Important Use a touch tone telephone as the extension tele...

Страница 46: ... wish to have a different number for fax in a single telephone line To use this service you must subscribe to the Distinctive Ring service offered by your local telephone company 1 Press p Display 2 Press then 31 3 Press or to select ON 4 Press w 5 Press p SETUP ITEM DISTINCTIVE RING MODE ON DISTINCTIVE RING MODE OFF SYSTEM SET UP PRESS NAVI I H SET MENU How to receive calls If the incoming call i...

Страница 47: ...n the example the ring pattern assigned for fax is a triple ring so you should program C triple ring Standard ring one long ring A Double ring two short rings B Triple ring short long short rings C Other triple ring short short long rings D Programming the ring pattern assigned for fax 1 Set feature 31 to ON page 46 2 Press p 3 Press then 32 FAX RING PATTERN RING B D SYSTEM SET UP PRESS NAVI I H 4...

Страница 48: ...9 F A C E D O W N COPY START RESOLUTION STOP Document guides Note Do not open the document cover when making a copy with the auto document feeder Any transmittable document can be copied p 33 To make a clear copy from transparencies be sure to use the scanner glass Place a blank sheet of paper on top of the transparency and leave the document cover open during copying 2 Press d If necessary enter ...

Страница 49: ...nlarged copy of the bottom of the document turn the document around and then make a copy When using the scanner glass the unit will only enlarge the right bottom corner of the document starting from the TOP mark on the unit To reduce a document The unit can reduce copies to as little as 50 of the original by changing the reduction rate 5 at a time After step 2 on page 48 press repeatedly to select...

Страница 50: ...ing Storing editing or erasing entries in directories from your PC Programming the basic and advanced features from your PC Sending receiving fax documents using your PC To run Multi Function Station software you need the following OS Works with Windows 95 98 Me 2000 XP and Windows NT 4 0 CPU Windows 95 98 Pentium 90 MHz or higher processor Windows Me Pentium 150 MHz or higher processor Windows NT...

Страница 51: ...ructions are from Windows Me The screens may differ slightly from those of the actual product The screens are subject to change for improvement without notice Installing Multi Function Station software To uninstall the software 1 Click Start 2 Point to Settings then click Control Panel 3 Double click Add Remove Programs 4 Select Panasonic Multi Function Station from the list 5 Click Add Remove Win...

Страница 52: ...t by the user When the fax machine is connected to the PC via a PCI card or other expansion card When the fax machine is connected to another piece of hardware such as a USB hub or interface adapter and not connected directly to the PC Remote Control p 57 To store edit or erase entries in directories To program the basic and advanced features To view or erase items in the journal report or Caller ...

Страница 53: ...ord proceed as follows Printing from Windows applications Setting the printer properties You can change the printer setting in the Paper tab in step 3 We recommend that you test paper especially special sizes and types of paper on the fax machine before purchasing large quantities Paper size Letter 216 mm x 279 mm 81 2 x 11 Legal 216 mm x 356 mm 81 2 x 14 A4 210 mm x 297 mm 81 4 x 1111 16 COM10 10...

Страница 54: ...ed through and ejected without being printed on Some types of transparencies have instructions recommending which side to print on If the print quality is poor try printing on the other side Labels Use labels designed for laser printing We recommend the following Avery 5160 5161 5162 5163 5164 5165 5167 5168 Xerox LWH100 LWH110 LWH120 LWH130 LWH140 Load label sheets one page at a time for printing...

Страница 55: ...re they can lay flat and their edges will not be bent or damaged The humidity should not exceed 70 RH Do not use envelopes with any of the following characteristics using these may result in paper jams Irregularly shaped envelopes Envelopes with curls wrinkles nicks twists dog ears or other damage Envelopes with side seam construction Highly textured envelopes or with extremely shiny surfaces Enve...

Страница 56: ...E DOWN in the fax machine Using the scanner glass Place the document FACE DOWN on the scanner glass of the fax machine 2 Start Imaging for Windows 3 Select Select Scanner Windows 95 98 Me NT4 0 Select Device Windows 2000 from the File menu then select the Panasonic FLM551 FLB751 Series in the dialog box Using other applications Multi Function Station includes a TWAIN compliant scanner driver You c...

Страница 57: ...so click Apply to continue the next operation without closing the window Operating the fax machine from your computer You can easily operate the following functions from your computer Storing editing or erasing entries in directories p 23 25 36 38 Programming the basic and advanced features p 61 65 Viewing or erasing items in the journal report p 32 Storing the journal report as PC file Viewing or...

Страница 58: ...s 1 Open the document you want to send 2 Select Print from the File menu The Print dialogue box will appear 3 Select Panasonic MFS PC FAX as the active printer 4 Click OK The Send a fax dialogue box will appear 5 Enter the fax number using the keypad display or the directory Note To stop transmission press on the fax machine If the document exceeds the memory capacity of your fax machine transmiss...

Страница 59: ... Select Received Log in Communication Log 3 Click the item you want to view 4 Click File in the menu bar then select View or click View in the toolbar The received fax will be displayed If the fax machine s memory stores a received fax document You can load the document into your PC 1 Select PC FAX 2 Select Received Log in Communication Log 3 Click File in the menu bar then click Receive a fax If ...

Страница 60: ... displayed 3 Press or until the desired setting is displayed This step may vary depending on the feature 4 Press w The setting you selected is set and the next feature will be displayed 5 To exit programming press p ADVANCED MODE PRESS SET SYSTEM SET UP PRESS NAVI I H Programming by entering the program code number directly You can select a feature by directly entering the program code and 2 digit...

Страница 61: ...w the unit operates 03 Setting your facsimile telephone number YOUR FAX NO PRESS SET Up to 20 digits 04 Printing the sending report To print and check the sending report for fax transmission results p 32 SENDING REPORT MODE ERROR ERROR ON OFF 06 Changing the ring setting in FAX ONLY mode To change the number of rings before the unit answers a call in FAX ONLY mode FAX RING COUNT RINGS 3 1 2 3 4 5E...

Страница 62: ...ize PAPER SIZE LETTER LETTER A4 LEGAL You can select the ringer pattern The selected ringer pattern will sound while setting this feature 17 Setting the ringer pattern RINGER PATTERN MODE A A B C 15 Selecting the cable type to connect to the PC If you use Multi Function Station change the setting depending on the cable connected to your computer PC INTERFACE MODE PARALLEL PARALLEL USB PARALLEL IEE...

Страница 63: ...eas If you have difficulty sending an overseas fax activate this feature before starting transmission This feature makes sending documents easier by reducing the transmission speed OVERSEAS MODE MODE ERROR Feature Display Settings How the unit operates 25 Sending a fax at a specific time This feature allows you to take advantage of low cost calling hours offered by your telephone company The setti...

Страница 64: ...hat is longer than your recording paper AUTO REDUCTION MODE ON 41 Changing the fax activation code If you use an extension telephone and wish to use it to receive a fax activate this feature and enter the code p 45 FAX ACTIVATION MODE ON ON CODE 9 OFF 44 Setting the memory reception alert To alert you with a beeping sound when a document which has been received is stored into memory due to some ex...

Страница 65: ...TION MODE ON ON OFF This feature is available when the transmitting receiving stations are ECM compatible 80 Resetting advanced features to their default settings SET DEFAULT RESET NO YES NO 1 Follow steps 1 and 2 above 2 Press or to select YES 3 Press w 4 Press w again 5 Press p The default setting is in bold type 79 Saving on toner consumption TONER SAVE MODE OFF ON OFF ON The toner cartridge wi...

Страница 66: ...the jammed document p 77 ERROR NOT YOUR UNIT CODE 54 59 70 A transmission or reception error occurred because of a problem with the other party s fax machine Check with the other party MEMORY FULL The document was not received due to the memory being full NO DOCUMENT The document was not fed into the unit properly Reinsert the document and try again OTHER FAX NOT RESPONDING The other party s fax m...

Страница 67: ...The memory is full of received documents due to a lack of recording paper or a recording paper jam Install paper p 16 or clear the jammed paper p 75 When performing memory transmission the document being stored exceeds the memory capacity of the unit Transmit the entire document manually FAX MEMORY FULL There is something wrong with the unit Contact our service personnel CALL SERVICE There is no s...

Страница 68: ...ce the toner cartridge p 73 TONER EMPTY A transmission error occurred Try again TRANSMIT ERROR The fax message was printed on paper which is shorter than letter size paper Use the appropriate size paper p 16 WRONG PAPER The cable or the PC power cord is not connected correctly Check the connections p 50 The software is not running on the PC Restart the software and try again PC FAIL OR BUSY The re...

Страница 69: ... after a dial tone is obtained the last number dialed will be redialed The receiving mode does not function properly A Distinctive Ring pattern of feature 31 is set p 64 continued During programming I cannot enter the code or ID number All or part of the numbers are the same Change the number of features 12 p 62 and 41 p 64 The unit beeps Recording paper has run out Press to stop the beeps and ins...

Страница 70: ...e line or a dirty pattern appears on your recording paper The white plate scanner glass or lower glass are dirty Clean them p 77 79 continued The printing quality is poor The other party sent a faint document Ask them to send a clearer copy of the document Some paper has instructions recommending which side to print on Try turning the paper over You may have used paper with a cotton and or fiber c...

Страница 71: ...et the number of rings on the answering machine to 1 or 2 continued I cannot retrieve recorded voice messages on the answering machine from a remote location You did not program your remote access code into your fax machine correctly Program the same code that is programmed on the answering machine on the fax machine with feature 12 p 62 I pressed the remote access code to access the answering mac...

Страница 72: ...on Station and restart If Multi Function Station still does not close restart the PC If you connect the USB cable to USB hub connect it to the USB port of your computer directly Confirm the BIOS setting of your computer For parallel connection select ECP Bi directional or an equivalent parallel port mode For USB connection select USB port mode Please refer to your PC operating instructions or cons...

Страница 73: ...cratch the green drum surface Do not place the drum unit near dust or dirt or in a high humidity area Do not expose the drum unit to direct sunlight Do not unplug the fax machine to prevent loss of fax documents in memory Do not leave the toner cartridge out of the protection bag for a long time It will decrease the toner life Do not pour any toner into the toner cartridge TONER EMPTY TONER LOW Re...

Страница 74: ...e from the drum unit The toner may stick to the cartridge and the drum unit Be careful when handling See page 5 for details Do not drop the toner on the green drum surface Put the used toner cartridge into the protection bag 8 Slide the tab on the toner cartridge into the slot of the drum unit Tab Slot 9a Firmly press down on the right side of the toner cartridge to snap into position and 9b turn ...

Страница 75: ...and toner unit by holding the tabs Drum and toner unit 12 Close the printer cover by pushing down on both sides until locked Waste disposal method Waste material may be dumped or incinerated under conditions which meet all country and local environmental regulations Printer cover Lower glass Caution Do not touch the bottom of this cover when cleaning the lower glass It is very hot If the lower gla...

Страница 76: ... bottom of this cover It is very hot The display will show the following Display Remove the recording paper Straighten and reinsert it into the recording paper entrance FAILED PICK UP Recording paper entrance When the recording paper is not fed into the unit properly 3 Close the printer cover by pushing down on both sides until locked Straighten and reinsert the recording paper into the recording ...

Страница 77: ...lose the document cover Jammed document ADF cover 3 Close the ADF cover White plate and glasses If a black line a white line or a dirty pattern appears on your recording paper on your original or on the fax document received by the other party clean the white plate scanner glass and lower glass White plate Document cover Scanner glass 1 Open the document cover 2 Clean the white plate and scanner g...

Страница 78: ...ution Be careful when handling the drum and toner unit See the caution for the drum unit on page 73 for details Do not use paper products such as paper towels or tissues to clean the inside of the unit The area near the lower glass is hot We recommend to clean the lower glass after the unit cools 5 Reinstall the drum and toner unit by holding the tabs Drum and toner unit Lower glass Power cord Tel...

Страница 79: ...er cord and the telephone line cord Printer cover Power cord Telephone line cord ADF cover ADF cover 3 Close the ADF cover 2 Clean the document feeder rollers with a soft and dry cloth Document feeder rollers 1 Lift and hold open the ADF cover Document feeder rollers If misfeeding of your original occurs frequently clean the document feeder rollers ...

Страница 80: ...atures p 61 65 Telephone number list provides you with names and telephone numbers which are stored in one touch dial and navigator directory Journal report keeps records of fax transmission and reception This report will be printed automatically after every 30 fax communications feature 22 on page 63 Broadcast programming list provides you with entries which are stored in the broadcast feature p ...

Страница 81: ...d Connection to party line service is subject to state tariffs Contact the state public utility commission public service commission or corporation commission for information This equipment is hearing aid compatible as defined by the FCC in 47 CFR Section 68 316 If your home has specially wired alarm equipment connected to the telephone line ensure the installation of this equipment does not disab...

Страница 82: ...ed as new A purchase receipt or other proof of the original purchase date is required for Limited Warranty service Carry In or Mail In Service For Carry In or Mail In Service in the United States call 1 800 HELP FAX 1 800 435 7329 For assistance in Puerto Rico call Panasonic Sales Company 787 750 4300 or fax 787 768 2910 Limited Warranty Limits And Exclusions This Limited Warranty ONLY COVERS fail...

Страница 83: ...Warranty gives you specific legal rights and you may also have other rights which vary from state to state If a problem with this product develops during or after the Limited Warranty period you may contact your dealer or Servicenter If the problem is not handled to your satisfaction then write to the warrantor s Consumer Affairs Department at the addresses listed for the warrantor PARTS AND SERVI...

Страница 84: ... 217 mm x 443 mm x 461 mm 817 32 x 177 16 x 185 32 Mass Weight Approx 9 2 kg 20 3 lb Power consumption Standby Approx 6 W Transmission Approx 15 W Reception Approx 250 W Copy Approx 250 W Maximum Approx 900 W When the fuser unit turns on Power supply 120 V AC 60 Hz Memory capacity Approx 150 pages of memory transmission reception Based on the ITU T No 1 Test Chart in standard resolution Laser diod...

Страница 85: ...m x 220 mm 45 16 x 85 8 Note Do not use the following types of paper Paper with a cotton and or fiber content that is over 20 such as letterhead paper or paper used for resumes Extremely smooth or shiny paper or paper that is highly textured Coated damaged or wrinkled paper Paper with irregularities such as tabs or staples Paper which has dust lint or oil stains Paper that will melt vaporize disco...

Страница 86: ...lay contrast 64 41 Remote fax activation code 45 64 44 Fax receiving alert 64 68 ECM selection 65 76 Connecting tone 65 79 Toner save 65 80 Reset advanced features 65 Basic features Code Feature name 01 Date and time 18 02 Your logo 19 03 Your facsimile telephone number 21 04 Sending report 32 61 06 FAX ring setting 61 12 Remote activation ID 62 13 Dialing mode 62 15 Cable selection 62 16 Paper si...

Страница 87: ...ecting tone Feature 76 65 Connections 17 50 Copy 48 Collation 49 Enlarge 49 Reduce 49 D Date and time Feature 01 18 61 Delayed transmission Feature 25 63 Dialing mode Feature 13 62 Display Contrast Feature 39 64 Error messages 67 68 Distinctive ring service Feature 31 46 64 Document size 33 Drum life 85 Drum unit 13 73 E ECM selection Feature 68 65 Envelope 55 Error messages 66 68 Extension teleph...

Страница 88: ... 57 80 Power down 72 Printer test 80 Sending 32 Setup 80 Telephone number 80 Reset Feature 80 65 Resolution 31 48 Ringer pattern Feature 17 22 62 Ring pattern for Distinctive Ring Feature 32 47 64 Ring setting FAX ONLY Feature 06 61 S Scanner 56 Scanner glass 32 48 Sending Broadcast 39 Manually 31 32 Navigator directory 34 One touch dial 34 Quick scan 31 Sending report Feature 04 32 61 Set default...

Страница 89: ...89 ...

Страница 90: ...90 ...

Страница 91: ...91 ...

Страница 92: ...er or inadequate packing will be charged to you as an out of warranty cost If our 1 800 HELP FAX technicians determine that your unit may be an out of box failure 5 we will attempt to provide you with a factory new replacement unit6 You must ship a copy of your receipt with your original unit to verify that you purchased the unit within 10 days prior to your 1 800 HELP FAX call Requirements You mu...

Отзывы: