


30
[MATRIX] Adjust the hue and chroma.
Be sure to view a vector scope or a color video monitor when the hue and chroma adjustment is
performed.
“SCENE FILE” screen
“MATRIX” screen
Step 1
Display the color to be adjusted in the screen
center as large as possible.
Step 2
Select the axis close to the target color with
use of “MATRIX” on the “SCENE FILE” screen.
Step 3
Press the [SEL] button after axis selection.
The “MATRIX” screen appears.
A
Step 4
To perform fine adjustment, adjust “GAIN”
(chroma) and “PHASE” (hue) by pressing the
[
e
] or [
f
] button.
** SCENE FILE 1 ** P2
LABEL:................
FLARE COMP OFF
DNR LOW
MATRIX *USER
CHROMA GAIN ..
|
......38
TOTAL PED
|
........77
FILE LABEL *OFF
AWC MEMORY 1
RET END
** MATRIX ** USER
AXIS16 PHASE ....
|
.... 0
−
+
AXIS16 GAIN ....
|
.... 0
−
+
USER AREA *
RET END
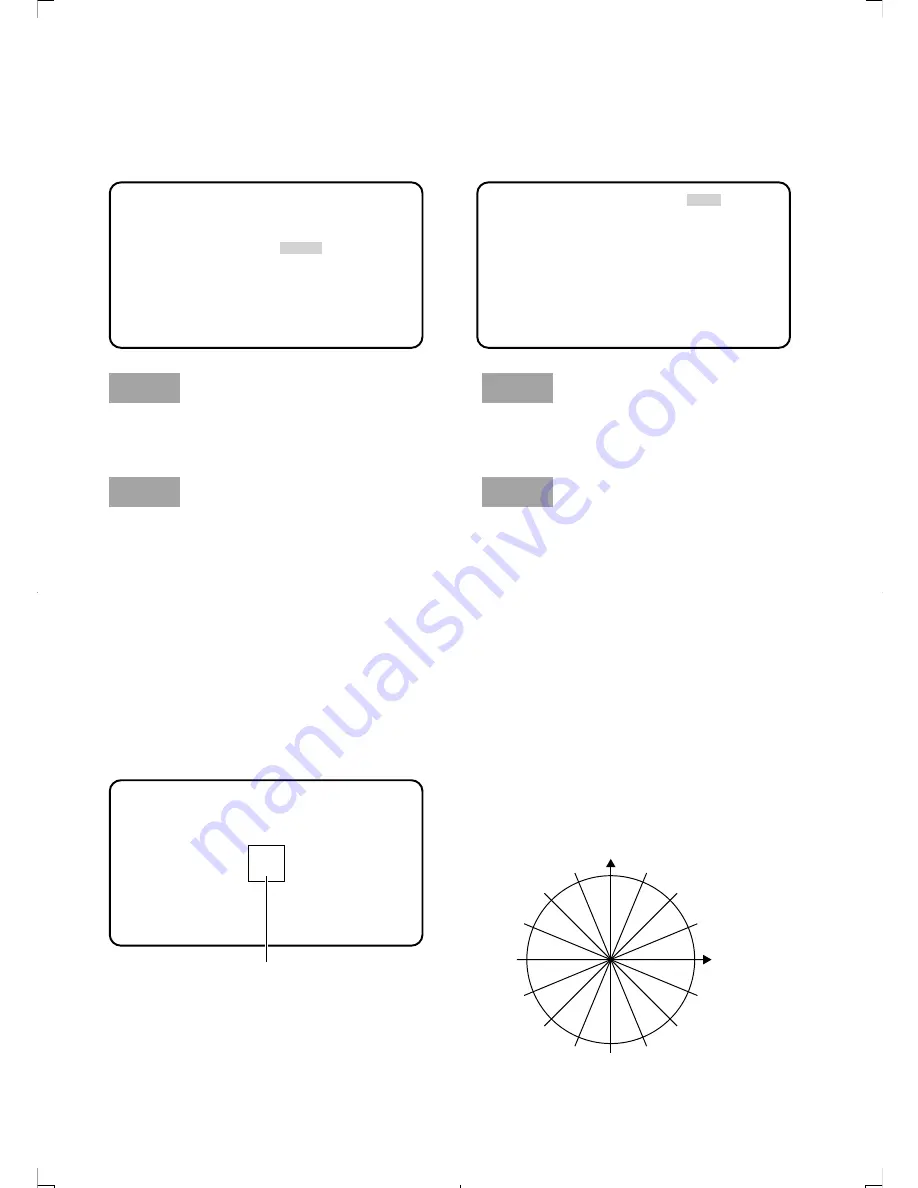
When the color axis is unclear
When “USER AREA” is selected on the “MATRIX” screen, the axis is automatically displayed by
selecting a color on the screen.
Color selection is performed on the color detection screen.
The white rectangle cursor is blinking to select a target color on the color detection screen.
Color detection screen
<Color matrix splitting chart>
* This chart is a guideline for displaying the closest
axis at adjustment.
AX10
Cursor (blinking)
1 B-Y
2
3
4
5
R-Y
6
7
8
9
10
11
12
13
14
15
16


