3
4
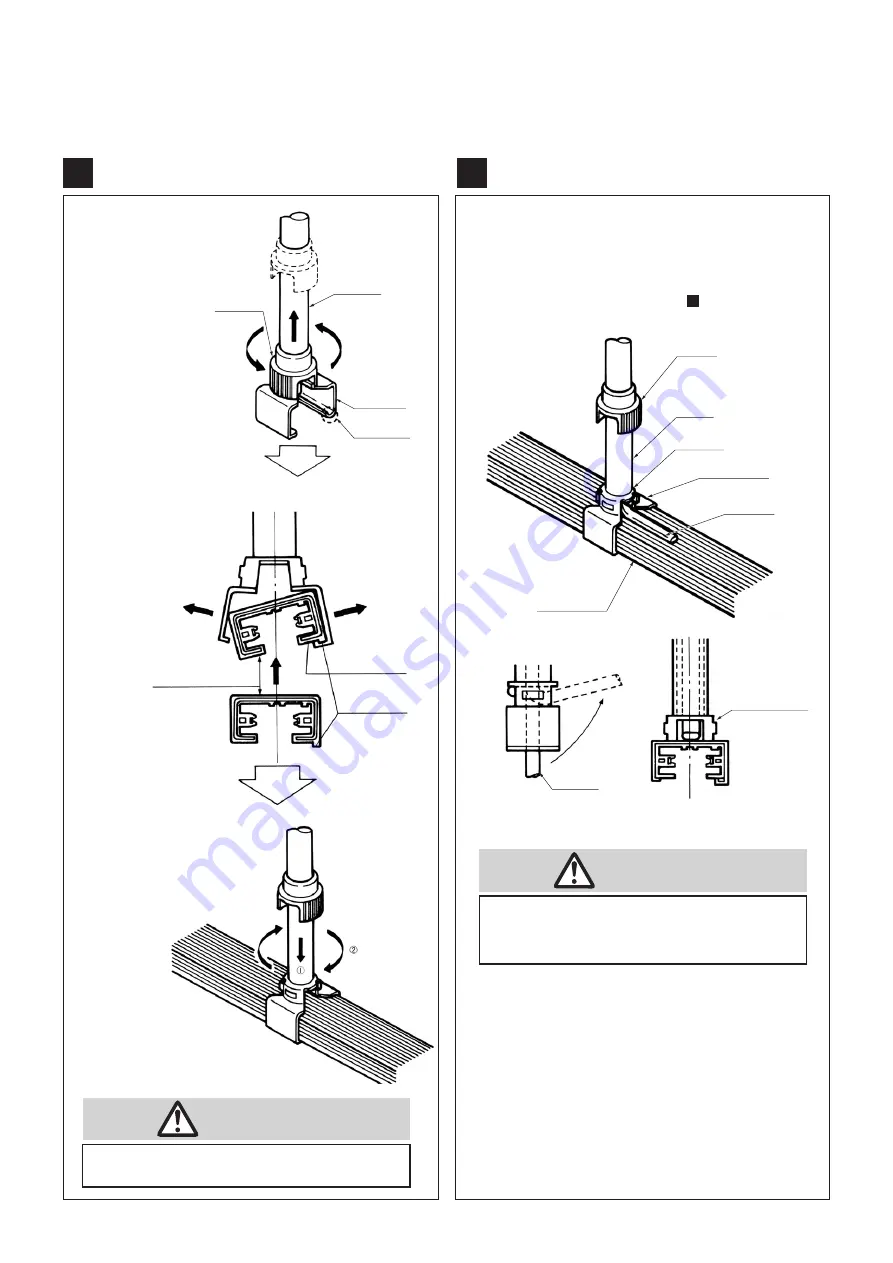
Mounting the pipe-suspended hangers 2
Loosen the cap securing screw
and turn the cap to the left to
remove it from the hanger.
Spread apart the hanger and
match the polarity indication
on the duct with the polarity
indication on the hanger.
Spread apart.
Spread apart.
Factory Line 20 duct
Mount the hanger from
the polarity indication
side of the duct.
Match the polarity
indications.
Fit the duct into the hanger,
and then turn the cap to the
right and tighten the securing
screw in order to secure the duct.
Tighten.
Mounting the pipe-suspended hangers 3
Supplying power via the pipe-suspended hangers(method for
bringing in the power supply)
Route the cable from the ceiling into the pipe. When doing this,
it is easier if the cable is passed through the pipe before
securing the Factory Line 20 duct in the hanger.
Following the same procedure for Step
, fit the duct in the
hanger, and then fix it with the cap.
・
Use single-conductor cables of 1.6 or 2.0 m
㎡
in size.
●
Make wire connections with careful attention so
that cables will not be bitten or damaged.
Not doing so may result in electric shocks or fire.
Caution
●
Turn the cap until it is fully locked.
Not doing so may cause the duct to drop.
Caution
1.
1.
2.
2.
3.
3
Cap
Pipe
Hanger
Cable routing hole
Cable
Factory Line 20 duct
push up
Cable
fit the cap
Cap
Loosen
Pipe
Hanger
Polarity indication
5


