


ENGLISH-5
The illustration for this procedure uses
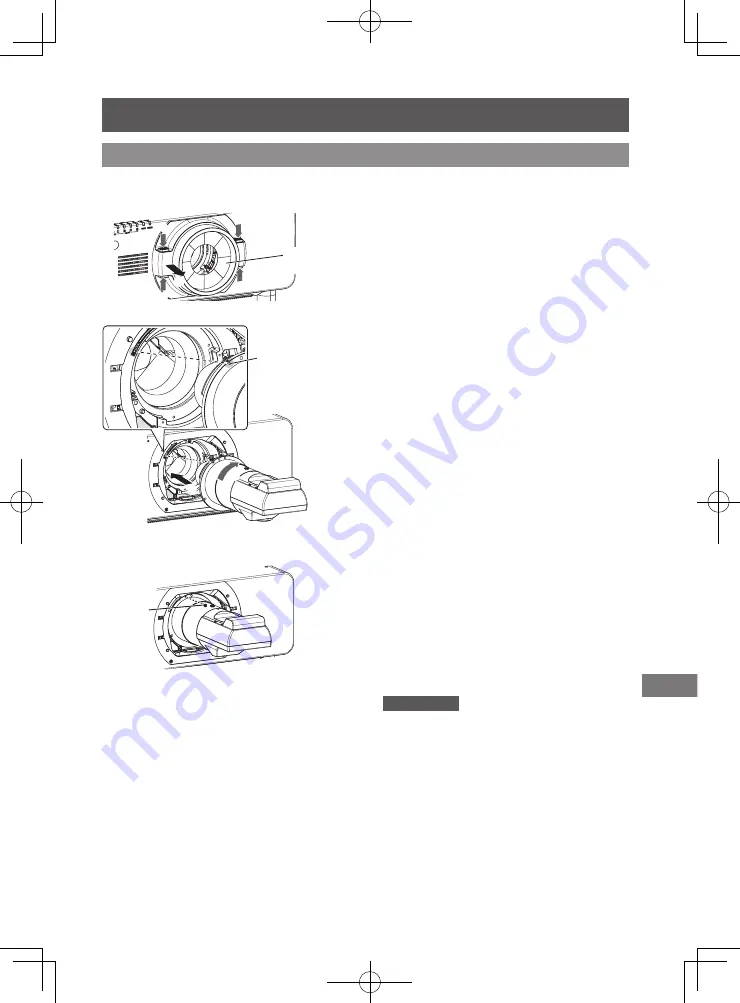
PT-SDZ21K2C as an example.
1) Remove the projection lens cover.*
1
2) Align the mark on the projection
lens (orange color) with the mark
on the projector (O on the left
side of the LOCK) and insert; then
rotate in a clockwise direction
until it makes a "click" sound.
(i)
(i)
(i)
(i)
(ii)
Projection
lens cover
(i)
(ii)
Orange color
3) Secure the projection lens with
the lens drop prevention screw
included with the projector.
z
Secure it in the screw hole (location
shown in the figure to the left) on the right
side of the projection lens mark (orange
color) using a Phillips screwdriver.
4) Attach the projection lens cover.*
1
Attention
z
Gently turn the projection lens
counterclockwise to check that it will not
fall out.
Lens drop
prevention
screw
Attaching the Lens
Attaching the Lens / Detaching the Lens (continued)
*1: Only when using a projector that has a projection lens cover. In addition, there are cases where
the attachment method or removal method of the projection lens cover differs from the procedure
(illustration) described above depending on the model being used. For details, see "Attaching/
removing the projection lens (optional)” in the operating instructions for the projector you are
using.
Содержание ET-D75LE95C
Страница 28: ...14 附表 Appendix MEMO ...
Страница 29: ...15 附表 Appendix MEMO ...
Страница 30: ... https panasonic cn 4 日本福冈县福冈市博多区美野岛四丁目1番62号 2022 松下互联株式会社 2022版权所有 HS0916AM1042 PS 日本印刷 ...


