27
VQT3N81
Ad
van
ced
o
p
erati
o
n
s
Copying from a video cassette recorder
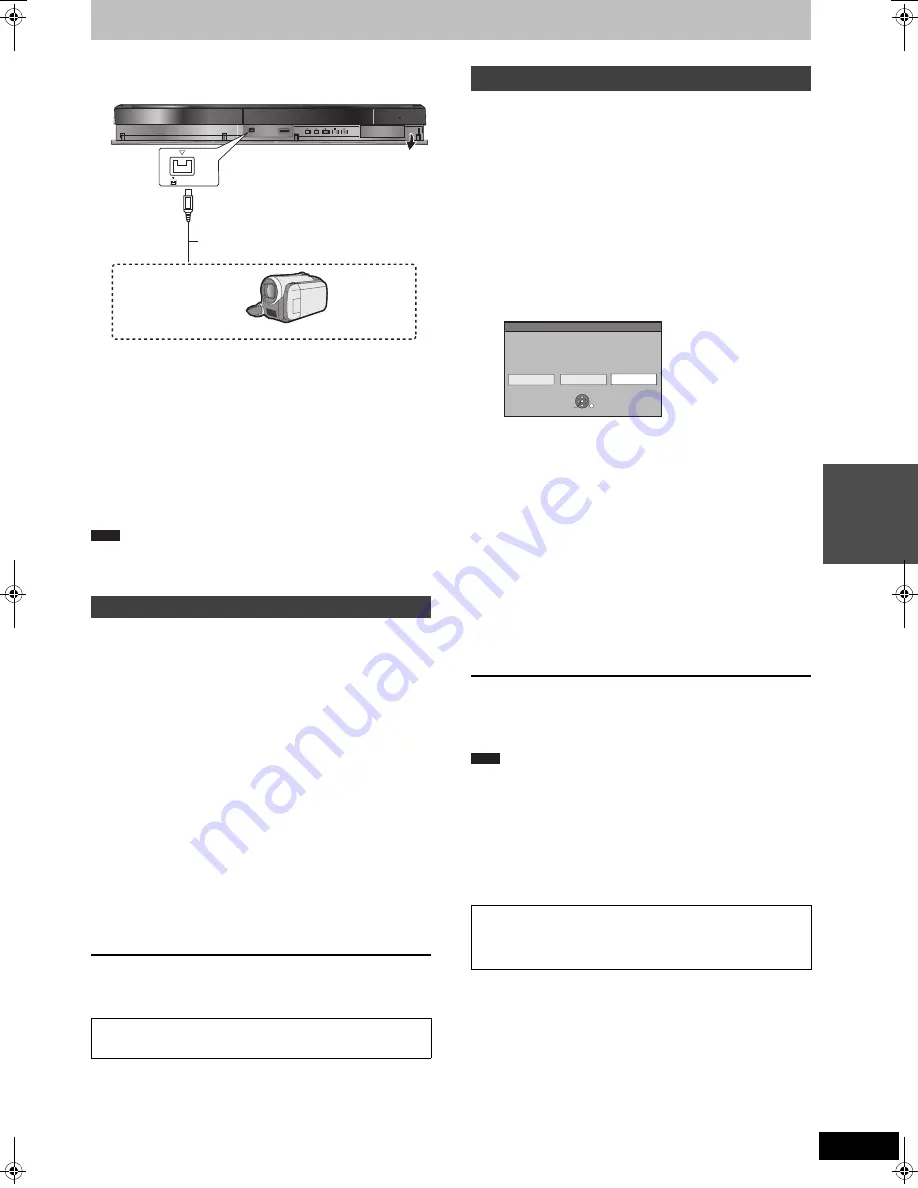
e.g., Connecting to the DV input terminals on the front
≥
Turn off the unit and other video equipment before connecting.
≥
Refer to “Connecting a television and VCR, digital/satellite receiver
or decoder” when connecting to the AV2 input terminals on the rear
panel. (
>
71)
When recording from the unit’s DV terminal
≥
Select the type of audio recording from “Audio Mode for DV Input”
in the Setup menu (
>
66).
≥
When recording from DV equipment (e.g., digital video
camcorder), you can record audio/video recordings from DV tape
only.
≥
When “Rec for High Speed Copy” (
>
65) is set to “On” and you
make a copy, the copy will be made using the picture size selected
in “Aspect for Recording” (
>
65) of the Setup menu.
About the aspect when recording a programme (
>
23)
≥
If it becomes time for a timer recording to start while copying, the
recording will start and the copying will stop.
≥
If video is copied from another piece of equipment to this unit, then
the video quality will be degraded.
[HDD]
[RAM]
[-R]
[-RW‹V›]
[+R]
[+RW]
Preparation
≥
Press [DRIVE SELECT] to select the HDD or DVD drive.
≥
Press [REC MODE] to select the recording mode.
≥
When recording bilingual programmes (
>
23, Notes for recording)
≥
When the output signal from the external equipment is NTSC,
change the “TV System” to “NTSC” in the Setup menu (
>
67).
This unit cannot record NTSC signals to discs that already have
PAL signal recordings. (However, both types of programmes can
be recorded onto the HDD.)
≥
To reduce noise in input from a video cassette recorder, set “Input
NR” to “On” in the on-screen menu (
>
60).
≥
Check the time on the unit is correct.
1
While stopped
Press [INPUT SELECT] to select the
input channel for the equipment you
have connected.
2
Start play on the other equipment.
3
When you want to start recording
Press [
¥
REC].
Recording starts.
To skip unwanted parts
Press [
;
] to pause recording. (Press again to restart recording.)
To stop recording
Press [
∫
].
≥
Using Flexible Recording (
>
25), you can record the content of a
video cassette (approx. 1–8 hours) to a 4.7 GB disc with the best
possible quality of recording without wasting disc space.
[HDD]
[RAM]
[-R]
[-RW‹V›]
[+R]
[+RW]
[HDD]
[RAM]
When the “DV Auto Rec” function is used, programmes
are recorded as a title while at the same time chapters are created at
each break in the images and the Playlist (Video) is created
automatically.
Preparation
1
Turn off the main unit and DV equipment, then connect the
equipment with the unit’s DV input terminal (
@
left).
2
Turn on the main unit.
≥
When the output signal from the external equipment is NTSC,
change the “TV System” to “NTSC” in the Setup menu (
>
67).
1
Turn on the DV equipment, and pause
play at the point you want recording to
start.
The following screen appears.
≥
When the screen is not displayed
2
Press [
2
,
1
] to select “Rec to HDD”
or “Rec to DVD” and press [OK].
3
Press [REC MODE] to select the
recording mode.
4
Press [
2
,
1
] to select “Rec” and
press [OK].
Recording starts.
When recording finishes
The confirmation screen appears. Press [OK] to finish DV automatic
recording.
To stop recording
Press [
∫
].
≥
Only one piece of DV equipment (e.g., digital video camcorder)
can be connected to the unit via the DV input terminal.
≥
It is not possible to operate the unit from the connected DV equipment.
≥
The DV input on this unit is for use with DV equipment only. (It
cannot be connected to a computer, etc.)
≥
The DV equipment name may not be shown correctly.
≥
Depending on the DV equipment, the images or audio may not be
input properly.
≥
The date and time information on the tape of the DV equipment will
not be recorded.
≥
You cannot record and play simultaneously.
Manual recording
Almost all videos and DVD-Video on sale have been treated
to prevent illegal copying. Any software that has been so
treated cannot be recorded using this unit.
DV IN
This unit
Other video equipment
Connect to Audio/Video output terminals.
DV cable
(IEEE 1394, 4-pin)
Note
DV automatic recording (DV Auto Rec)
After performing step 1
1
Press [DRIVE SELECT] to select the HDD or DVD drive.
2
Press [FUNCTION MENU].
3
Press [
3
,
4
] to select “Others” and press [OK].
4
Press [
3
,
4
] to select “DV Auto Rec” and press [OK].
@
Go to step 3 (
@
below)
If the DV automatic recording function does not work properly,
check the connections and DV equipment settings, and turn the
unit off and back on.
If that does not work, follow the instructions for manual
recording (
@
left).
DV Auto Rec
Rec to HDD
Rec to DVD
Cancel
DV unit is connected.
Record from the DV unit?
OK
RETURN
SELECT
Note
DMR-EH545EG-VQT3N81_eng.book 27 ページ 2011年3月2日 水曜日 午前10時55分


