background image

Operating Instructions

120

[Analyzing Remote Server Logs (remote client function)]

During remote access, the following menus are added to the log type in the 
operation support page (see page 131):

System Log (server)

Operation Log 1 (server)

Operation Log 2 (server)

Restore Log (server)

Select when analyzing remote server logs.

1.

Select [Window] 

 [Settings] on the menu bar.

2.

Select [Preferences] 

 [Operation Support].

3.

Select the date of the logs to analyze, log type.

4.

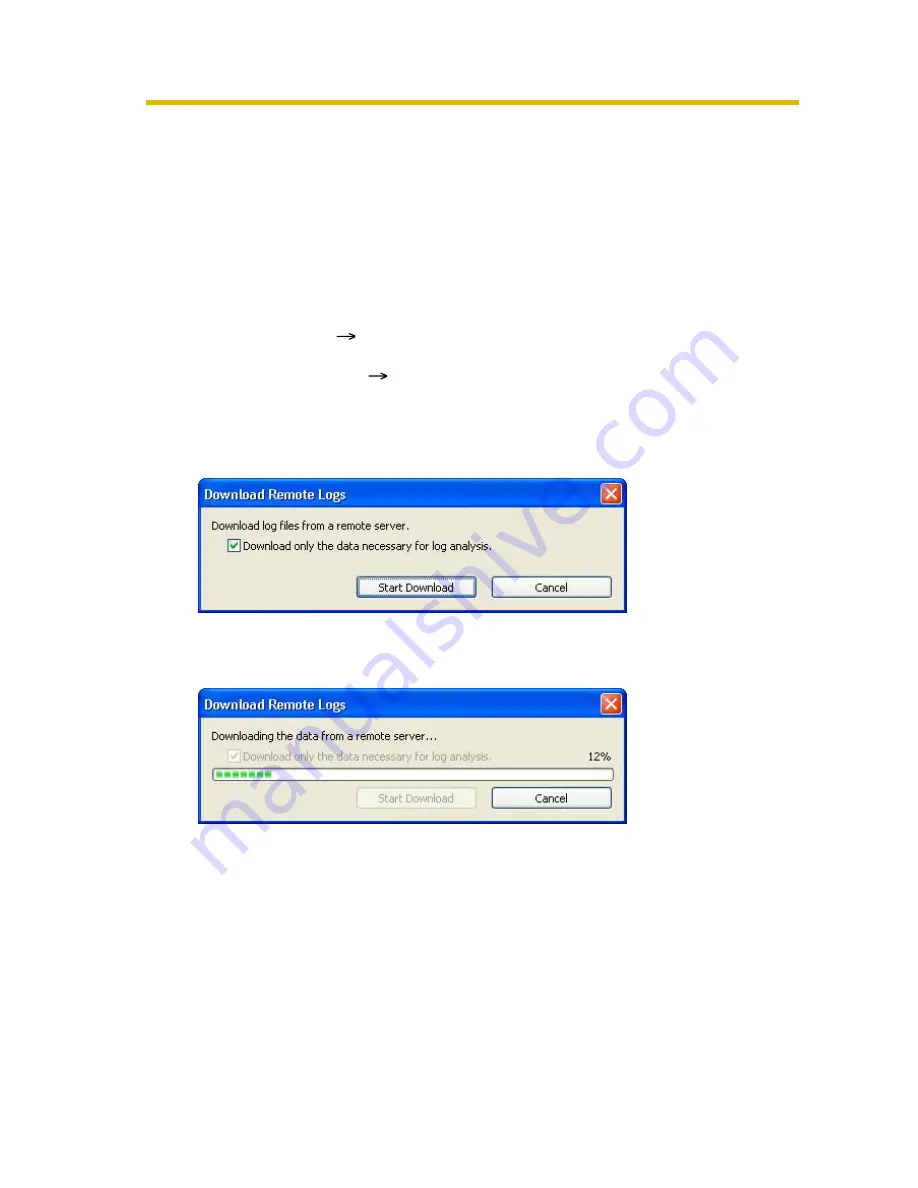
Click [Execute Log Analysis].

5.

Click [Start Download].

• Start downloading.

• When the download completes, a log analysis result will be displayed.

Содержание BB-HNP15A

Страница 1: ...Operating Instructions 1 Operating Instructions Please read this document before using and save this document for future reference Network Camera Recorder with Viewer Software Model No BB HNP15A ...

Страница 2: ...er Window 38 2 2 1 About the Application Windows 38 2 3 Monitoring the Camera 50 2 3 1 Multi Monitoring Page 50 2 3 2 Using the Camera Operation Bar 53 2 4 Recording the Image 56 2 4 1 Recording Method 56 2 4 2 Recording All Images 57 2 4 3 Motion Detection Recording 58 2 4 4 Alarm Recording 59 2 4 5 Timer Recording 60 2 5 Playing the Recorded Images 67 2 5 1 Display the Recorded Images 68 2 5 2 S...

Страница 3: ...ss Functions 108 2 8 1 Configuring the Settings 110 2 9 Other Features 121 2 9 1 Audio Transmission 121 2 9 2 Exporting Importing the Camera Information 122 2 9 3 Copying Camera Images 124 2 9 4 Deleting the Registered Cameras from the List 125 2 9 5 Deleting the Timer Setting 127 2 9 6 Checking the Recording Capacity and Remaining Time 129 2 9 7 Executing Restore Program and Log Analysis 131 2 10...

Страница 4: ... can convert recorded images to several audio and video formats MPG JPG WAV ASF AVI The converted images can be played back with Windows Media Player Recording Modes see page 56 10 timers can be set for each camera In addition alarm mode which starts recording after detecting an action such as doors or windows being opened and closed is available Audio Transmission see page 121 Using this software...

Страница 5: ... Microsoft Corporation in the United States and or other countries Adobe Reader is registered trademark or trademark of Adobe Systems Incorporated in the United States and or other countries Intel Pentium and Intel Core are trademarks or registered trademarks of Intel Corporation or its subsidiaries in the United States and other countries ATI Radeon is trademark of Advanced Micro Devices Inc Scre...

Страница 6: ...ze of the recorded image can be calculated from the recording method and the number of days to record Change the hard disk capacity considering Calculated disk capacity to record see page 25 and file size shown on page 16 Items Description Operating System Microsoft Windows Vista Microsoft Windows XP Microsoft Windows Server 2003 Resolution 1280 x 1024 pixel or higher Web Browser Internet Explorer...

Страница 7: ...nstalling this software Install this software see Important Information Performing License Registration see page 10 To use this software the license registration is necessary The attached registration code stickers are required Setting Recording Environment see page 13 Setting a folder to save recorded images Setting the proxy server when using one Configure the camera see page 20 Monitoring the c...

Страница 8: ...s displayed Note You can also start the operation window through the following procedures From the Start menu select All Programs Network Camera Recorder with Viewer Software Network Camera Recorder with Viewer Software From Explorer double click ncr3 exe in the location where the software was installed These softwares cannot work at the same time Use only a software To use this software perform t...

Страница 9: ...t be removed from the notification area When is displayed in the notification area the timer recording function is operating 1 2 3 Closing This Software 1 Right click in the notification area and select Exit 2 Click Yes Note When you exit this software will be removed from the notification area When you exit this software any timers that you have set stop operating ...

Страница 10: ...ow 1 3 1 Registering a New License 1 Select Help License Registration on the menu bar 2 Enter the registration code and license key and click OK 3 Click OK Note The registration code and license key are shown on the attached registration code stickers Characters are case sensitive so enter them exactly as printed If the registration is complete License Registration on the menu bar is grayed out ...

Страница 11: ...following window is displayed the registration code or license key is incorrect Confirm them and enter them again Keep the registration code and license key in a safe place where you will not lose them Lost codes and keys cannot be reissued ...

Страница 12: ...displayed language 1 Select Language on the menu bar 2 Select the language that you want to display In the default setting you can choose from the following languages 2009 1 present English or Japanese 3 Click Yes The displayed language will be changed after restarting the software ...

Страница 13: ...ecorded images are saved into the ncrdata folder in the folder where this software is installed You can change the destination folder to another folder or external hard disk drives 1 Select Window Settings on the menu bar 2 Click Preferences 3 Configure the settings in the Basic Settings page and click OK Note When you change a setting a mark is displayed on the icon for the item that you changed ...

Страница 14: ...he recordings or Delete old files and keep recording by 1 minute when the capacity is full Connection method to the camera Set the connection method to use for audio and video when the camera s data format is set to JPEG see page 25 If you monitor and record camera images with audio over the internet the audio may be interrupted due to the network environment If this is the case select Images and ...

Страница 15: ...y of individual cameras see page 27 Limit the destination recording capacity preferences setting and Limit the recording capacity individual camera setting cannot be used simultaneously When Limit the recording capacity is set the following window is displayed The recording capacity limitation of individual cameras is disabled by clicking OK Audio interruption may be reduced by lowering the maximu...

Страница 16: ... x 480 resolution Favor Clarity and 5 images per second for one hour 50 KB x 5 images s x 3 600 s 900 000 KB About 879 MB If the audio is attached add 4 KB per second 900 000 KB 4 KB x 3 600 s 914 400 KB About 893 MB Image size per second Image only Data format MPEG 4 Resolution Items Favor Clarity Standard Favor Motion 1280 x 1024 File Size About 100 KB About 77 KB About 60 KB 640 x 480 File Size...

Страница 17: ...ample 640 x 480 resolution MPEG 4 Bit Rate 768 Kbps for one hour 768 Kbps 8 Bit x 3 600 s 345 600 KB 337 5 MB If the audio is attached add 4 KB per second 345 600 KB 4 KB x 3 600 s 360 000 KB About 352 MB The MPEG 4 Bit Rate is dependent on the value of MPEG 4 Bit Rate in Video Streaming in the camera settings ...

Страница 18: ... proxy server on the Proxy Server Settings page If you have already registered the camera the following confirmation window will display when you select the Use a proxy server checkbox 4 Click Yes If you click Yes the Use a proxy server setting in the Camera Settings page for all registered cameras is selected However a check mark will not be displayed for cameras registered with an IPv6 address C...

Страница 19: ... 83 Setting Description Proxy Server Address and Port Enter the IP address of proxy server and port number Enter them after asking your administrator Enter the alphanumeric characters Enter only the numeric character for port number Proxy server does not support IPv6 connection Set the IPv4 address or URL that you registered by IPv4 domain name service Proxy User Name and Proxy Password Enter the ...

Страница 20: ...a power outlet and to your network The camera information can be imported and exported see page 122 Monitoring stops while the settings page is displayed 2 1 1 Creating New Camera 1 Select Window Settings on the menu bar 2 Click Add Camera on the Settings page The configuration window of the item that is selected on the left is displayed When you click Add from underneath Camera a New camera item ...

Страница 21: ...they will be changed automatically and a mark will be displayed on the icon for the items that were changed see page 45 If you cannot access the camera the following windows are displayed Confirm the camera s connection IP address port number user name and password 5 Click OK or Apply If you click OK settings page will close If you want to register another camera click Apply The new camera will be...

Страница 22: ... You can change the background color of disabled cameras see page 79 If you disable the camera manual recording and timer recording is stopped If you enable the camera timer recording starts again You can play recorded images even from disabled cameras Camera Name Enter the camera name Maximum 250 characters To display the camera name in the multi monitoring page select the Display the camera name...

Страница 23: ...he camera has security settings enabled authentication setting enter the administrator user name and password for the camera Enter the alphanumeric characters 4 to 15 characters If you set a general or unregistered user name and password this software may not work properly Password is saved in encryption Use a proxy server This option is enabled if you selected Use a proxy server in the proxy serv...

Страница 24: ...1 Select Window Settings on the menu bar 2 Configure the settings for the individual cameras and click OK or Apply If you click OK settings page will close If you want to configure other settings click Apply Setting the image data information Configure the settings for image data information Image Settings Page ...

Страница 25: ...images Resolution Select the resolution of the image The resolutions that are available depend on the camera and data format Default is 320 x 240 Recorded Frequency Set the interval at which to record images when using the JPEG format Not Specify Specify Record images at specified interval If you record images as they are set on the camera set to Not Specify If you select Specify Display the error...

Страница 26: ... page 14 do not make more than 4 connections to the same camera If you are making more than 4 connections select Images and audio are connected separately If you select the MPEG 4 format image display will be smoother even if bandwidth is lower If you select the JPEG format frame rate will be reduced but image quality will be higher If the camera disables setting changes resolution or image qualit...

Страница 27: ... images up to 250 MB 50 MB old images are deleted You can also limit the recording capacity in the basic settings page see page 14 Setting Description Limit the recording capacity To limit the recording capacity of individual cameras select Limit the recording capacity and enter a value in Recording Capacity Limit Select Stop recording or Delete old files and keep recording by 1 minute when the ca...

Страница 28: ...nd Limit the recording capacity individual camera setting cannot be used simultaneously When Limit the destination recording capacity is set the following window is displayed Limit the destination recording capacity in the basic settings page is disabled by clicking OK ...

Страница 29: ... this is grayed out Motion Detection Analysis Frequency Set the interval for comparing images By increasing the interval you can better detect slow moving objects and by decreasing the interval you can better detect fast moving objects Sensor deactivation time To limit unnecessary continuous detection set the deactivation time between detections Threshold to Start Recording The image is divided in...

Страница 30: ...ght clicking in the motion detection monitoring window see page 52 Cell Sensitivity Set the sensitivity in a cell Before or After Detection Specify the number of seconds to record before and after the motion is detected Executing Commands for Detection You can specify commands that execute for motion detection You can configure commands in Detection Commands page see page 34 Setting Description ...

Страница 31: ...ed area by clicking the cells in the disabled area Note If you set the date and time to be displayed on the camera images disable the area where the date and time are displayed in order to not detect that motion Click the cells that you want to disable in the motion detection monitoring window Disabled areas are darkened By dragging the mouse moving the mouse while holding down the left button you...

Страница 32: ...the camera is set to MPEG 4 format change the setting to JPEG format then configure the alarm sensor Alarm Sensor Page Setting Description Set the Alarm1 Sensor Recording Set the Alarm2 Recording After you select the check box recording will start when the camera detects a signal If the camera is set to the MPEG 4 format see page 25 the following message will be displayed Click OK to change to the...

Страница 33: ...fy the alarm enable condition after checking the alarm specification Rising GND to Open High is selected automatically when Sensor is selected Before Detected After Detected Specify the time before an alarm sensor is detected or after an alarm sensor is detected Executing Commands for Detection You can specify commands that execute for alarm detection You can configure commands in Detection Comman...

Страница 34: ...he command s operation recording performance may be Setting Description Commands for Camera External Output Settings Set a command Short to GND or Open to execute at the external equipment that is connected to the camera for motion detection and or alarm detection and an unlock time for the specified command see page 35 Optional Command Select optional commands to execute when motion or an alarm i...

Страница 35: ...xternal Output Settings When you set external output unlocking After 5 seconds from motion detection alarm detection or unlocking time Unlock the external output at the set time Unlocking time Unlocking time Unlocking time Unlocking time Execute Commands for Camera External Output Unlocking Execute Commands for Camera External Output Settings If detection occurs during the unlocking time unclockin...

Страница 36: ... at the start of recording After 5 seconds from motion detection alarm detection Execute commands only at the start of decetion recording Execute commands When you select Perform the following control when issuing a command Set an interval during which to not execute commands after executing a command After 5 seconds from motion detection alarm detection Execute commands specified time specified t...

Страница 37: ...d images You can assign keywords to manually recorded images You can use keywords to search recorded images Keyword Page 1 Setting Description Keyword1 Keyword2 Put a keyword to recorded images Maximum 40 characters 2 keywords Keyword1 Keyword2 can be set ...

Страница 38: ...ndow mode always displaying the title bar menu bar and toolbar 1 Select Display Mode Full Screen Mode or Window Mode on the menu bar Full screen mode Window mode Sliding window See page 49 The toolbar is displayed when the mouse is moved upward Changes the display to Window mode Title bar Displays the name of the software and the currently displayed window Menu bar See page 47 Tool bar See page 49...

Страница 39: ...lay see page 79 Default is four screen layout 2 rows x 2 columns You can rearrange the order of camera screens see page 85 and enlarge a camera display area see page 81 Note If you double click a camera s image on the multi monitoring page the display will switch to the single monitoring page When you double click on the single monitoring page the display will return to the multi monitoring page F...

Страница 40: ...nitoring page When you double click on the single monitoring page the display will return to the multi monitoring page If the click to center function is active the display area of a camera image may move when you double click the image You can disable the click to center function see page 79 The single monitoring page does not support switching pages If the single monitoring page is displayed whi...

Страница 41: ...recent day with recorded images Search window See page 70 Search Button Image Timelines Chart See page 68 Playback list If you select a camera name in the image timelines chart the cameras recorded images list will be displayed in the playback list see page 72 Playback Screen One selected recorded image is displayed played back see page 73 The recorded images that are checked on the playback list ...

Страница 42: ...ldface on the calendar Clicking one of these days displays the list of images for that day see page 68 If you press Ctrl Tab key the windows will cycle through Single Monitoring Multi Monitoring Multi Playback Recorded Images in that order You can change the items that are displayed in the playback list see page 91 ...

Страница 43: ...see page 88 In the 4 screen layout you can simultaneously playback the recorded images of 4 cameras You can select the display format Display timelines as chart or Standard see page 88 1 Select the desired recorded image in the Playback list in Recorded Images page then click Palyback see page 41 Display timelines as chart Standard Note If you press Ctrl Tab key the windows will cycle through Sing...

Страница 44: ...25 Add Timer See page 60 Delete Timer See page 127 Importing Exporting the Camera Information See page 122 Configure settings for individual cameras see page 20 The configuration window of the item that is selected on the left is displayed Configure the environment settings for this software Preferences See page 13 Proxy Server Settings See page 18 Multi Monitoring See page 78 Multi Playback See p...

Страница 45: ...etting change will not be applied Apply changes to the settings and close the window Close the window without applying changes Apply changes but leave the window open Use Apply to save your changes while configuring several different settings If you have not made any changes this button will be unavailable Expand an item by clicking and collapse an item by clicking Click Click Click Setting value ...

Страница 46: ...screen that you want to operate 2 Select Window Camera Operation on the menu bar The camera operation bar of the selected camera is displayed Note The display of the operation bar will differ depending on the camera type You can move the location of the operation bar by dragging moving the mouse while holding down the left button on the title ...

Страница 47: ... detection recording Stop all manual recordings Start manual alarm sensor recording of all Start manual alarm1 sensor recording Start manual alarm2 recording Enable all registered cameras Disable all registered cameras Enable the selected cameras Disable the selected cameras Move control to the next camera Enable if there is a next camera disable if there is not a next camera Move control to the p...

Страница 48: ... Playback Display the multi playback page Recorded Images Display the recorded images page Camera Operation Display Hide the camera operation bar Timer List Display the timer list for all cameras Settings Display the set environment page Remote Access Settings Display the remote access settings page New Connect Connect to a remote server Client Control Display the control page for clients that use...

Страница 49: ... the selected camera Start manual motion detection recording of the selected camera Start manual alarm recording alarm recording of all alarm 1 sensor alarm 2 of the selected camera Stop manual recording Displays the number of the current page and the total number of pages Move to a specific page by entering the page number Display the previous page Enable if there is a previous page disable if th...

Страница 50: ...s in a window extra pages are automatically created to accommodate the number of cameras To display the camera name and the frame rate check Display the frame rate and Display the camera name from Preferences Multi Monitoring see page 80 Sometimes audio may be interrupted or image may be paused Audio is played back for the focus camera and the selected camera You can adjust volume with on the tool...

Страница 51: ...e camera If you select Maintain the aspect ratio for the image display format in Preferences Multi Monitoring cameras with their resolution set to 1280x1024 will be displayed differently than at other resolutions Depending on your computer and network environment the display of the camera s image may be delayed when compared to the display in the monitoring page of the BB HNP11 software or a brows...

Страница 52: ... expanded by up to 10 times area ratio with the digital zoom The digital zoom can be accessed from the monitoring screen and playback screen The zoom features can be operated in the follow ways by accessing the camera operation bar by right clicking on the image and selecting expand from the menu or by using the mouse scroll wheel Note The image quality of images expanded by the digital zoom is re...

Страница 53: ...isables their controls they may be unable to function Displays resolution image quality Change these settings on the camera s settings page see page 25 k Resolution Image Quality When the lens has reached the end of its pan tilt range the appropriate message will be displayed here Up End Down End Right End Left End Additionally when a preset is selected the name of the preset is displayed here If ...

Страница 54: ...g Cameras available for the focusing function The camera has automatic or manual focusing features Automatic Focus Click button It is recommended to use automatic focus You can return to automatic focus from manual focus clicking button Manual Focus Clicking or sets the camera to manual focus button moves the pint closer to the camera button moves the pint further from the camera 1 Optical zoom is...

Страница 55: ...istered buttons are displayed blue Unregistered buttons are displayed gray 1 Click the preset number or select the preset list When clicking a preset button the preset name appears Note If the preset button is changed while this software is being used the change is not reflected on this software Clicking Refresh displays the latest preset buttons The preset list may not be displayed depending on t...

Страница 56: ...cording starts Alarm Sensor Recording See page 59 Select a camera and set alarm sensor recording with When the alarm or sensor signal is detected alarm or sensor recording starts Timer Recording See page 60 Set the timer for individual cameras Recording starts at the specified time for each camera During recording the following icons are displayed on the multi monitoring page Recording all images ...

Страница 57: ...us camera and other selected cameras start recording is displayed in the upper right portion of the screen for cameras that are record see page 56 To stop recording select a camera to stop and click You can select Start Recording or Stop Recording from the Recording on the menu bar Note See page 16 for the estimated file sizes of recorded images When you want to stop recording always click or sele...

Страница 58: ...top Recording from the Recording on the menu bar Note When you want to stop recording always click or select Recording Stop Recording If you close the operation window recording will not stop When is displayed in the notification area the recording software is running see page 9 You can set the camera to record a certain number of seconds before and after motion is detected The motion detection le...

Страница 59: ...page 56 To stop recording select a camera to stop and click You can select Alarm Sensor Recording Start All Start Alarm1 Sensor Start Alarm2 or Stop Recording from the Recording on the menu bar Note When you want to stop recording always click or select Recording Stop Recording If you close the operation window recording will not stop When is displayed in the notification area the recording softwa...

Страница 60: ...Select the camera for which to set a timer and click Add Timer New Timer is added to the timer list of selected camera Note The default timer name is New Timer followed by a number The number is generated automatically Default values are used for the other settings When you click Add Timer a New Timer item is added Add Button The configuration window of the item that is selected timer on the left ...

Страница 61: ...imer Settings page and click OK or Apply If you click OK timer settings page will close If you want to register another timer click Apply If you want to set the keyword for the recorded images enter a keyword on the keyword page see page 64 Timer Settings Page ...

Страница 62: ...etting and specify the day or multiple days of the week If the day of the week is not checked the timer recording is not set To record images for a full day set the same start and end time If you specify the same time for both start and end the end time will be considered to be the next day Recording Method Select timer recording motion detection recording only or alarm detection recording only A ...

Страница 63: ...played in the notification area the recording software is running see page 9 If the network is disconnected during recording recording will be paused but the recording icon see page 56 will still be displayed Recording starts again when the network is reconnected See page 127 for deleting timers ...

Страница 64: ...ded Images You can set a keyword for the images recorded by individual timers You can search recorded images by setting a keyword 1 Click Keyword of the timer to set 2 Enter a keyword and click OK Keyword Page Note 2 keywords can be set max 40 characters each ...

Страница 65: ...mera whose timers you want to display and click Timer List Timer List Page Note Colors displayed in charts can be changed in Recorded Images page in Preferences See page 80 for instructions on setting the color When you change the color the display on the timer list page recorded images page and multi display page is changed for all registered cameras ...

Страница 66: ...l cameras The timer schedules of all the cameras are displayed in a chart 1 Select Window Timer List on the menu bar Click Add to add a New Timer setting Click Change to change the timer settings Click Delete to remove the timer setting Timer List Page ...

Страница 67: ...ist on the Image Timelines Chart Drag the playback bar and select the time to playback see page 72 The images in the selected time frame are displayed in the playback list Confirm the images on the playback screen see page 73 The images that are selected in the playback list can be confirmed on the playback screen Playback the images on the multi playback page see page 74 When you select images fr...

Страница 68: ...criteria enter the criteria and then click Search see page 70 3 Click the day on the calendar Note The image timelines chart displays the image timelines for one day from 00 00 00 to 00 00 00 Displays the month that contains the most recent images that match the criteria ImageTimelines Chart If you click on a day that is bold the images recorded on that day are displayed in the chart see page 69 T...

Страница 69: ...ist page recorded images page and multi playback page is changed for all registered cameras The selected range is enlarged Images are displayed with different colors for each recording method Display in 24 h mode Select the time unit to display playback bar Images are displayed for each camera Cameras are displayed in the order that they were registered The timer recorded images are displayed with...

Страница 70: ...me Period Setting check box and enter a time frame Weekly Setting Select the desired days of the week Recording Mode Select the recording mode Normal recording is images recorded by using or by selecting full time recording as the timer recording method Motion detection recording is images recorded by using or by selecting motion detection recording as the timer recording method Alarm recording is...

Страница 71: ...k Search If you change the month images that match the criteria for the new month are displayed 3 On the calendar click the day that has the images that you want to playback The images that match the criteria for the selected day are displayed in the image timelines chart for each camera Blocks representing recorded images are displayed in the chart Change the month Displays the month that contain...

Страница 72: ...playback bar If you click the camera name the playback bar is set to start at the first image and end at the last image The playback bar moves by jumping to every recorded images If you want to move the playback bar to a specific position move the playback bar while holding down the Shift key The images surrounded by the playback bar are displayed in the playback list Select the camera to play bac...

Страница 73: ...playback again click Playback Screen The still image at the start time of the selected image is displayed Playback list Select the recorded image to confirm it Start playback of the recorded image on the playback screen by double clicking it Edit menu Edit the displayed image see page 93 Slider bar The playback position can be set by dragging the bar Playback screen Display the previous image Disp...

Страница 74: ... the playback list If a selected camera has no recorded images at the set time no image is displayed for that camera Multi Playback Page Select the time unit to display See page 75 Pointing to the timelines displays the camera name Cursor Set the play position Playback screen Adjust the volume Displays the camera name Displays the recording time Jump button Displays the time period button in incre...

Страница 75: ...s on the same camera the images are played back in the order in which they were recorded Pause playback The button is changed to during pause To start playback again click Stop playback Displays the image at the playback start time Display a previous image from the displayed image Reverse playback Start playback Display a next image from the displayed image Displays the image at the playback end t...

Страница 76: ...about the recorded image For instructions see Editing Recorded Images see page 92 To set the start and end times for a file conversion click each button and set the times If you click or the cursor moves by jumping to the time of the next previous recorded image Playback screen Jump button Displays the time period button in increments of 1 hour Clicking the timer period displays images from that h...

Страница 77: ... deselect all selected cameras select Clear All from Layout on the menu or select on the toolbar Note If there is more than one page to display selected cameras are deselected when you change pages You can change the width and color of the frames for the focus camera and selected cameras see page 79 You can also select and deselect cameras by using Select All and Clear All from the menu displayed ...

Страница 78: ...Page Settings You can change the camera layout from the multi monitoring page 1 Select Window Settings on the menu bar 2 Click Preferences Multiple Monitoring 3 Configure the settings in the Multiple Monitoring page and click OK Multi Monitoring Page ...

Страница 79: ...r of seconds see page 83 1 to 60 seconds Default 5 seconds Image display format Configure the aspect ratio of displayed camera images Fits the entire display area Resize the image to fit in the display area Maintain the aspect ratio Resize the image to fit the window while maintaining the aspect ratio of the camera Untouched centering display Display the image at actual size centering the image in...

Страница 80: ...second to 5 frames 1 second 10 frames 1 second to 30 frames 1 second per 5 frames Default is 2 frames 1 second Display text Select the check box to display the camera name and the frame rate on the multi monitoring page see page 84 You can also set the text color Adjust the monitoring refresh rate when the CPU is highly loaded Select the check the box to pause the multi monitoring page for the spe...

Страница 81: ...The background of the selected camera frame turns blue 2 Drag moving the mouse while holding down the left button the images The selection is enlarged maintaining the aspect ratio 3 Release the left mouse button The camera frame is enlarged Multi Monitoring Page After switching to the multi monitoring page the image is enlarged for the target camera ...

Страница 82: ...Operating Instructions 82 The enlarged image is returned to its original size by right clicking on the image Enlarged Display Examples Right clicking ...

Страница 83: ...ng Switching will restart when you return to the multi monitoring page Background Colors for Disabled Cameras and Error Cameras The background colors of disabled cameras error cameras and no camera are set in Multi Monitoring Background color from Preferences see page 79 Note Specify the different colors for disabled cameras and error cameras respectively Camera1 Camera2 Camera3 Camera4 Camera5 Ca...

Страница 84: ...sing When you select Adjust the monitoring refresh rate when the CPU is highly loaded monitoring is paused when the CPU load exceeds a specified threshold is displayed when monitoring is paused While monitoring is paused the monitoring window displays the image that was displayed just before pausing When recording an icon is displayed in the image just before pausing Frame rate image refreshing fr...

Страница 85: ...age while dragging the image then drop it at the location where you want to place it The new order is maintained when you restart this software You can also rearrange the playback images on the multi playback page see page 89 1 Drag moving the mouse while holding down the left button the image The mouse pointer changes to 2 Drop release the left mouse button the image at the location where you wan...

Страница 86: ...dio icon is audio from the focus camera and selected camera is played See page 77 instructions on selecting cameras Stop Audio Playback Mute Audio playback from the focus camera and selected camera stops when the toolbar s audio icon is Clicking changes the icon to Adjust the Playback Volume Right click on the toolbar to display the volume adjustment slider Use the slider to adjust the volume ...

Страница 87: ...lti Playback Page Settings The layout of multi playback page is configured on the settings page 1 Select Window Settings on the menu bar 2 Click Preferences Multi Playback 3 Configure the settings in the Multi Playback page and click OK ...

Страница 88: ...image to fit in the display area Maintain the aspect ratio Resize the image to fit the window while maintaining the aspect ratio of the camera Untouched centering display Display the image at actual size centering the image in the display frame Background color Configure the background colors for the frames of camera which has no image in the set time period Default is black color Set the transpar...

Страница 89: ...a name the frame rate and the recording time on the multi playback page You can also set the text color Focus and selected frame width color You can change the width and color of the frames for the focus camera and selected cameras Specify the colors for each frame respectively The defaults are frame width 3 focus frame Red and selected frame Blue Specify the frame rate Select the check box to ref...

Страница 90: ...or graphics on the Recorded Images Multi Playback and Timer List Pages Set colors of blocks representing recorded images on the Recorded Images Multi Playback and Timer List Pages See page 80 for color settings Playback Options Set whether or not to automatically playback images on the multi playback page when you select recorded images from the Playback List on the Recorded Images page and click ...

Страница 91: ...he Current Display Items list are displayed in the Playback List Clicking the Remove button will move items selected in the Current Display Items list to the Available Items list Items are displayed in the Playback List in the order they appear in the Current Display Items list To change the order select an item and click the Up and Down buttons Setting Description ...

Страница 92: ...on the menu bar 2 Search for the recorded image to edit and display it on the playback list see page 72 3 Select the recorded image from the playback list The still image at the start time of the selected image is displayed on the playback screen 4 Edit the image on the playback screen Perform any of the above operations For details see the corresponding section Playback List Images surrounded by ...

Страница 93: ...ed image 1 Select the image that you want to convert in Playback list See page 92 for how to display recorded images in Playback list 2 Select the file format from the editing menu and click Execute 3 To specify a time frame set start time and end time and click OK If you do not set a time frame all selected images will be converted Example Converting images to MPG format The editing menu is displ...

Страница 94: ... and end time of recording by default A confirmation screen is displayed if a file with the same name already exists To overwrite the existing file click Yes To save the file under a different name click No then enter a different file name The file extensions are determined by converted file formats mpg avi asf wav The converted image can be played back with Windows Media Player Version 9 0 or lat...

Страница 95: ...nvert in Playback list See page 92 for how to display recorded images in Playback list To select multiple images click the images while pressing Ctrl key 2 Select the file format from the editing menu and click Execute 3 Click To one file The save as window is displayed The editing menu is displayed by clicking here ...

Страница 96: ...of the first image by default A confirmation screen is displayed if a file with the same name already exists To overwrite the existing file click Yes To save the file under a different name click No then enter a different file name The file extensions are determined by converted file formats mpg avi asf wav The converted image can be played back with Windows Media Player Version 9 0 or later If co...

Страница 97: ... in Playback list See page 92 for how to display recorded images in Playback list To select multiple images click the images while pressing Ctrl key 2 Select the file format from the editing menu and click Execute 3 Click To multiple files The folder selection window is displayed The editing menu is displayed by clicking here ...

Страница 98: ...ected image is set to its start time and end time 1 second If files have the same name _XXX is appended to the end of the file name XXX is a 3 digit number in the range 001 999 The file extensions are determined by converted file formats mpg avi asf wav The converted image can be played back with Windows Media Player Version 9 0 or later If conversion is canceled images that were converted are not...

Страница 99: ... Playback list See page 92 for how to display recorded images in Playback list 2 Select Convert to JPG format from the editing menu and click Execute 3 To specify a time frame set start time and end time If you do not set a time frame all selected images will be converted 4 Set the interval to convert The editing menu is displayed by clicking here ...

Страница 100: ...ges The procedure is the same as that for Converting recorded images into MPG WAV ASF AVI files See page 97 Note When converting multiple recorded images to JPG format you cannot use To one file Images converted to JPEG format are saved in a subfolder in the destination folder The name of the subfolder is set to the start time A new subfolder is created each 1 000 images If conversion is canceled ...

Страница 101: ...rame and create a new recording file 1 Select the image that you want to copy in Playback list See page 92 for how to display recorded images in Playback list 2 Select Make Copy from the editing menu and click Execute 3 Specify the start and end time of the images to extract 4 Click OK The copy operation is started ...

Страница 102: ...Operating Instructions 102 When copy operation is completed successfully the following window is displayed Note If copying is canceled images that were copied before the cancellation are saved ...

Страница 103: ...in Playback list 2 Deleting the displayed image Select Delete from the editing menu and click Execute Delete all recorded images that are checked in the playback list Select Delete all checks from the editing menu and click Execute 3 Click OK on the confirmation window The selected images are deleted Note Although it appears that the deletion operation finishes quickly the actual deletion of the f...

Страница 104: ...ant to change the keyword in Playback list See page 92 for how to display recorded images in Playback list 2 Select Change Keyword from the editing menu and click Execute 3 Changing the keyword 4 Click OK The keyword is changed Note You can also change the keyword on the multi playback page by right clicking on the playback screen and selecting Change Keyword ...

Страница 105: ...y recorded images in Playback list 2 Select Copy To The Clipboard from the editing menu and click Execute Copy image displayed in the playback page to the Clipboard Take a Snapshot Take a snapshot of image displayed in the playback page 1 Select the image that you want to take a snapshot in Playback List See page 92 for how to display recorded images in Playback list 2 Select Snapshot from the edi...

Страница 106: ...dow is displayed 4 Select the destination folder enter a file name and click Save Note Clicking Copy To The Clipboard copies image to the Clipboard The clipboard is a place to temporarily save in copying or pasting data The copied image can be used in the program such as Paint ...

Страница 107: ...ay information about a recorded image 1 Select the image whose information you want to display in Playback List See page 92 for how to display recorded images in Playback list 2 Select Recorded Image Information from the editing menu and click Execute Displaying Recorded Image Information ...

Страница 108: ...e server at a time Other PCs cannot connect to a remote server when one is already connected Some operations such as Executing Restore Program cannot be used see page 114 It may not be possible to connect to a remote server from proxy servers that serve as the company firewall If you have difficulties connecting to a remote server consult a network administrator You may have problems using a remot...

Страница 109: ...sonic Viewnetcam com service If you have already registered with Panasonic Viewnetcam com use the domain name obtained when you registered For details about Viewnetcam com see the operating instructions for your Network Camera Remote server Configure the remote server see page 110 Remote client Configure the remote client see page 112 Operating the recording software on the server by remote access...

Страница 110: ...r and remote client PC If you do not use remote access functions this software install on the remote server and remote client can use the software as a normal recording software Remote Server Settings remote server function Configure the following settings after installing this software on a PC to be used as a remote server 1 Select Remote Access Settings on the menu bar 2 Select the Use Remote Ac...

Страница 111: ...nfigure a port for port forwarding For details on configuring port forwarding see your router s documentation Setting Description Use Remote Access Connection Select this check box when you are using remote access functions Select Operate as a server to use as a remote server Server Settings Port Enter a port number Enter a number from 1 to 65535 except for 10081 Default is 10082 Admin User Name A...

Страница 112: ...be used as a remote client 1 Select Remote Access Settings on the menu bar 2 Select the Use Remote Access Connection check box on the Settings screen 3 Select Operate as a client and click OK 4 Click Yes After you restart the program it will operate as a remote client Note When operating as a remote client is not displayed in the notification area ...

Страница 113: ...mote server Click Change to change remote server settings Click Delete to remove remote server settings Click Search to search for remote server settings You can register up to 1000 remote servers 2 Click Register 3 Enter the Server Name Server Address IP address or domain name and the port number of the remote server and click OK 4 Click Connect ...

Страница 114: ...te server the remote client registration code is automatically registered on the client control page of the remote server Only one remote client can be connected to a remote server at a time You cannot connect to a remote server if another client is already connected An error message is displayed if you try to connect to a remote server if another client is connected Use the same version of the so...

Страница 115: ...3 X Copying O X X Delete files O X X Change the keyword O X X Image information display O O O Settings Basic Settings Destination Folder X X X Basic Settings Destination Hard Disk Space O X X Basic Settings Limit the destination recording capacity O X X Basic Settings Connection method to the camera O X X Proxy server settings O X X Multi Monitoring O X X Multi Playback O X X Navigation O X X Oper...

Страница 116: ... administrator privileges to connect to the settings pages If a connection reset is connected after connecting to a remote server the following message will be displayed Click Yes to reconnect Processing continues if the reconnection is successful If you click No the unconnected multi monitoring page is displayed ...

Страница 117: ...on the Client Control page and click Delete 3 Click OK Note You can register up to 999 remote clients Duplicate registration codes cannot be registered To change information for a remote client select the remote client and click Change After you have modified the information in the settings page click OK In the Status column the connection status Connected Unconnected is displayed You can see whic...

Страница 118: ...k the images while pressing Ctrl key 2 Select the Download from the editing menu and click Execute Available functions differ for administrator privileges and general user privileges see page 114 The above screen is displayed when connected with administrator privileges 3 To specify a time frame set start time and end time and click OK If you do not set a time frame all selected images will be con...

Страница 119: ...enter a file name and click Save 5 Click Start Conversion will begin on the remote server Download will begin on the remote client When the download has completed successfully the following window is displayed When you select multiple recorded images start time and end time are not displayed ...

Страница 120: ...System Log server Operation Log 1 server Operation Log 2 server Restore Log server Select when analyzing remote server logs 1 Select Window Settings on the menu bar 2 Select Preferences Operation Support 3 Select the date of the logs to analyze log type 4 Click Execute Log Analysis 5 Click Start Download Start downloading When the download completes a log analysis result will be displayed ...

Страница 121: ...ion icon returns to 2 Audio is transmitted while displayed You can transmit audio to focus cameras and selected cameras 3 Click and finish the transmission will change to Note Transmitting audio requires a microphone connected to your PC You must provide your own microphone During transmission the volume icon changes to When transmission is terminated the icon returns to If you are accessing the c...

Страница 122: ...era Information You can import and export the setting information for cameras The camera information can be exported for use on another PC with this software installed 1 Select Window Settings on the menu bar 2 Click Export or Import Export button Import button ...

Страница 123: ...ct HNP60 Camera Definition File def as the file type To import camera information for BB HNP11 select HNP11 Camera Definition File h11 as the file type To import the camera information BB HNP15 select HNP15 Camera Definition File h15 as the file type 3 Click Open The camera information is imported Note This software can import camera information for BB HNP15 BB HNP11 and BB HNP60 BB HNP15 and BB H...

Страница 124: ... multi monitoring page The menu window is displayed 2 Select Copy To The Clipboard This software copies the image to the clipboard Note The clipboard is a place to temporarily save in copying or pasting data The copied image can be used in the program such as Paint If you select Snapshot on the displayed menu a still image is captured from the displayed image ...

Страница 125: ...hether or not the camera s recorded images are deleted 1 Select Window Settings on the menu bar 2 Select the camera to delete 3 Click Delete Camera 4 To delete the recorded images click Delete recorded Images To keep the recorded images click Do not delete recorded images Delete Camera button Select the camera to delete ...

Страница 126: ...f you click Do not delete recorded images the recorded images are not deleted even after the camera is deleted Deleted camera Camera ID will be displayed in the recorded images page If you want to delete the recorded images of the deleted camera select and delete the recorded images from the playback list on the Recorded Images page see page 103 or click Execute Restore Program from Operation Supp...

Страница 127: ...ng the Timer Setting You can delete timer settings 1 Select Window Settings on the menu bar 2 Select the timer to delete 3 Click Delete Timer The following confirmation window will be displayed Delete Timer button Select the timer to delete ...

Страница 128: ...g Instructions 128 4 Click OK A deletion mark is displayed on the icon of the timer item see page 45 5 Click OK or Apply If you click OK Settings page will close If you want to delete another timer click Apply ...

Страница 129: ...Select destination drive When you have set a limit for the recording capacity for the destination drive see page 14 Displays the total size of the recording capacity limit for individual cameras and the amount of guaranteed free space for the destination drive Displays the length hours or size MB of the recorded images and the percentage of the recording capacity being used for each camera You can...

Страница 130: ...al cameras and the capacity for the rest of the destination drive Displays the recording capacity limit for each individual camera and the guaranteed free space for the destination drive Displays the limited recording time capacity the length hours or size MB of the recorded images and the percentage used for each camera Displays the total capacity of the destination drive You can change the displ...

Страница 131: ...estore program manual Executing the restore program optimizes recorded images and deletes the recorded images of deleted cameras 1 Select Window Settings on the menu bar 2 Select Preferences Operation Support 3 Click Execute Restore Program at the Operation Support page 4 Click OK To execute the restore program you must first exit this software ...

Страница 132: ...een deleted see page 125 If you select Delete all images from the deleted camera and click Start Restoring all the recorded images from deleted cameras will be deleted To restart the software after the restore program has finished select After finishing restoration exit this program and start the Network Camera Recorder with Viewer Software When you click Start Restoring the restore program is sta...

Страница 133: ...Operating Instructions 133 Executing the restore program automatic If corruption is found in the recording image while loading the software the restore program will be automatically executed ...

Страница 134: ...e menu bar 2 Select Preferences Operation Support 3 Select the date of the logs to analyze log type camera name and timer name 4 Click Execute Log Analysis List of log type Log type Description System Log Program execution log Operation Log 1 Log for operation window performance Operation Log 2 Log for interaction between program execution and operation window Restore Log Log for repair program ...

Страница 135: ...Operating Instructions 135 Displays the analysis results Log list Analysis result are displayed If you select a log from the log list the error contents and the measures taken will be displayed ...

Страница 136: ...onfiguration If you use other applications while operating this software the CPU will have a higher load and performance of this software will be affected For best results do not run other software while operating this software When using the MPEG 4 format the multi monitoring frame rate and CPU usage will be higher possibly resulting in unstable unreliable performance When using MPEG 4 set a fram...

Страница 137: ... 1 second 2 frames 1 second 14 27 10 12 14 27 10 12 14 27 10 12 4 x 4 6 x 6 4 x 4 4 x 4 2 frames 1 second 2 frames 1 second 2 frames 1 second 2 frames 1 second Monitoring frame rate Registration number CPU Pentium 4 2 6 GHz Memory 512 MB OS Windows XP CPU Intel Core TM 2 Duo 2 1 GHz Memory 1 GB OS Windows XP CPU Intel Core 2 Duo 2 1 GHz Memory 2 GB OS Windows Vista Video Card ATI Radeon X1300 Simu...

Страница 138: ...r CPU Pentium4 2 6 GHz Memory 512 MB OS Windows XP CPU Intel Core2 Duo 2 1 GHz Memory 1 GB OS Windows XP CPU Intel Core2 Duo 2 1 GHz Memory 2 GB OS Windows Vista Video Card ATI Radeon X1300 Simultaneous recording Multi monitoring number Multi monitoring layout Playback frame rate Monitoring frame rate Registration number Simultaneous recording Multi monitoring number Multi monitoring layout Playba...

Страница 139: ...cessed without a proxy server the proxy setting should be set on this software Check Use a proxy server and set the proxy settings at proxy server settings on the preferences page There are more than 4 connections to the same camera using this software There is a limit to the number of connections to the same camera using this software including BB HNP11 If you select Audio and images are sent usi...

Страница 140: ...t audio Microphone is not properly connected Confirm that microphone is properly connected Volume setting on your PC is muted or set to minimum Adjust the volume on the volume control window on your PC The speaker is malfunctioning Confirm that the speaker is working Audio cannot be listened while viewing recorded images of the camera with audio Image Only is selected at Audio Recording Settings o...

Страница 141: ...s blank Follow the instruction message Message Cause and Remedy Basic Settings Enter a number in one byte character in Guaranteed Destination Hard Disk Space Follow the instruction message Enter Guaranteed Destination Hard Disk Space Guaranteed Destination Hard Disk Space was blank Follow the instruction message Guaranteed Destination Hard Disk Space should be between 100 and 50000 A number not be...

Страница 142: ...ion Recording Capacity Limit Destination Recording Capacity Limit was blank Follow the instruction message If the connection method is changed all cameras will be reconnected While reconnecting recording will temporarily be stopped Do you want to proceed Follow the instruction message The specified Destination Folder is incorrect The pass of the destination folder was more than 128 characters Foll...

Страница 143: ...proxy server could not be authenticated The IP address and port number settings may be incorrect Do you want to keep these settings The proxy server cannot be accessed Check the address and port number of the proxy server The proxy server authentication is not available Enter the correct user name and password and try again This software does not pass the proxy authentication Check the user name a...

Страница 144: ... This color has already been set Select a different color Follow the instruction message Operation Support To execute restore program exit this program If the program is exited the camera stops recording and the timer does not work Do you exit this program and execute restore program This program and the restore program cannot execute simultaneously Follow the instruction message The restore progr...

Страница 145: ...nstruction message Enter English one byte character in User Name Follow the instruction message Enter English one byte character in Password Follow the instruction message Camera Name should be 250 characters or less The Camera Name was more than 250 characters Follow the instruction message Comment should be 128 characters or less The Comment was more than 128 characters Follow the instruction me...

Страница 146: ...e instruction message Some settings are unavailable because the functions of the selected camera have not been confirmed Click the Camera Function Check button and check the functions Follow the instruction message Cannot use a proxy server to the IPv6 camera address To use a proxy server set the IPv4 address or URL of the IPv4 domain name service for the camera Follow the instruction message Imag...

Страница 147: ... the proper value When registering a camera that does not support 1280x1024 resolution Follow the instruction message The selected camera does not support MPEG 4 format The format is changed to JPEG Follow the instruction message The time settings for Before detected and After detected are specified on the timer settings Set the recording frequency shorter than Before detected and After detected s...

Страница 148: ... the preferences page Do you want to disable this setting and enable the Limit the recording capacity setting for each camera Limit the destination recording capacity and Limit the recording capacity cannot be used simultaneously Follow the instruction message Motion Detection Alarm The MPEG 4 format does not support motion detection recording Do you want to change the format to JPEG If using the ...

Страница 149: ...cted setting longer than the recording frequency setting Follow the instruction message Timer Name Delete the specified timer Follow the instruction message Keyword Keyword1 should be 40 characters or less Keyword1 was more than 40 characters Follow the instruction message Keyword2 should be 40 characters or less Keyword2 was more than 40 characters Follow the instruction message Message Cause and...

Страница 150: ...ction message End Time should be within the recording time The end time is not within the recording time Follow the instruction message Conversion interval should be between 1 and the number of images 1 The frequency is not between 1 and the number of images 1 or the space was blank Follow the instruction message Conversion interval should be between 1 and end time start time seconds The number is...

Страница 151: ...ion is essential Perform license registration Some features cannot be used without license registration JPG MPG WAV ASF AVI Conversion Make Copy Perform license registration The copy operation was canceled You clicked cancel button while copying the image Conversion is complete Conversion has completed successfully You cannot convert the recorded images to a single JPEG file When converting multip...

Страница 152: ...he instruction message Keyword2 should be 40 characters or less Keyword2 was more than 40 characters Follow the instruction message Snapshot A snapshot writing error has occurred If a writing error occurred when saving a file or the file has been opened by another application Confirm that you have write permissions for the save destination Close the application that opened the file and try again P...

Страница 153: ...uction message has reached its recording capacity Delete recorded images Camera Name Destination Folder The recorded images of the camera or recorded images of the destination folder have reached the limit of recording capacity and recording is stopped Delete the recorded images of the camera or increase the recording capacity Change the limit of recording capacity and select Delete old files and ...

Страница 154: ...ot create it 4 Check if the folder is writable and set it writable 5 Change the destination folder There is only MB of free space remaining in Save Destination Folder Disk Either increase the free space to over 100 MB or select a disk with over 100 MB of free space The save destination free space is less than 100 MB Follow the instruction message Images could not be acquired for one minute Confirm...

Страница 155: ...e Cause and Remedy The total size of the recording capacity limit and the guaranteed hard disk space is larger than the capacity of the destination drive Check your settings Follow the instruction message Software Startup failed Restart this software If situation does not improve after restarting the software restart your PC This software fails to start the ncrcore3 exe file Restart your PC Progra...

Страница 156: ... found Install Adobe Reader and try again The web browser could not be started Start the web browser and access the following URL http Camera Address Web browser could not be started support information and camera portal site Install the web browser Internet Explorer 6 0 or later Specify a local drive Although mapping this folder to a network drive allows you to specify this folder the program may...

Страница 157: ...ver Address Follow the instruction message Enter Port Follow the instruction message Enter a number in one byte character in Port Follow the instruction message Port should be between 1 and 65535 except for 10081 A number not between 1 and 65535 or 10081 was entered in the Port blank Follow the instruction message Setting is modified restart of this program is necessary Is it OK to restart the pro...

Страница 158: ...congestion Remote client Follow the instruction message The number of connections has exceeded the limit Wait for a moment and try again A remote client has connected to the server while you were trying to connect to the remote server Remote client Follow the instruction message Another administrator changed the settings Wait for a moment and try again Settings were applied while you were configur...

Страница 159: ...e server is busy Wait for a moment and then try again When performing a specific action e g navigation the server cannot respond to other requests Remote client Remote server Follow the instruction message Message Cause and Remedy ...

Страница 160: ... method to the camera Audio and images are sent using one connection Proxy Server Settings Use a proxy server Proxy Server Address Port Proxy User Name Proxy Password Multi Monitoring Monitor Screen Layout 2 x 2 Page 1 Total Page 1 Setting the camera to display Display the images in the order in which they were registered Click to Center Function Uses Switch the multi pages in order Image display ...

Страница 161: ...loaded When the CPU is loaded more than 80 the refresh rate is paused for 15 seconds Multi Playback Playback Screen Layout 2 x 2 Playback position display format Display timelines as chart Image display format Maintain the aspect ratio Background color no images Black Set the transparency level Transparency 50 Text color Black Display the camera name checked Display the frame rate Display the time...

Страница 162: ...rding Red RGB 255 0 0 Playback Options Play automatically Playing List All Navigation Display unit Recorded Time h Operation Support Execute Restore Program Restoration Target Folder Destination Folder Delete all images from the deleted camera After finishing restoration exit this program and start the Network Camera Recorder with Viewer Software checked Execute Log Analysis Log Time Period Today ...

Страница 163: ...ata Format JPEG Resolution 320 x 240 Image Quality Standard Recorded Frequency Not Specify Audio Recording Settings Image Only Calculated disk capacity to record 30 days of recording will require Recording images Display the error message Recording Capacity Limit Limit the recording capacity Operation when the capacity reached the limit Stop recording Capacity Limit 100 MB Calculated recording tim...

Страница 164: ...ing Alarm enable condition Status Open High Before detected After detected After detected Record images for 5 seconds Executing Commands for Detection Sensor deactivation time Set the Alarm2 Recording Alarm enable condition Status Open High Before detected After detected After detected Record images for 5 seconds Executing Commands for Detection Sensor deactivation time Detection Commands Commands...

Страница 165: ...ecording Method Record images during all the set time period Before detected After detected After detected Record images for 5 seconds Executing Commands for Detection Sensor deactivation time Keyword1 Keyword2 Exporting Importing Export Destination folder Install folder File name File type Camera Definition File h15 Import Destination folder Install folder File name File type Camera Definition Fi...

Страница 166: ... Sat Sun Recording Mode Normal Recording Motion Detection Recording Alarm Sensor Recording Recording Trigger Timer Recording Manual Recording Keyword Display timelines as chart Time Unit 1 hour Display scale Display in 24 h mode Calender Today s date Playback time from 00 00 00 to Right before 00 00 00 Playback List Selection top line Playback Screen The still image at the start time of the select...

Страница 167: ...Operating Instructions 167 Remote Access Settings Use Remote Access Connection Server Settings Port 10082 Admin User Name Admin Password User Name User Password Items Default ...

Страница 168: ...Operating Instructions 168 ...

Страница 169: ...ed below or to executive or regional sales offices These locations do not repair consumer products When you ship the product Panasonic Servicenters are listed in the servicenter directory Call 1 800 272 7033 for the location of an authorized servicenter This Network Camera Recorder is designed for use in the United States of America Sale or use of this product in other countries areas may violate ...

Отзывы: