background image

Model No.

  AW‑HN130WP

Model No.

  AW‑HN130KP

Operating Instructions

Excerpted Version

Installation Instructions provided

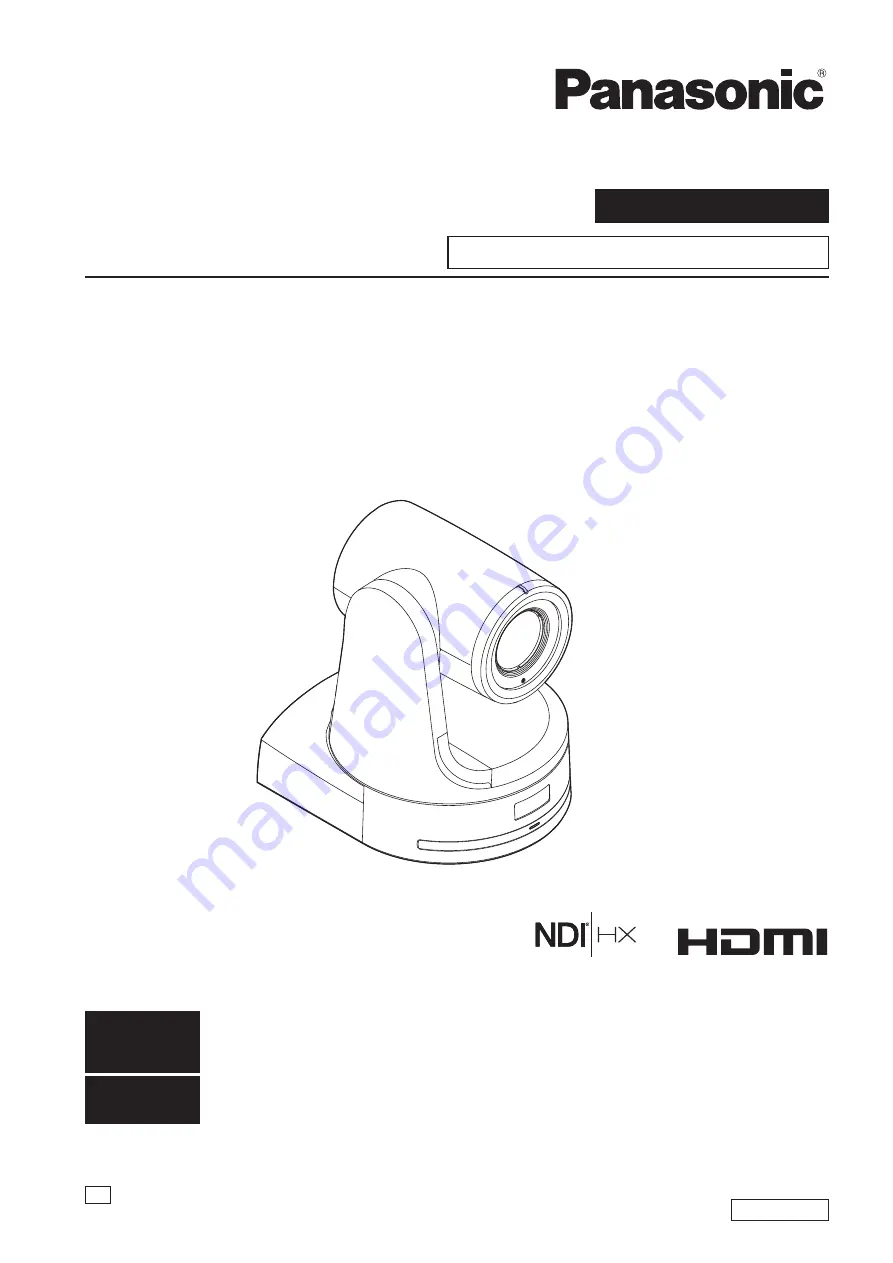
HD Integrated Camera

DVQX1528ZA

SS0118TY0 -FJ

Printed in Japan

ENGLISH

PJ

ENGLISH

Excerpted Version

Before installing and using this product, be sure to read “Read this first!” (pages 4, 24 to 25).

This manual contains information excerpted from the Operating Instructions.

For more information, please visit the Panasonic website 

(http://pro-av.panasonic.net/manual/en/index.html)

, and 

refer to the Operating Instructions.

ESPAÑOL

Antes de instalar y usar este producto, asegúrese de leer “Lea esto primero!” (páginas 4, 26 a 27).

Si desea obtener más información, visite el sitio web de Panasonic 

(http://pro-av.panasonic.net/manual/en/index.

html) 

y consulte las instrucciones de funcionamiento y las instrucciones de instalación.

Before operating this product, please read the instructions carefully and save this manual for future use.

Содержание AW-HN130WP

Страница 1: ...rating Instructions For more information please visit the Panasonic website http pro av panasonic net manual en index html and refer to the Operating Instructions ESPAÑOL Antes de instalar y usar este producto asegúrese de leer Lea esto primero páginas 4 26 a 27 Si desea obtener más información visite el sitio web de Panasonic http pro av panasonic net manual en index html y consulte las instrucci...

Страница 2: ...ve owners About copyright and licence Distributing copying disassembling reverse compiling reverse engineering and also exporting in violation of export laws of the software provided with this unit are expressly prohibited Abbreviations The following abbreviations are used in this manual Microsoft Windows 7 Professional SP1 32 64 bit is abbreviated to Windows 7 Microsoft Windows 8 Pro 32 64 bit is...

Страница 3: ...xample 2 IP control 21 System example 3 IP image transmission PoE 22 System example 4 connection with commercially available controller RS 232C daisy chain connection 22 Appearance 23 Read this first 24 Note on grounding 25 Lea esto primero 26 Nota sobre la conexión a tierra 27 Before use 28 Overview 28 Computer requirements 28 Disclaimer of warranty 29 Network security 29 Features 30 Controller s...

Страница 4: ...resulting in instability causing possible injury indicates safety information Lea esto primero ADVERTENCIA Para evitar heridas este aparato debe estar firmemente instalado al piso pared de acuerdo con las instrucciones de instalación ADVERTENCIA La instalación solamente debe llevarla a cabo personal cualificado Una instalación incorrecta podría provocar la caída del dispositivo y causar lesiones P...

Страница 5: ...ferring in detail with your dealer Install the unit on a ceiling that is strong enough such as a concrete ceiling If the unit is to be installed on a ceiling which is not strong enough reinforce the ceiling sufficiently first Do not install or use the unit in the following kinds of locations On walls where the unit would be installed sideways In locations including places such as under the eaves o...

Страница 6: ...g measure Power switch This unit does not have a power switch The power turns on when its power plug is connected to a power outlet When the power is turned on the pan tilt zoom and focusing operations are performed 1 Before proceeding with maintenance be absolutely sure to disconnect the power plug from the power outlet 1 The unit is set to Standby mode under factory default settings When turning...

Страница 7: ...ras whose switches are set to 1 to 7 Manually setting multiple cameras to the same address will not allow you to control multiple cameras from a single controller simultaneously SW1 to SW3 camera address setting switches Configure the camera address Set this to AUTO under normal circumstances When cameras are set to AUTO addresses will be assigned to the cameras automatically in response operation...

Страница 8: ...mine where the unit is to be installed and in which direction it should be mounted Factor in the unit mounting area and include space for the wires extending from its rear panel The asterisk in the illustration marks the position and dimensions of the hole for mounting the mount bracket 160 6 5 16 Space for the wires from the rear panel 320 12 19 32 or more Space for the wires 90 3 17 32 88 3 15 3...

Страница 9: ...ch has been attached to the bottom panel of the unit around the end of the hook part of the mount bracket Pull the drop prevention wire and check that it has been attached securely to the hook End of hook Drop prevention wire A Loop the circle part of the drop prevention wire around the end of the hook part of the mount bracket B Pull the wire and check that it is securely attached to the hook NOT...

Страница 10: ... M3 screw with flat washer spring washer Status display lamp Approx 20 On the camera main unit Holes x3 used to insert the bottom panel On the mount bracket Protrusions x3 used for inserting the camera Hole for checking the positioning NOTE Do not do this work while holding the camera head since doing so may result in malfunctioning of the unit Use only the screws supplied Do not use any other scr...

Страница 11: ...lamp Loosely secure the cable clamp in the area shown above B Fasten the cable clamp Strap part Take hold of the strap part slide the cable clamp until it stops moving and then secure it tightly 7 Attach the cable cover Fit the two tabs on the cable cover into the square mounting hole at either side of the rear panel Secure the cable cover using the screw M3 x 25 mm provided Screw diameter Clampin...

Страница 12: ...he anchor bolts and direct ceiling mount bracket This job is facilitated if the direct ceiling mount bracket is loosely secured to the ceiling panel in one place and the direct ceiling mount bracket and anchor bolts are vertically aligned before the nuts are tightened up 2 First remove the screws which were loosely fastened in step 1 and then align the camera mount bracket of the AW HN130 with the...

Страница 13: ...it is mounted on the ceiling its nameplate will be upside down The direction of the unit s nameplate can be changed 1 Push in the part indicated by the arrow and pull out the nameplate A W H N 1 3 0 2 Change the direction of the nameplate 3 Push the nameplate back into place 13 ...

Страница 14: ...t bracket 5 Push the unit A Turn it approximately 20 degrees away from the installed position B and remove it C Main unit mounting screw M3 screw with flat washer spring washer Approx 20 NOTE Do not do this work while holding the camera head since doing so may result in malfunctioning of the unit 6 Disengage the drop prevention wire from the mount bracket A Pull the dropprevention wire in the dire...

Страница 15: ...p prevention wire 4 Mount the unit Align the position of the hole for checking the positioning with the status display lamp Align the holes on the camera main unit used to insert the bottom panel with the protrusions on the mount bracket used for inserting the camera push the bracket and camera firmly together and rotate the main unit by about 20 degrees in the direction of the arrow Secure the mo...

Страница 16: ...he cable clamp Cable clamp Loosely secure the cable clamp in the area shown above B Fasten the cable clamp Strap part Take hold of the strap part slide the cable clamp until it stops moving and then secure it tightly 7 Attach the cable cover Fit the two tabs on the cable cover into the square mounting hole at either side of the rear panel Secure the cable cover using the screw M3 x 25 mm provided ...

Страница 17: ...G When mounting the unit on a tripod Attach the tripod to the threaded holes for mounting the camera on the camera s bottom panel Place the tripod on a completely flat and level surface Tighten the screws by hand to mount the tripod securely Use screw for mounting the tripod that satisfy the following standard Screw for mounting tripod 1 4 20UNC ISO1222 6 35 mm 4 5 mm to 6 mm 0 18 inches to 0 24 i...

Страница 18: ...Accessory AC adaptor HD Integrated Camera AW HN130 HD Integrated Camera AW HN130 LAN cable Switching hub NDI HX compatible switcher Monitor Monitor External DC power supply The AC adaptor provided with the unit is not shown in the above figure Remote Camera Controller AW RP120 18 ...

Страница 19: ... HRP200 LAN cable crossover cable Pan tilt head camera control signals HD Integrated Camera AW HN130 Remote Camera Controller AW RP50 HDMI SDI Accessory AC adaptor Monitor Remote Camera Controller AW RP120 External DC power supply Accessory AC adaptor 19 Connections continued ...

Страница 20: ...130 HD Integrated Camera AW HN130 SDI video signal Compact Live Switcher AW HS50 Monitor 1 Monitor 2 Monitor Monitor Pan tilt head and camera control signal LAN straight cable System TALLY External DC power supply Remote Camera Controller AW RP120 Genlock signal generator Accessory AC adaptor RS 422 connector Accessory AC adaptor 20 Connections continued ...

Страница 21: ...deo signal Switching hub LAN cable straight cable Compact Live Switcher AW HS50 Monitor 1 Monitor 2 Monitor Monitor LAN cable straight cable Remote Camera Controller AW RP50 The AC adaptor provided with the unit is not shown in the above figure Accessory AC adaptor Accessory AC adaptor Accessory AC adaptor LAN connector 21 Connections continued ...

Страница 22: ...ct up to seven cameras to the commercially available controller RS 232C communication connector Configure the service switches at the bottom of the unit For details on the service switches see Service switch settings page 7 SW1 to SW3 Set the camera address to AUTO or 1 to 7 Set address numbers so that they do not duplicate each other SW4 Enable standard serial communication ON SW7 Set the baud ra...

Страница 23: ...Installation Instructions Appearance Unit mm inch AW HN130 R90 180 7 3 32 125 4 29 32 90 3 17 32 234 9 3 16 3 1 8 71 2 25 32 175 6 7 8 225 8 27 32 R3 17 32 23 ...

Страница 24: ...n be operated at a voltage in the range of 100 240 V AC Voltages other than 120 V are not intended for U S A and Canada Operation at a voltage other than 120 V AC may require the use of a different AC plug Please contact either a local or foreign Panasonic authorized service center for assistance in selecting an alternate AC plug CAUTION The mains plug of the power supply cord shall remain readily...

Страница 25: ...not use this apparatus near water 6 Clean only with dry cloth 7 Do not block any ventilation openings Install in accordance with the manufacturer s instructions 8 Do not install near any heat sources such as radiators heat registers stoves or other apparatus including amplifiers that produce heat 9 Do not defeat the safety purpose of the polarized or grounding type plug A polarized plug has two bl...

Страница 26: ...ECAUCIÓN Este aparato puede funcionar con una tensión de entre 100 240 V CA Las tensiones diferentes de 120 V no son adecuadas para los EE UU y Canadá El funcionamiento con una tensión diferente de 120 V CA puede requerir la utilización de una clavija de CA diferente Póngase en contacto con un centro de servicio autorizado por Panasonic bien sea local o del extranjero para que le ayude en la selec...

Страница 27: ...limentación para que nadie lo pise ni quede pellizcado particularmente en la clavija receptáculo de conveniencia y en el punto por donde sale del aparato 11 Utilice solamente los aditamentos accesorios especificados por el fabricante 12 Utilice el aparato sólo con el carrito soporte trípode ménsula o mesa especificado por el fabricante o vendido con el aparato Cuando utilice un carrito tenga cuida...

Страница 28: ...ble controllers Connection with a Panasonic camera controller is also possible via Panasonic s proprietary serial communication format The unit is available in white AW HN130WP or black AW HN130KP to suit your intended application and environment Computer requirements CPU Intel Core 2 DUO 2 4 GHz or more recommended Memory For Windows 1 GB or more 2 GB or more for 64 bit editions of Microsoft Wind...

Страница 29: ...DATA CAUSED BY ANY FAILURE Network security As the unit intended to be used while connected to a network the following security risks exist A Leakage or theft of information through the unit B Unauthorized operation of the unit by persons with malicious intent C Interference with or stoppage of the unit by persons with malicious intent It is your responsibility to take precautions such as those de...

Страница 30: ...sonic Corporation so that an existing system can be used to advantage to put together a system that is even more flexible NOTE It may be necessary to upgrade the version of the controller in order to support the unit For details on upgrading visit the support page on the following website http pro av panasonic net The maximum distances between the units and controller is 1000 meters 3280 ft when s...

Страница 31: ...pported R Pedestal B Pedestal Not supported Supported with some restrictions 5 Detail Not supported Not supported V Detail Level Not supported Not supported CAM BAR Supported 1 Supported Pan Supported Supported Tilt Supported Supported Preset Supported Supported Preset Speed Not supported Not supported Preset Speed Table Not supported Not supported Preset Scope Not supported Not supported Freeze D...

Страница 32: ...unt bracket for installation surface Hanging Desktop 1 Main unit mounting screw with flat washer spring washer M3 6 mm 1 AC adaptor 1 Power cable 1 Drop prevention wire 1 Drop prevention wire mounting screw 1 comes attached to the unit Bracket mounting screws bind head M4 10 mm 4 Cable cover 1 Optional accessories z zWireless remote controller AW RM50G Size AA dry battery x 2 obtained separately z...

Страница 33: ... OUT signal is provided in case the images are to be monitored Concerning the HDMI interface standard This unit has been certified as HDMI compatible but on rare occasions images may not be displayed depending on the HDMI device which has been connected to the unit Color bars Color bars are used to adjust the color phase and the widths and positions of these bars may differ from other models The s...

Страница 34: ...therwise the casing may become discolored Do not turn the camera head by hand Turning the camera head by hand may cause the unit to malfunction Use the unit in an environment with minimal moisture and dust Avoid using the unit in an environment with high concentration of moisture or dust since these conditions will damage the internal parts Disposal of the unit When the unit has reached the end of...

Страница 35: ...h products or if the unit is exposed to sunlight the effects of the light may make it impossible for the unit to be operated using the wireless remote control Be sure to follow the steps below for installation and use Take steps to ensure that the wireless remote control signal light sensing area will not be exposed to the light from fluorescent lights plasma monitors or other such products or fro...

Страница 36: ...ce When a signal matched by the remote control ID has been received from the wireless remote control optional accessory while the power is on Orange and blinks twice When a signal not matched by the remote control ID has been received from the wireless remote control optional accessory while the power is on 6 Camera head This rotates in the up and down direction 7 Tilt head This rotates in the rig...

Страница 37: ...composite video signals Use the monitor in the internal synchronization mode Provide a BNC coaxial cable as the connecting cable There is a delay in the VIDEO OUT signal output by 120H HD lines when at 720p and by 90H HD lines for any other 16 Hole used to secure cable cover Use the screw provided to secure the cable cover 17 SDI OUT connector SDI OUT This is the SDI video signal output connector ...

Страница 38: ...tput conditions for each video format z zSDI HDMI VIDEO output Format SDI output HDMI output VIDEO output 4 HD SDI 1080 59 94p 1080 50p 1080 59 94i 1080 50i 1080 29 97PsF 1 1080 25PsF 2 1080 23 98PsF 1080 29 97p 3 1080 25p 3 1080 23 98p 1 720 59 94p 720 50p SD SDI 480 59 94p 576 50p 480 59 94i 576 50i 1 OVER 59 94i output your monitor may recognize the signal as 59 94i 2 OVER 50i output your monit...

Страница 39: ...a menu 8 Preset memory call buttons 1 to 12 These are used to call the information on the unit s directions and other settings which have been registered in the unit s preset memories No 1 to No 12 and reproduce those settings Settings in preset memories No 13 and above cannot be called from the wireless remote control 9 PRESET LIMIT button PRESET LIMIT This is used to register the settings in the...

Страница 40: ...ilter switching is not possible in night mode 15 HOME button HOME When this is pressed for 2 seconds the unit s direction panning or tilting returns to the reference position 16 ZOOM button T W These are used to adjust the lens zoom The zoom is adjusted in the wide angle using the W button and in the telephoto using the T button 17 FAST button FAST This is used to change the movement speed at whic...

Страница 41: ...mber of these units using wireless remote controls set a different remote control ID for each control When using one unit set the remote control ID to CAM1 unless the setting needs to be changed Setting procedure Operate the IR ID switches on the unit s rear panel and select CAM1 CAM2 CAM3 or CAM4 as the remote control ID page 37 The IR ID switch settings CAM1 to CAM4 correspond to the CAM1 to CAM...

Страница 42: ... time The IP address settings may no longer be recognized as a result The Easy IP Setup Software cannot be used from a different subnet via a router Use Easy IP Setup Software ver 4 25R00 or newer 1 Start the Easy IP Setup Software 2 Click the Search button 3 Click the MAC address IPv4 address of the camera to be set and click the Network Settings button NOTE When a DHCP server is being used the I...

Страница 43: ...thentication function upon installation We also recommend using DIGEST authentication when connecting to a device that supports DIGEST authentication The AW RP50 AW RP120 and AK HRP200 support DIGEST authentication Preparation 1 Startup the web browser and display the Live page on a PC 2 Click Setup button and then click User mng button The user authentication window will be displayed C A B D ASel...

Страница 44: ...e control s batteries run down or have the batteries been installed with their polarities reversed If the status display lamp does not blink even when the wireless remote control is operated near the wireless remote control signal light sensing area it means that the batteries have run down Replace the batteries Have the IR ID switches been set correctly page 37 page 41 Is there a fluorescent ligh...

Страница 45: ... camera A reply returned from the unit signifies that there are no problems in operation If a reply is not received try following operation Reboot the unit and within 20 minutes change the IP address using the Easy IP Setup Software Are you accessing via http while the HTTPS function is enabled Perform access via https when using the HTTPS function Entry of the port number is also required PDF pag...

Страница 46: ... to a port number that will not be filtered It is not possible to download the setting files For Windows Has the file download function been disabled Perform the following A Select Tools Internet Options in Internet Explorer B Click the Security tab and click the Custom level button under Security level for this zone C In the Security Settings dialog box select the Enable option for File download ...

Страница 47: ...minal Is the URL correct Has mobile been entered at the end of the URL Check whether the URL has been entered correctly When accessing the unit from a mobile terminal mobile must be added to the end of the URL used to access the unit from a personal computer PDF page 101 Is the HTTPS SSL encryption of the mobile terminal different from that of the unit Set HTTPS Connection for the unit to HTTP and...

Страница 48: ... No auto focusing Is the focus set to manual Auto focusing is initiated as soon as the focus is set to auto PDF page 26 In some situations it may be hard to focus at the auto setting In cases like this select the manual setting and focus manually PDF page 27 The subject is not brought into focus during zooming when the manual setting is used for the focus Was the focus adjusted at the Tele end Fir...

Страница 49: ...y the top or bottom of the screen becomes lighter With a MOS imaging sensor the pickup timing differs slightly at the top left and bottom right of the screen This means that when the flash is fired the bottom of the screen will become lighter in the field concerned and the top will become lighter in the next field This is normal and not indicative of any problem The brightness changes cyclically o...

Страница 50: ...s be acquired For Mac Press the Command R key on the personal computer s keyboard to request that the settings be acquired For mobile terminals Refresh the screen by pressing the Refresh button on the web browser for example to request that the settings be acquired The images do not update or display properly Perform the following to delete the temporary Internet files For Windows A Select Tools I...

Страница 51: ...s This section describes the procedure for Windows 7 as an example Changing the settings may not be possible depending on your environment A Right click on the desktop and select Screen Resolution from the menu B Click Advanced settings C Select the Troubleshoot tab and click Change setting D If the User Account Control dialog box appears click Yes When logged on with an account other than an admi...

Страница 52: ...n nwcv4SSetup exe from Panasonic System Networks Co Ltd Select Install When the security warning window appears click the Install button For Internet Explorer 8 0 The following message appears in the information bar This site might require the following ActiveX control nwcv4SSetup exe from Panasonic System Networks Co Ltd Click here to install Click the information bar and select Install ActiveX c...

Страница 53: ...ontrol RJ 45 RS 422 CONTROL IN RS 422A RJ 45 MIC LINE input φ3 5 mm stereo mini jack Input impedance High impedance During MIC input Supported mic Stereo mic plug in poower on off switching via menu Supply voltage 2 5 V 0 5 V Mic input sensitivity Approx 40 dBV 3 dBV 0 dB 1 V Pa 1 kHz During LINE input Input level Approx 10 dBV 3 dBV FUNCTIONS AND PERFORMANCE Camera unit Imaging sensors 1 2 86 typ...

Страница 54: ...safety the unit must be secured using the mount bracket supplied Camera pan tilt head control IP connecting cable When connecting through a hub LAN cable 5 category 5e or above straight cable max 100 m 328 ft When a hub is not used LAN cable 5 category 5 or above crossover cable max 100 m 328 ft RP connecting cable LAN cable 5 category 5 or above straight cable max 1000 m 3280 ft RS 422A AW series...

Страница 55: ...e cover 37 I IR ID switches 37 41 L LAN connector for IP control 37 M Mount bracket for installation surface 36 N NDI HX compatible switcher 18 O Optional accessories 32 P Plug in viewer software 43 R Remote control IDs 41 RS 232C connectors 37 RS 422 connector 36 S SDI OUT connector 37 Service switches 37 Simultaneous output conditions 38 Square holes for cable cover tabs 37 Status display lamp 3...

Страница 56: ...Web Site http www panasonic com Panasonic Corporation 2018 ...

Отзывы: