57
Web setting
Web setting screen
(continued)
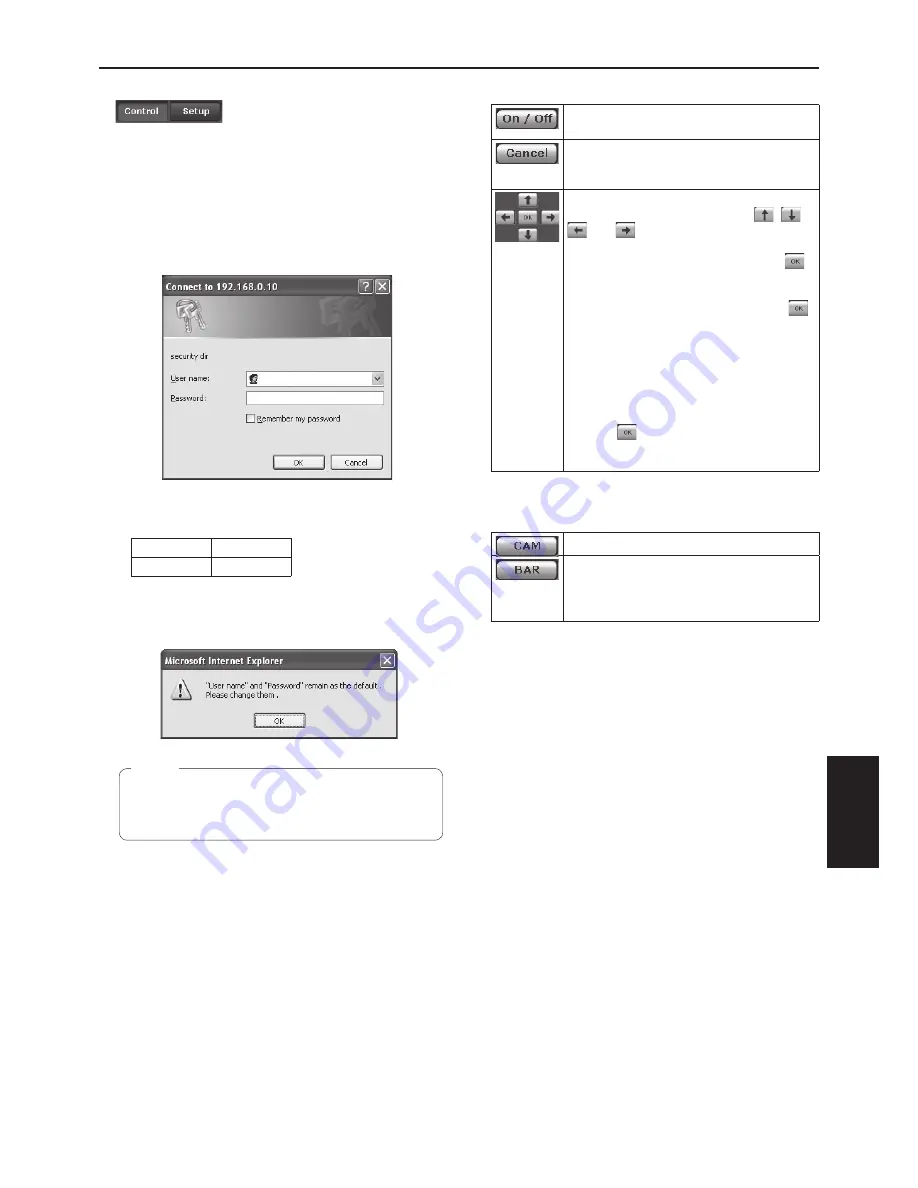
Control button / Setup button
Press the Control button to switch to the Control screen
on which to control such operations as the panning, tilting,
zooming and focusing of the camera. (See page 59)
Press the Setup button to switch to the Setup screen on
which to establish the camera’s settings.
(See page 61)
When the Setup button is pressed, the login screen shown
below is displayed.
When logging in for the first time, input the following
default values.
User name
admin
Password
12345
When the OK button is clicked after inputting the values,
the screen shown below is displayed.
Click the OK button.
On the User auth. screen (see page 75), register
the user name and password of your choice at the
earliest possible opportunity.
Note
OSD Menu Operation
Use this to select whether the camera’s
on-screen displays are to be shown.
It cancels the selection of the setting which
is being changed.
It restores the pre-change setting.
Use these to perform the menu operations.
The items are selected using the
,
,
and
buttons.
If a selected item has a sub menu, this
sub menu is displayed by pressing the
button.
When the cursor is moved to any item on
the bottom-level setting screen and the
button is pressed, the setting of the selected
item starts flashing.
A setting for a regular menu item is
reflected immediately if it is changed while
it is still flashing. However, there are a
number of menu items (Scene, Format and
Initialize) whose setting is reflected only
after the
button has been pressed,
causing the setting to stop flashing and the
new setting to be entered.
Camera button / Color bar button ( CAM/BAR)
Use this to output the camera pictures.
Use this to output the color bar signals.
The “Down CONV. Mode” item is fixed at
“Squeeze” while the color bar signals are
displayed.
Содержание AW-HE120KE
Страница 99: ...99 Memo ...
Страница 100: ...2011 ...


