34 (E)
Regular shooting
Before shooting, check that the camera-
recorder is operating properly.
Check the equipment as warranted by the
shooting conditions.
$
Battery
(P22)
Have a fully charged battery ready.
We also recommend that you keep a spare
battery on hand.
$
Cassette tape
(P12, P17)
Check that the cassette tape can be used for
recording:
O
Is the cassette’s accidental erasure
prevention tab not set to the SAVE
position?
O
Is there not already any important material
on the tape?
O
Is the cassette cover closed securely?
$
Viewfinder
(P25)
Check whether the viewfinder’s diopter
adjustment has been made.
$
Zoom/focus/iris
O
Check that motor-driven zooming is
possible.
(P35)
O
Check that the focusing can be performed
both automatically and manually.
(P41)
O
Check that the lens iris operations can be
performed automatically and manually.
(P43)
$
Time data
(P28-P33)
O
Check that the calendar and time have
been set correctly.
O
Check that the time code and user’s bit
have been set correctly.
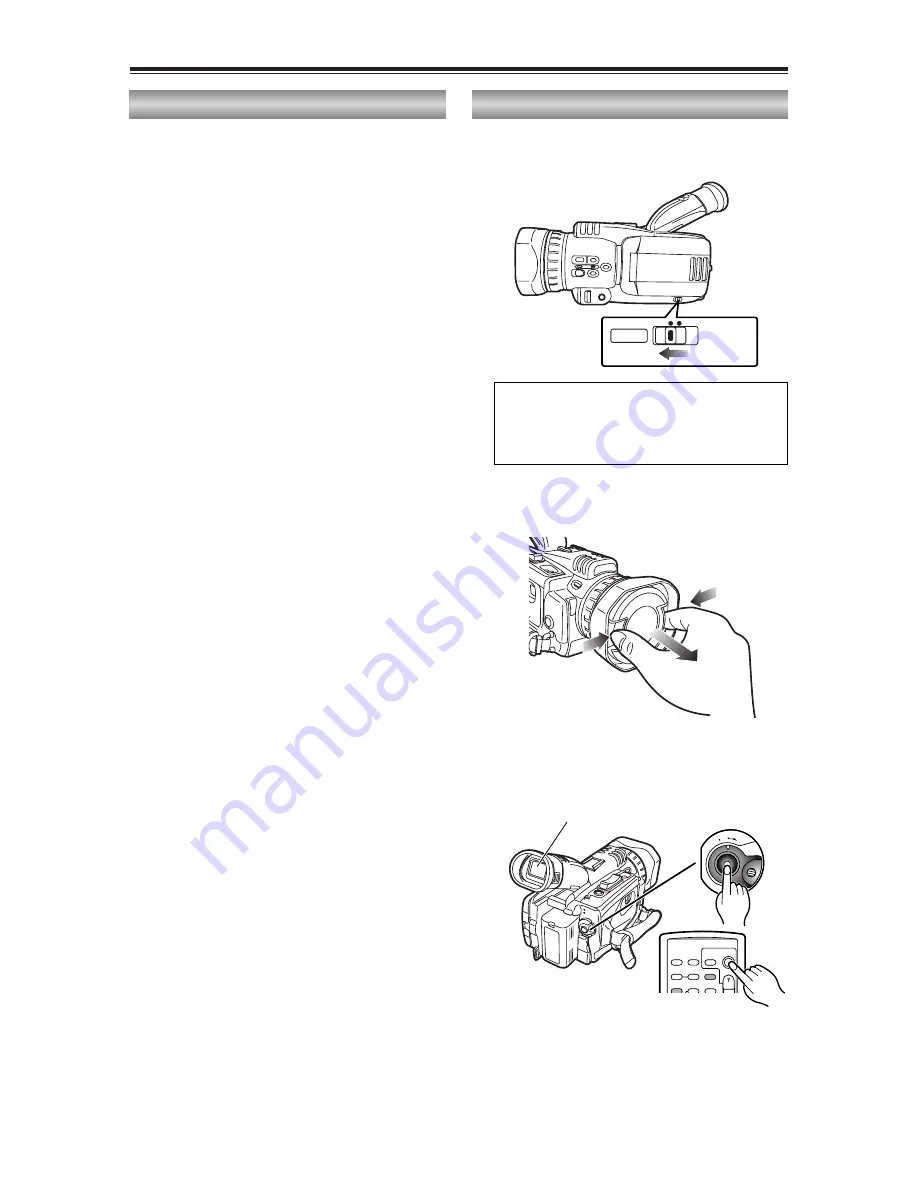
Preparation and inspections
1
Set the AUTO/MANUAL selector switch to
the AUTO position.
2
Squeeze both sides of the lens cap and
remove it.
3
Look through the viewfinder and check what
you want to shoot.
4
Shooting starts when you press the
START/STOP (red) button on the POWER
lever.
Press this button again to pause shooting
(shooting pause mode).
Shooting
3
4
OFF
ON MODE
OSD
COUNTER RESET
TITLE
V
OL +
MULTI/
P-IN-P
REC
A.DUB
ZOOM
DATE/
TIME
PHOTO
SHOT
START/
STOP
Viewfinder
1
MANUAL
AUTO
2
The following items are adjusted automatically in the
auto mode.
O
Focusing
O
Shutter speed
O
Iris
O
Gain
O
White balance


