6-2
6.1 Display and operation in R (Register) mode
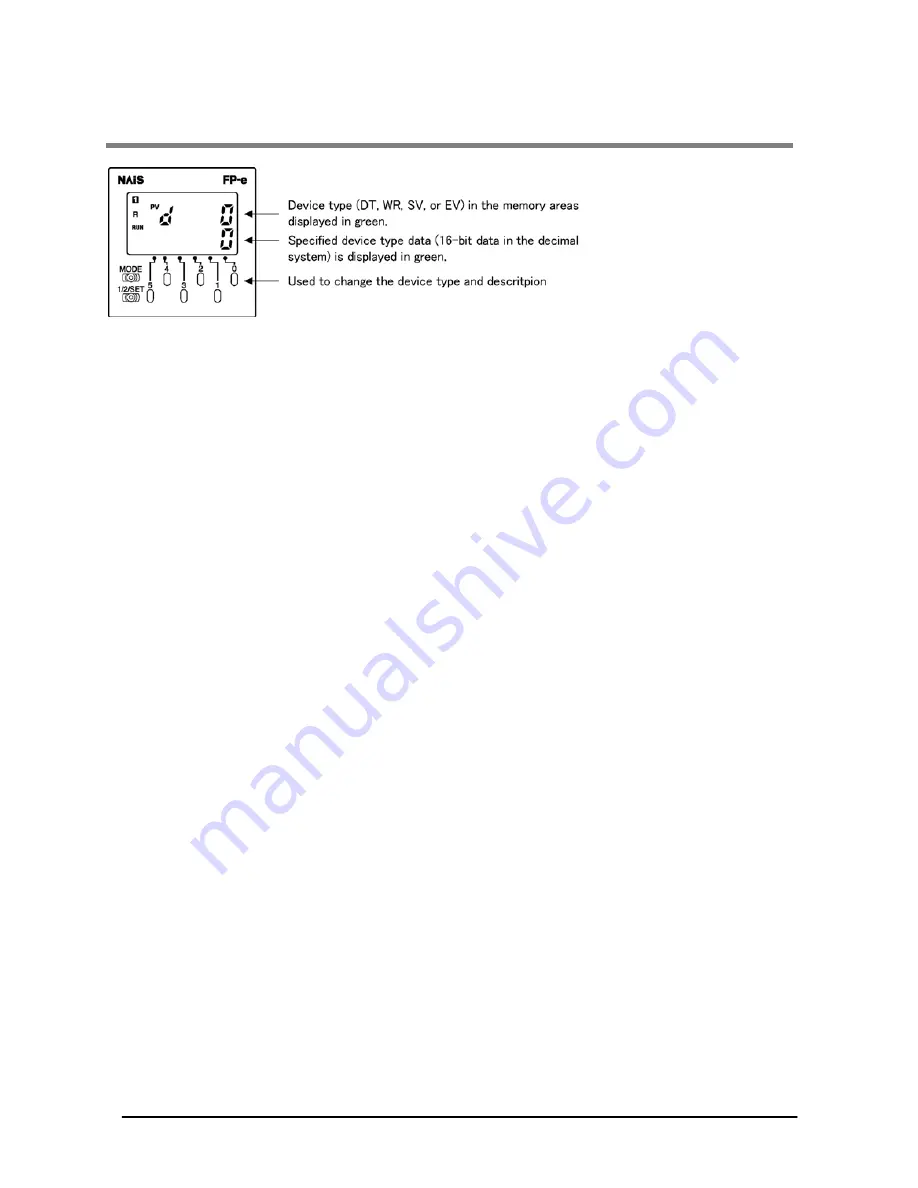
1. When the device type (DT, WR, SV, or EV) in the memory area is specified using the front
operation switch, the specified device type data is displayed.
- When “PV” blinks, the device type in the memory area can be specified.
- The device No. can be specified using the switches “0” to “3.” The device type can be switched using
the switch “4” in the following order: DT
→
WR
→
SV
→
EV
Note:
When specifying the No. which is out of the designated range,
the display color in the upper
section switches from green to red and the display in the lower section turns off.
2. The specified device data can be changed using the front switch.
- When the switch “5” is pressed for about 1 second, “SV” blinks. In this status, the data can be
changed.
- When the switch “0” to “5” is pressed, the data in the lower section is changed and then blinks.
- When the “1/2/SET” switch is pressed for about 1 second, the blinking stops and the data change
completes.
- For canceling the data change process before the data is not yet completely changed, press the
operation switch “5” for about one second. Then, blinking the display data stops.
- For changing to the device specification mode after the data change has completed, press the
operation switch “5” for about one second. When the mode changes to the device specification mode,
“PV” blinks.
- The mode cannot be changed to the device specification mode before the data is not yet completely
changed. Wait for the completion of the data change process or cancel the data change process to
change the mode to the device specification mode.
Note:
If you try to change the data to the one which is out of the specified range, the data is displayed in
red only when the “1/2/SET” switch is pressed, and blinking does not stop.
When the power ON/OFF or RUN/PR OG. mode switching is performed, the data which is not yet
completely changed using the front switch will be cancelled.
The
data
change can also be cancelled by turning Y38 ON.
(This is available for Ver. 1.1 or higher.)
3. Pressing the “1/2/SET” switch changes the current screen to 1
st
screen or 2
nd
screen.
4. When “MODE” switch is pressed for about 2 seconds, “LOCK” is displayed. In this ”LOCK”
status, the display cannot be changed even if any switches are pressed.
Phone: 800.894.0412 - Fax: 888.723.4773 - Web: www.clrwtr.com - Email: [email protected]
Содержание AFPE214325
Страница 1: ...Phone 800 894 0412 Fax 888 723 4773 Web www clrwtr com Email info clrwtr com ...
Страница 2: ...Phone 800 894 0412 Fax 888 723 4773 Web www clrwtr com Email info clrwtr com ...
Страница 14: ...1 6 Phone 800 894 0412 Fax 888 723 4773 Web www clrwtr com Email info clrwtr com ...
Страница 56: ...4 12 Phone 800 894 0412 Fax 888 723 4773 Web www clrwtr com Email info clrwtr com ...
Страница 60: ...5 4 Phone 800 894 0412 Fax 888 723 4773 Web www clrwtr com Email info clrwtr com ...
Страница 66: ...6 6 Phone 800 894 0412 Fax 888 723 4773 Web www clrwtr com Email info clrwtr com ...
Страница 67: ...Chapter 7 I I O Monitor Mode Phone 800 894 0412 Fax 888 723 4773 Web www clrwtr com Email info clrwtr com ...
Страница 69: ...Chapter 8 PID Control Phone 800 894 0412 Fax 888 723 4773 Web www clrwtr com Email info clrwtr com ...
Страница 80: ...Phone 800 894 0412 Fax 888 723 4773 Web www clrwtr com Email info clrwtr com ...
Страница 81: ...Chapter 9 Specifications Phone 800 894 0412 Fax 888 723 4773 Web www clrwtr com Email info clrwtr com ...
Страница 97: ...Chapter 10 Dimensions Phone 800 894 0412 Fax 888 723 4773 Web www clrwtr com Email info clrwtr com ...
Страница 98: ...10 2 10 1 Dimensions Phone 800 894 0412 Fax 888 723 4773 Web www clrwtr com Email info clrwtr com ...
Страница 99: ...Chapter 11 Appendix Phone 800 894 0412 Fax 888 723 4773 Web www clrwtr com Email info clrwtr com ...
Страница 228: ...11 130 11 7 ASCII Codes Phone 800 894 0412 Fax 888 723 4773 Web www clrwtr com Email info clrwtr com ...


