background image

Appendix B. 

92

Model CTF878 Startup Guide

Содержание CTF878

Страница 1: ...panametrics com Flow 910 254U Rev A AUG 2021 Model CTF878 Clamp On Tag Flowmeter Startup Guide...

Страница 2: ......

Страница 3: ...l contains one or more registered trademarks of Baker Hughes Company and its subsidiaries in one or more countries All third party product and company names are trademarks of their respective holders...

Страница 4: ...ii no content intended for this page...

Страница 5: ...purpose and warranties arising from course of dealing or usage or trade Return Policy If a Panametrics Sensing Inc instrument malfunctions within the warranty period the following procedure must be c...

Страница 6: ...Warranty iv Model CTF878 Startup Guide no content intended for this page...

Страница 7: ...erature and Pressure Transmitters 32 2 1 13 PC Board Connections 34 2 1 14 Option Card Wiring 36 Chapter 3 3 1 Initial Setup 41 3 1 1 Introduction 41 3 1 2 Powering Up 41 3 1 3 Using the Screen 42 3 1...

Страница 8: ...Contents vi Model CTF878 Startup Guide...

Страница 9: ...sec 46 m sec and it is less susceptable than previous systems to cross flow disturbances 1 1 1 1 Electronics Package In addition to the built in LCD display the flowmeter provides the following 1 Two...

Страница 10: ...thin the Main Menu a set of forms windows asks you all the necessary setup information for a particular site Once you complete answering the necessary questions you simply save the information to a fi...

Страница 11: ...clamp on ultrasonic transducers externally mounted on a pipe The transducers are arranged in two pairs one upstream and one downstream The upstream and downstream pairs are each composed of one trans...

Страница 12: ...Typical CTF878 System Setup using a CFT V Clamping Fixture 1 GE January 28 2009 Wiring Diagram Flow P T Ch 1 TX Ch 2 TX Ch 2 RX Ch 1 RX Preamplifiers 1080 installed on receiving transducers Transducer...

Страница 13: ...l safety authorities to verify the safety of any procedure or practice WARNING In order to meet CE Mark requirements all wiring connections must be made in accordance with the instructions in Appendix...

Страница 14: ...dard Screwdriver to mount the electronics console etc Phillips Screwdriver to remove and replace the plastic shroud Wire Cutter to cut cables and wires Wire Stripper to prepare wires for TB connection...

Страница 15: ...t tipped Ink Marker to mark the pipe for fixture transducers placement Wall Thickness Gauge to determine pipe wall thickness Adjustable Wrench to install the clamping fixture Calipers to measure the c...

Страница 16: ...tandard CTF878 electronics package is housed in a NEMA 4X weather resistant enclosure Refer to Figure 24 on page 39 for the mounting dimensions of this enclosure WARNING Proper grounding of the CTF878...

Страница 17: ...as follows WARNING Improper connection of the line power leads or connecting the meter to the incorrect line voltage may damage the unit It may also result in hazardous voltages at the clamping fixtu...

Страница 18: ...he damping material is installed prior to the fixture itself To install a clamping fixture on pipes over 12 proceed to Installing the CFT PI Clamping Fixture on page 16 2 1 7 1 Locating the CFT V Clam...

Страница 19: ...ing material Setting the Transducer Spacing and TAG path The following procedure can be easily done before installing the clamping fixture on the pipe For a more detailed description of these steps re...

Страница 20: ...uch of the paper layer is peeled off at one time the damping material will be harder to handle and apply to the pipe without making air bubbles IMPORTANT The damping material should adhere very tightl...

Страница 21: ...uide 13 Chapter 2 Figure 3 Damping Material Orientation and Application for CFT V Fixtures Pipe 1st Damping Material Strip Top End of Damping Material Clamping Fixture Bracket Locations 2nd and 3rd Da...

Страница 22: ...the transducer spacing see Setting the Transducer Spacing and TAG path on page 11 3 Set the TAG path one side at a time and tighten the yoke screws before repeating this step for the other side Figur...

Страница 23: ...ust the spacings loosen the nut on the smaller spacing rod and tighten the nut on the bigger spacing rod 5 Use the caliper again and check to see if the bottom and top spacings on one end are the same...

Страница 24: ...cers are mounted 4 Because condensate or sediment at the bottom of the pipe may cause attenuation of the ultrasonic signal set up the clamping fixture so that the transducers are on the side of a hori...

Страница 25: ...pipe IMPORTANT The measurement plane the plane formed by the four transducers should be horizontal 3 and 9 o clock or as close to horizontal as possible 1 Using a pipe wrap and a felt tipped ink marke...

Страница 26: ...posite side of the pipe The clamping fixture should now look like Figure 6 below WARNING Proper grounding of the clamping fixture using the grounding lugs provided is required to prevent the possibili...

Страница 27: ...ial will be harder to handle and apply to the pipe without making air bubbles IMPORTANT The damping material should adhere very tightly to the pipe 3 Continue to peal off the paper and apply the dampi...

Страница 28: ...should be used Note If the pipe temperature is over 150 F a PDJ pipe damping jacket with DMP 3 damping material applied is required see Installing the PDJ Damping Jacket on page 23 Preparing the Pipe...

Страница 29: ...e pipe and use the palm of the hand to press it onto the pipe see Figure 8 below Figure 8 Applying DMP 3 Damping Material 5 Spread the DMP 3 material so that it covers the whole area under the fixture...

Страница 30: ...2 Model CTF878 Startup Guide 7 Remove the DMP 3 material from the transducer locations see Figure 10 below and proceed to Installing Transducers on page 24 Figure 10 DMP 3 Damping Material with Fixtur...

Страница 31: ...pe Damping Jacket Dwg 583 145 1 Remove any insulation from the installation area as well as any loose paint rust and high spots from the pipe 2 Remove the backing paper from the inside of the pipe dam...

Страница 32: ...ly on the location and alignment of the transducers Now that the clamping fixture is in place use the following guidelines to install the four transducers For detailed instructions on installing clamp...

Страница 33: ...be difficult to complete because the yokes are partially in the way If necessary loosen the yoke screws and move the yokes 5 Using a solvent consistent with safety disposal and cleaning requirements...

Страница 34: ...r transducer orientation and complete the following steps one transducer at a time Figure 14 Typical CFT V Clamping Fixture Transducer Setup top view of pipe 4 Carefully position the transducer inside...

Страница 35: ...ing Cable Connections Panametrics Sensing supplies transducer cables up to 500 ft 153 m in length If longer cables are required consult the factory for assistance When installing the transducer cables...

Страница 36: ...er 2 28 Model CTF878 Startup Guide WARNING Proper grounding of the clamping fixture using the grounding lugs provided is required to prevent the possibility of electric shock and to meet CE Mark compl...

Страница 37: ...c buildup by shorting the center conductor of the transducer cables to the metal shield on the cable connector 1 Using a pair of coaxial cables with BNC to BNC connectors supplied by the factory or eq...

Страница 38: ...Chapter 2 30 Model CTF878 Startup Guide Figure 17 Transducer Connections Main PC Board Upstream Transmitter TX1 Downstream Transmitter TX2 Upstream Receiver RX1 Downstream Receiver RX2...

Страница 39: ...1 S TRE AM UP FLOW UPSTREAM DOWNSTREAM ORN RED GRN BLU TRANSMIT TRANSDUCER PREAMPLIFIER PREAMPLIFIER ELECTRONICS CONSOLE CONNECTIONS CAUTION As part of maintaining the environmental rating NEMA TYPE 4...

Страница 40: ...insulated the coupling may need to be extended to provide convenient access Of course other types of mounting ports including flanged ports may be used for the transmitters Figure 19 below shows a typ...

Страница 41: ...ERENCEONLY IN OUT IN REFERENCEONLY PRESSURETRANSMITTER SENSOR SENSOR PIN 24V IN1 IN1 24V 1 2 3 4 PRESSUREINPUT CTF878 PIN 5 6 7 8 24V IN2 IN2 24V TEMPERATURETRANSMITTER OUT REFERENCEONLY IN OUT IN REF...

Страница 42: ...erface The RS232 serial communications port may be used for connecting the CTF878 flowmeter to a personal computer The RS232 serial interface is wired as Data Terminal Equipment DTE and the signals av...

Страница 43: ...rt to network multiple CTF878 flowmeters to a single computer terminal To wire the RS485 serial port complete the following steps 1 Disconnect the main power to the unit and open the cover on the elec...

Страница 44: ...both conventional and fail safe mode Connect the two wires required for each alarm relay in accordance with the pin number assignments shown in Figure 25 on page 40 Figure 21 Conventional and Fail Saf...

Страница 45: ...o the temperature pressure card described above and they should be wired in the same manner see Figure 22 on page 37 The analog inputs on the option card s can be calibrated with the CTF878 s built in...

Страница 46: ...r can accommodate up to 4 analog outputs option cards Each analog outputs option card includes four isolated 0 4 20 mA outputs designated as A B C and D Connections to these outputs may be made with s...

Страница 47: ...are in inches millimeters ENTER MENU ESC SEL 7 4 1 0 8 5 2 9 6 3 F1 F2 F3 CTF878 Flowmeter 11 46 291 14 24 362 13 48 342 1 20 30 Typ 2 42 62 5 08 129 Typ 1 30 33 1 75 44 1 10 28 6 places 88 22 10 plac...

Страница 48: ...mon C Relay A Normally Closed NC Relay B Normally Open NO Relay B Common C Relay B Normally Closed NC Relay C Normally Open NO Relay C Common C Relay C Normally Closed NC 4 20 mAANALOGOUTPUTS Descript...

Страница 49: ...t this information is not required to begin taking measurements Note See the Programming Manual for information on those User Program options not covered in this manual 3 1 2 Powering Up Immediately u...

Страница 50: ...n in Figure 27 below Figure 27 CTF878 Screen in Operate Mode The top line of the screen is the status bar which normally displays the time and date However when you press MENU the menu key the menu ba...

Страница 51: ...of the screen displays the three function key options F1 F2 and F3 These keys have different functions depending on the task being performed The initial factory setup configuration for these keys is...

Страница 52: ...24 keys that are labeled with their functions The complete keypad is illustrated in Figure 28 below and a detailed description of the functions for each of the 24 keys is listed in Table 3 on page 7...

Страница 53: ...to scroll through menu choices in programming mode Press as a backspace key in programming mode Help Key Use to access on line help See the next section for details Escape Key Press to exit menus or...

Страница 54: ...ng instructions see the Program Menu Map Figure 46 on page 65 Figure 29 Program Menu To scroll to a particular option press the or arrow keys until you reach the option Then press ENTER to open the op...

Страница 55: ...ter the Transducer option scroll to the Transducer tab on the Program Menu and press ENTER The screen appears similar to Figure 30 below To step through each parameter press the key Refer to the Progr...

Страница 56: ...es that the transducer selection must match the Receiver Board Figure 32 Transducer Selection Warning Screen The Receiver Board option number corresponds to the frequency range selected with the origi...

Страница 57: ...on number is 3 Figure 33 Transducer Type Options The program now varies depending on whether you have selected typical or SPECIAL transducers If you have selected a typical transducer the CTF878 comes...

Страница 58: ...encies selected in the Programming Menu MUST correspond to those of the installed Frequency Board The frequency printed on the transducers represents a frequency band of operation and does not always...

Страница 59: ...From the Transducer window you can scroll back up to the Transducer tab and press the arrow key to reach the Pipe window and press ENTER The screen appears similar to Figure 34 below To step through e...

Страница 60: ...rdened Steel Carbon Steel Mild Steel Stainless 302 Steel Stainless 303 Steel Stainless 304 Transduc Mate OD mm Nominal Copper Aluminum rolled Brass Copper annealed Copper rolled Copper Nickel 10 Coppe...

Страница 61: ...ompt moves to the outside diameter OD text box Type the OD in mm or in whichever is displayed into the box and press ENTER to confirm your choice or Move the prompt to the circumference ODxPI text box...

Страница 62: ...ey twice to move the prompt to the Nominal pipe size drop down menu Press ENTER to open the menu Scroll to the desired pipe size and press ENTER to confirm your choice c Press the key to move the prom...

Страница 63: ...TER to confirm your selection Note If you select Air or Natural Gas the meter sets the soundspeed and suggests a value for K V x 10 6 If you wish you can change the value of K V x 10 6 If you select O...

Страница 64: ...tten if the user wants to use a value other than the one calculated by the flowmeter However it must always match the TAG Path set on the clamping fixture for reliable operation If the path is changed...

Страница 65: ...here each option card is installed Cards are numbered from right to left Figure 39 Selecting Analog Output The screen appears similar to Figure 40 below To step through each parameter press the key Se...

Страница 66: ...hown in Figure 42 below Figure 42 Data Source Selection Window a Press ENTER to open the window b Scroll to the desired output type c Press SEL to confirm your selection d The prompt then moves to a l...

Страница 67: ...sks you to select how the CTF878 will handle the analog outputs in the event of a fault condition The meter offers three alternatives Hold Last Value hold the last good reading Force Low force the rea...

Страница 68: ...mbered from right to left The screen appears similar to Figure 43 below To step through each parameter press the key Refer to the Program Menu Map Figure 48 on page 67 Figure 43 Digital Output Window...

Страница 69: ...s F3 OK to confirm your selection 3 The last set of parameters that appears depends on the selection you made at the Function prompt If you selected Pulse Totalizer The prompt asks for the units pulse...

Страница 70: ...Menu Map Figure 46 on page 65 Figure 44 Calibration Factor Window 1 To enable or disable the Calibration Factor scroll down to the next line and select On or Off a Use the and keys to scroll to the ap...

Страница 71: ...ndow without confirming the entries press F2 Cancel or the ESC key The CTF878 returns to Operate Mode If you selected Table The menu asks first for the data source and then for the entry of values int...

Страница 72: ...8 and 9 for the remainder of the table 11 When you have completed entering values press F3 OK to confirm the table and return to the Correction Factors window You have completed entering data for corr...

Страница 73: ...Tungsten Titanium Tin Plastic Nickel Monel Zinc Cast Iron PVC CPVC Wall Thickness ODor ODxPI Air Natural Gas Other Fluid Fluid Tag Path Txdr Spacing Brass Aluminum DIN Wall Thickness ODor ODxPI F2 no...

Страница 74: ...ters hr 3 3 3 Velocity m s UserF8 UserF7 UserF6 UserF5 UserF4 UserF3 UserF2 UserF1 MMHG KPA Pressure Bars Temp K Temp C Hectare cm Fwd liters Fwd m Elapsed Hectare m Elapsed Hectare m Hectare cm Rev l...

Страница 75: ...UserF7 UserF6 UserF5 UserF4 UserF3 UserF2 UserF1 MMHG KPA Pressure Bars Temp K Temp C Fwd liters Fwd m Elapsed Elapsed Rev liters Rev m Elapsed Fwd m Fwd liters Elapsed Rev liters Rev m Frequency Fun...

Страница 76: ...Model CTF878 Startup Guide 68...

Страница 77: ...ly in numeric format but as line or bar graphs as well You can configure any given measurement for your particular requirements To configure an individual measurement press SEL from the Operate Mode w...

Страница 78: ...n the drop down list of format choices b Scroll to the appropriate selection c Press ENTER to confirm your choice 2 The second step asks you to choose the number of decimal places to be displayed Avai...

Страница 79: ...to program the minimum or maximum values displayed the time interval and the display of the average value To enter the Limits option 1 Press SEL from the Operate Mode window until you have reached th...

Страница 80: ...b The second box asks for the interval in terms of seconds minutes hours or days Press ENTER to open the drop down menu and then press the or keys to move to the desired parameter Press ENTER to confi...

Страница 81: ...ears similar to Figure 53 below The left column displays categories of data while the right column displays English and metric measurement units or with the Diagnostics source shown a list of diagnost...

Страница 82: ...8 keypad The Menu Bar replaces the Status Bar at the top of the screen Scroll to Site using the and keys Press ENTER or the arrow key The screen now appears similar to Figure 54 below While following...

Страница 83: ...he designated number of windows For example Figure 55 below shows the screen displayed in Figure 51 on page 71 reconfigured for a single view Figure 55 Display Screen Configured for Single View Note T...

Страница 84: ...ar menu To customize a softkey from within the Site Menu 1 From the Site Menu shown in Figure 54 on page 74 use the or arrow keys to move to the FKeys entry on the menu Press ENTER The screen now appe...

Страница 85: ...58 on page 78 with the F1 window displaying Site Manager Pressing F1 opens the Site Manager window To customize a softkey from a particular menu 1 Open the desired menu on the Menu Bar see other chap...

Страница 86: ...to Figure 56 on page 76 2 Use the or arrow keys to move to the desired Clear FKey 1 2 or 3 entry on the menu Press ENTER The softkey window clears You can also clear the softkey through the Configure...

Страница 87: ...About window scroll to the About option on the Site Menu and press ENTER The screen appears similar to Figure 59 below To access data on your specific CTF878 press F2 Next Figure 59 The About Window T...

Страница 88: ...4 View FKeys About New Open Save Save As 2 View File Sort Clear F3 Clear F2 Clear F1 F3 F2 F1 Manager Refresh Rename Message Delete Name File Name Name File Mes By Name By Date Menu Item Menu Item Men...

Страница 89: ...nts in linear or circular format for standard and error logs Keypad programmable for log units log interval and start and stop times 5 1 1 3 Display Functions Graphic display shows flow in numeric or...

Страница 90: ...ng Pipe Sizes 3 to 24 80 mm to 610 mm ANSI Velocity Range for Acoustically Conductive Gases Minimum Velocity 3 6 ft sec 1 1 m s Maximum Velocity 150 ft sec 45 7 m s Note The CTF878 requires flow to mo...

Страница 91: ...Frequency Mode Pulse frequency proportional to magnitude of parameter e g 10 Hz 1 ft3 min Alarm Relays Select up to two boards of the following types see note below General Purpose Relay Board with th...

Страница 92: ...Condensing Vibration Unit 10 Hz to 75 Hz Sinewave 0 020 Peak to Peak Displacement Vibration Unit w Packaging 10 Hz to 75 Hz Sinewave 0 020 Peak to Peak Displacement 5 1 3 5 Regulatory Safety Certifica...

Страница 93: ...e Transducer Preamplifier Temperature Range Ambient Storage Operating Temperature 40 to 167 F 40 to 75 C Process Temperature Rated the same as the transducer Housing Options External Preamplifier moun...

Страница 94: ...nd plastics No lined pipes 5 1 5 2 Sizes 3 to 24 in NB ANSI 80 to 610 mm NB and larger 5 1 5 3 Wall Thickness Up to SCH 80 Thicker walled pipes may be possible consult the factory 5 1 5 4 Pressure Req...

Страница 95: ...must each have an external ground wire attached Note If the CTF878 is wired as described in this appendix the unit will comply with the EMC Directive 2004 108 EC Table 3 Wiring Modifications Connectio...

Страница 96: ...Appendix A 88 Model CTF878 Startup Guide...

Страница 97: ...ion Cards Installed Whenever an option card is installed in one of the CTF878 s expansion slots record the type of card and any additional setup information in the appropriate row of table below Slot...

Страница 98: ...odel Reference Software Vers Date Serial Signal Processing Parameters Velocity Averaging C Corr Avg Transducer Parameters Pipe Parameters Std Trans Pipe Material Spec Trans Pipe O D Frequency Up Pipe...

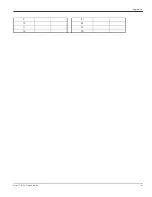
Страница 99: ...Model CTF878 Startup Guide 91 Appendix B 9 21 10 22 11 23 12 24...

Страница 100: ...Appendix B 92 Model CTF878 Startup Guide...

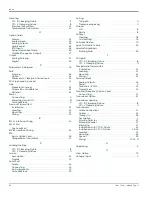
Страница 101: ...Display 69 Connecting See Part Name Connectors Electrical 8 D Damping Material CFT PI Clamping Fixture 19 CFT V Clamping Fixture 12 DMP 1 12 19 DMP 3 20 PDJ Pipe Damping Jacket 23 Data Record Initial...

Страница 102: ...e CFT PI Clamping Fixture 16 CFT V Clamping Fixture 11 Screen Description 42 Display 74 Serial Port Cable 34 Connecting 34 Pin Assignments 34 Terminal Block 34 Setting TAG path 11 Transducer Spacing 1...

Страница 103: ...ing CE Mark Compliance 87 Option Card See Card Name Pressure Transmitters 32 RS232 Interface 34 RS485 Interface 35 Temperature Transmitters 32 Terminal Block See Block Name Transducers 27 29 31 Y Yoke...

Страница 104: ...Index 96 Doc Tittle Manual Type...

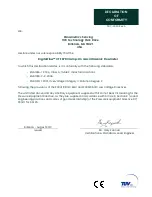
Страница 105: ...EN 61326 2 3 2006 EN 61010 1 2001 Overvoltage Category II Pollution Degree 2 following the provisions of the 2004 108 EC EMC and 2006 95 EC Low Voltage Directives The unit listed above and any ancilla...

Страница 106: ......

Страница 107: ......

Страница 108: ...t and company names are trademarks of their respective holders 910 254U Rev A Customer Support Centers U S A The Boston Center 1100 Technology Park Drive Billerica MA 01821 U S A Tel 800 833 9438 toll...

Отзывы: