

© Pan Acoustics GmbH
Page 7 of 10
Manual
Doc. No
.: 2022_01588 - 16.03.2022
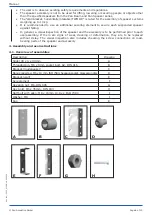
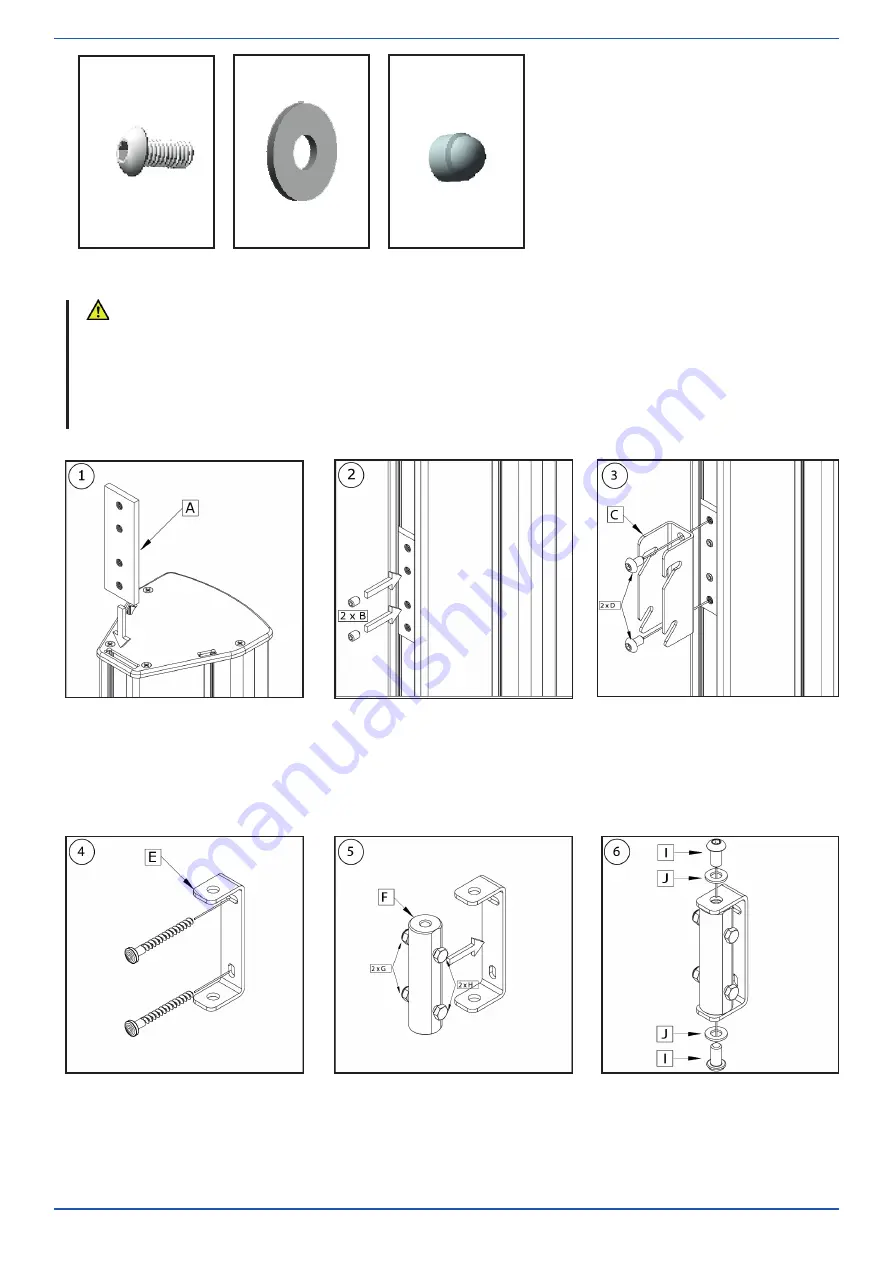
4.2. Assembly
I
J
K
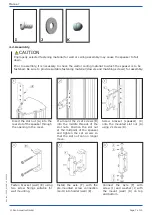
Insert the slot nut (A) into the
rear slot of the speaker through
the opening in the cover.
Pre-mount the 2 set screws (B)
into the middle threads of the
slot nuts. Position the slot nut
at the midpoint of the speaker
and tighten the set screws so
that the slot nut can no longer
move.
Screw bracket (speaker) (C)
onto the mounted slot nut (A)
using 2 screws (D).
Improperly selected fastening material for wall or ceiling assembly may cause the speaker to fall
down.
Prior to assembly, it is necessary to check the wall or ceiling material to which the speaker is to be
fastened. Be sure to provide suitable fastening material (dowels and matching screws) for assembly.
CAUTION
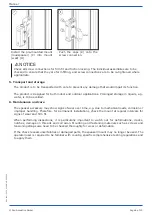
Fasten bracket (wall) (E) using
two screw fi xings suitable for
wall mounting.
Install the axle (F) with the
pre-mounted screw connection
(G+H) into holder (wall) (E).
Connect the Axle (F) with
screw (I) and washer (J) with
the mount (wall) (D) on top
and bottom.


