


Basic Operations
(Continued)
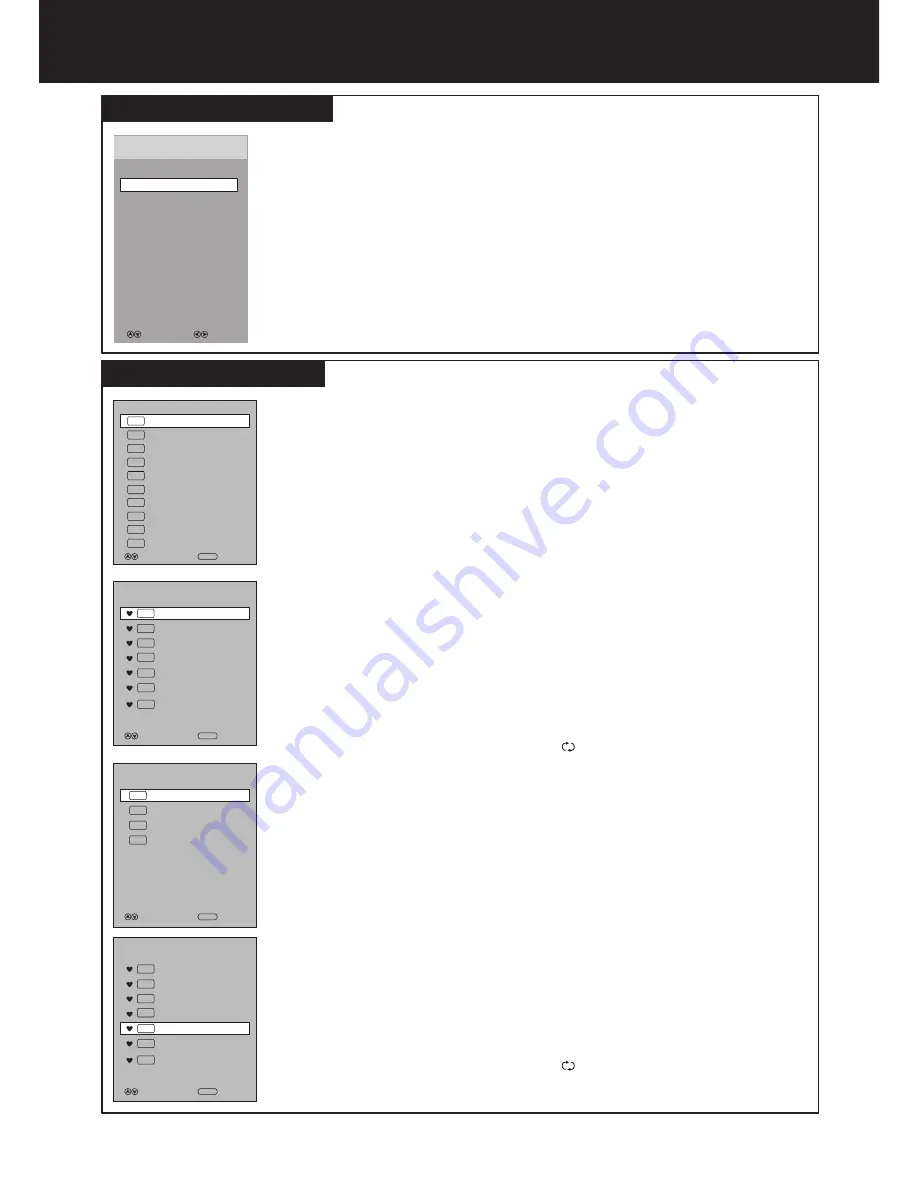
Input
Source
Selection
16
To select the input source:
1
Press
SOURCE
button. The
Input Source
list appears.
Press
6
or
5
to select
the input source, then press
OK
or
4
to confirm your choice.
The TV switches to the selected source.
2
Programme
Selection
Analogue programme selection
Be sure to select
ATV
through the
Input Source
menu (See the above steps for
source selection).
!
Press
to go to the next or previous channel. The skipped channels
can not be selected.
!
Press the
number
buttons to directly select any channel you want, then wait for the
channel to change.
Note
: Button presses must be within three seconds of each other.
!
Press
LIST
to display the
Channel List
, then press
6
or
5
to select a channel, and
then press
OK
.
!
After you have created the favorite channel list, you can press
FAV.LIST
button to
display the favorite channel list. Use
5
or
6
to select a channel and then press
OK
.
!
To go to the previous channel viewed, press
.
CH
5
or
CH
6
Channel List
2 ABC TV Sydney
DTV
20 ABC HDTV
21 ABC2
22 ABC TV
Favourite List
Move
OK
Select
Move
OK
Select
Channel List
1
TV
S-03
2
TV
C-42
3
TV
S-04
4
TV
C-04
Move
OK
Select
DTV
DTV
DTV
350
DTV
CH1
DTV
DTV
DTV
351 CH2
352 CH3
353 CH4
2 ABC TV Sydney
DTV
22 ABC TV
DTV
350
DTV
CH1
DTV
353 CH4
DTV
DTV
354 CH5
355 CH6
1
TV
S-03
2
TV
C-42
4
TV
C-04
Favourite List
Move
OK
Select
2 ABC TV Sydney
DTV
22 ABC TV
DTV
350
DTV
CH1
DTV
353 CH4
1
TV
S-03
2
TV
C-42
4
TV
C-04
Digital programme selection
After you have tuned the TV, you have several ways to select DTV programmes.
Be sure to select
DTV
through the
Input Source
menu (See the above steps for
source selection).
When watching digital programme and you want to listen to radio, simply press
TV/RADIO
button to switch. To return to TV program, press
TV/RADIO
button again.
(When watching analogue programme, the
TV/RADIO
button does not work.)
!
Press
CH
or
CH
to go to the next or previous channel. The skipped channels can
not be selected.
!
Press the
number
buttons to directly select any channel you want, then wait for the
channel to change.
Note
: Button presses must be within three seconds of each other.
!
Press
LIST
to display the
Channel List
, then press
6
or
5
to select a channel, and
then press
OK
.
!
After you have created the favorite channel list, you can press
FAV.LIST
button to
display the favorite channel list. Use
5
or
6
to select a channel and then press
OK
.
!
To go to the previous channel viewed, press
.
5
6
Select
Move
DTV
AV1
Component1
HDMI1
HDMI2
Input Source
ATV
Component2
D-SUB
HDMI3
USB
AV2


