background image


Page  13     Gecko Star 2.0                                                                                                                                                                                                                                 01/2017 

 
6.7   WHEEL ADJUSTMENTS GECKO STAR 2.0 or 2.0 (R) 

 
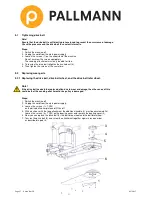
Note! 

The best sanding results along with optimum machine control are achieved if the sanding 
attachment is set up such that approx. 1/3 of the sanding disc is in firm contact with the floor. 
In order to achieve this angle the height of the wheels can be adjusted. This lifts the machine 
at the motor side and sets the sanding attachment at an angle. 
 
 
The pre-set wheel adjustment from the 
factory is Left Wheel at #8 and Right Wheel at #7. Further information on the wheel setting 
can be found below. 


Содержание GECKO STAR 2.0

Страница 1: ...Unit G Aurora CO 80016 Tel 1 720 374 4810 Fax 1 720 374 2113 www ufloorsystems com Operating Instructions GECKO STAR 2 0 115V Wood Floor Sanding Edger USA 67301 GECKO STAR 2 0 R 115V Wood Floor Sandi...

Страница 2: ...al before operating the machine Observing the safety instructions protects against situations that may endanger health and safety and helps to prevent improper use of the machine Before using the tool...

Страница 3: ...6 Adapter for dust containment 7 Rear handle screw in 8 Dust Bag 9 Socket wrench 10 Tool Bag 11 Screwdriver with bit socket Bit box with TX10 20 30 40 12 Hearing protection 13 Dust Mask 14 Additional...

Страница 4: ...1 Dust tube 9 Locking pin for dust tube not shown 2 Rear handle 10 Drive belt not shown 3 Top handle 11 Front handle 4 Sanding attachment short 12 Cord 5 Sanding attachment long 13 Switch 6 Sliding w...

Страница 5: ...ave reached their wear limit the machine switches off and can only be turned on by the switch Damage will occur to the motor if operation of the machine is continued Bring your machine to a service ce...

Страница 6: ...has come to a complete stop Caution Never sand towards the cord If you sand over the electrical cord there is fatal risk of electrical shock 5 5 Approved clothing Caution Wear suitable workwear Do no...

Страница 7: ...rborne coatings can create dust that may cause allergic reactions Sawdust from various species of wood are classified as carcinogens The tool has a connection 11 2 1 3 8 for an external vacuum cleaner...

Страница 8: ...lation of the additional handle 1 Screw 1 the additional handle on at the rear of the machine 2 On the sanding attachment a star knob 2 can be screwed in for improved handling Note The additional hand...

Страница 9: ...nger The machine must be switched off and the main cord unplugged for all work on the machine Note The dust tube has several drilled holes 2 at the end of the tube The locking pin 1 latches into these...

Страница 10: ...efully open the draw cord on the dust bag and remove the bag Keep the dust bag opening closed 3 Empty the dust bag outdoors into a non flammable waste bin Caution Risk of fire Because of the fire risk...

Страница 11: ...ding grains on the sanding discs have sharp edges Wear protective gloves when changing the sanding discs Caution The sanding disc must lie centrally on the sanding plate Ensure that there is an even m...

Страница 12: ...uries to the hands The grinding grains on the sanding discs have sharp edges Wear protective gloves when changing the sanding discs Steps 1 Switch the machine off 2 Unplug the cord from the main power...

Страница 13: ...set up such that approx 1 3 of the sanding disc is in firm contact with the floor In order to achieve this angle the height of the wheels can be adjusted This lifts the machine at the motor side and s...

Страница 14: ...d during the sanding work Grinding nails can produce sparks that can cause a fire in the dust bag 7 1 Switching on and off Caution Risk of injury Hold the machine in both hands when switching on The m...

Страница 15: ...the wood floor with a side to side and backwards and forwards motion The design of the machine will allow for efficient sanding close to the wall 7 3 Switching off the GECKO STAR 2 0 M Steps 1 To swit...

Страница 16: ...t 3 5 Fit the new sanding attachment and drive belt to the machine 6 Loosely tighten screws do not over tighten the screws 7 Turn the knurled nut 4 until the drive belt is tight then tighten screws 9...

Страница 17: ...9 2 1 Replacing the drive belt drive belt wheel and the drive belt idler wheel Note If the drive belt needs to be replaced often due to wear or damage then the cause of this could be that the sanding...

Страница 18: ...cordingly 11 Trouble shooting Problem Possible Cause Action Step Machine does not start Power supply interrupted Defective fuse Cord or plug defective parts replaced Brushes worn out or broken Have pr...

Страница 19: ...Page 19 Gecko Star 2 0 01 2017...

Отзывы:

Похожие инструкции для GECKO STAR 2.0