20
51-3000
MAINTENANCE
figure 1
figure 2
figure 3
Replacing Brush Sections
1. Remove the front bolt from inside the right-
hand side of the brush frame. This allows you
to remove the shield and right mounting bracket
(figure 1).
2. Remove the rear screw from the right-hand side
of the brush frame.
3. Remove the 2 bolts from inside the left-hand
side of the brush frame (figure 2).
4. Pull the brush out of the brush frame.
5. Stand the brush on end and rest it on blocks.
6. Loosen screws on the retainer plate and take off
the retainer halves (figure 3).
7. Remove old sections from the core.
8. Install new sections by doing the following:
a. Number the tubes on the core as 1, 2 and 3
(figure 4).
b. Slide the first section onto the core with the
drive pins on both sides of tube 1. Make sure
that drive pins (figure 5) face up.
NOTE: When using 1/2 poly - 1/2 wire sections,
place a poly section first and last on
the core to prevent damage to the
hood, driveline and frame.
c. Place the second section on the core with
drive pins on both sides of tube 2. Be sure
drive pins face down.
d. Slide the third section onto the core with
drive pins around tube 3. Be sure the drive
pins face up.
e. Slide sections on until the core is full, making
sure to alternate the tubes used and the
direction of the drive pins.
Front Bolt
Содержание Sweepster M24 Series
Страница 2: ...2 51 3000 NOTES...
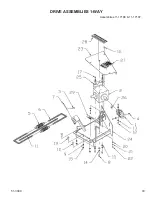
Страница 29: ...29 51 3000 DRIVE ASSEMBLIES 1 WAY Assembly 11 17142...
Страница 31: ...31 51 3000 DRIVE ASSEMBLIES 1 WAY Assembly 11 17390...
Страница 33: ...33 51 3000 DRIVE ASSEMBLIES 1 WAY Assemblies 11 17186 11 17187...
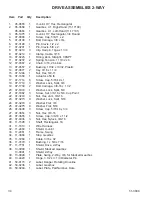
Страница 35: ...35 51 3000 DRIVE ASSEMBLIES 2 WAY Assemblies 11 17100 11 17101...
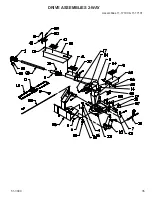
Страница 39: ...39 51 3000 DRIVE ASSEMBLIES 2 WAY Assemblies 11 17177 11 17182...
Страница 41: ...41 51 3000 DRIVE ASSEMBLIES 2 WAY Assemblies 11 17371 11 17372...
Страница 43: ...43 51 3000 DRIVE ASSEMBLIES 2 WAY Assemblies 11 17198 11 17231...


