150-388-125-01, Revision 01
Provisioning
HLU-388 List 2E
September 15, 1998
11
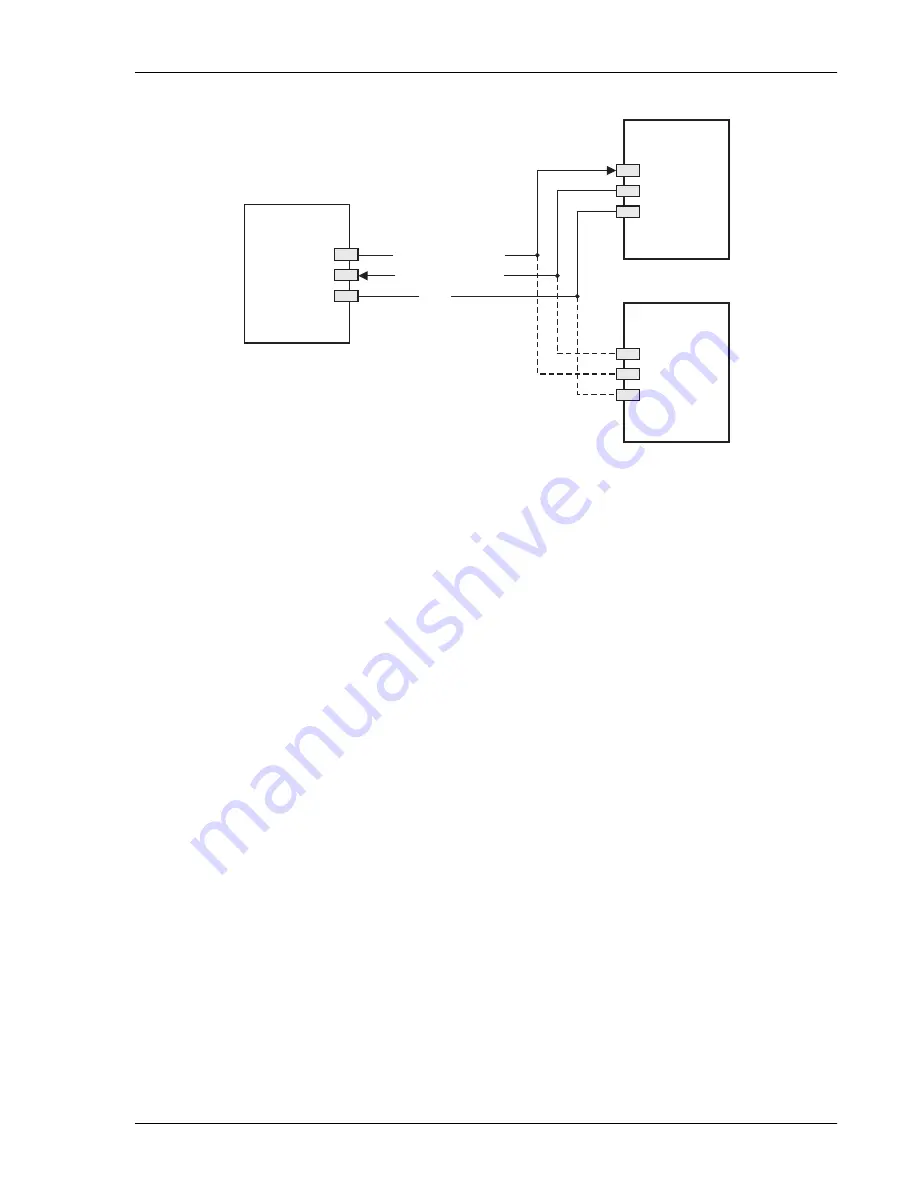
Figure 4.
DB-9 RS-232 I/O Pinouts
HLU-388
(Female)
DB-9 Connector
(DCE)
RD (Receive Data)
TD (Transmit Data)
2
3
5
DB-9 Connector
(DTE)
DB-25 Connector
(DTE)
TERMINAL
TERMINAL
2
3
5
2
3
7
GND


