EasyNote BU Disassembly Manual
14
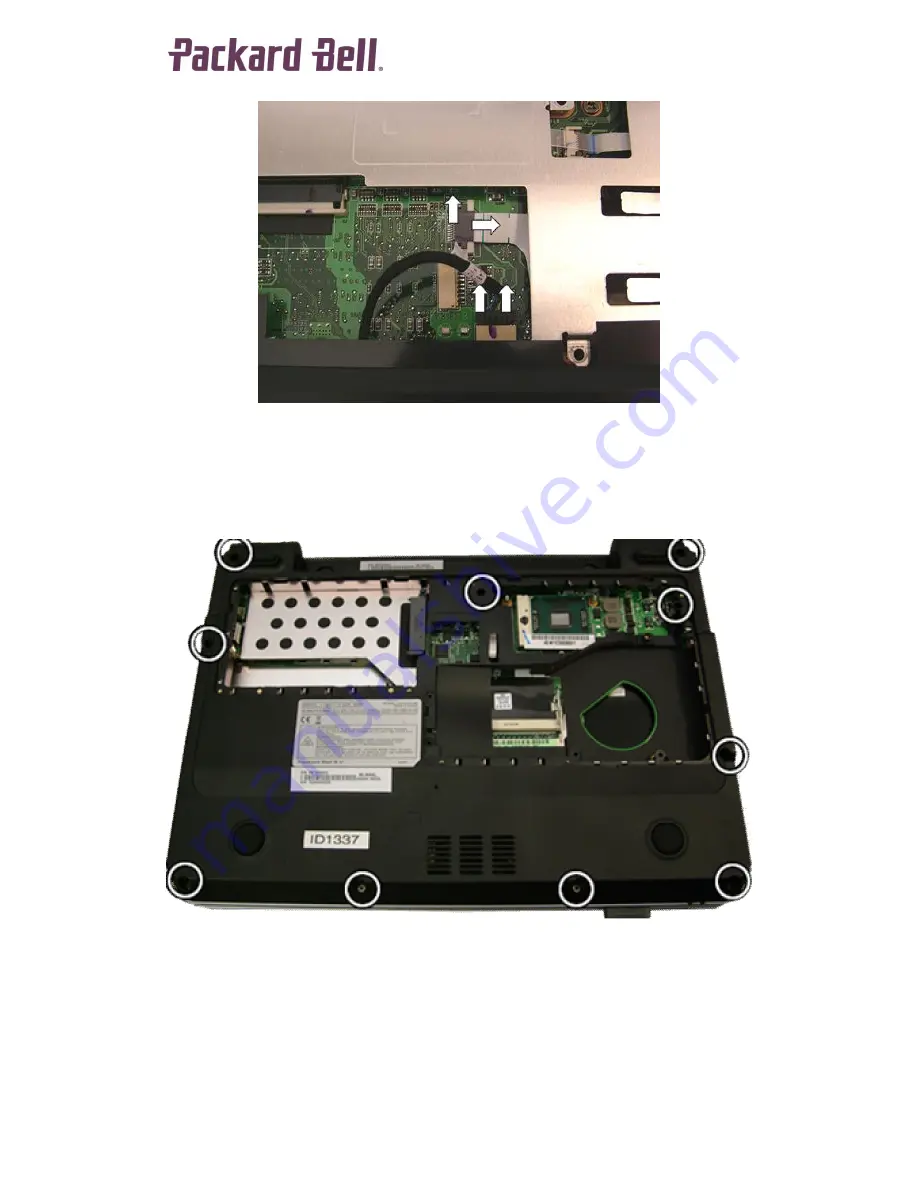
Fig. 18
The fingerprint and touchpad cable.
3.
Remove three screws in the heat shield (see Fig. 16).
4.
Remove the screws from the bottom base. Note that two are located
near the hole for the CPU heat sink, and that one screw is longer
(located between the optical drive space and the side mounted USB
ports and Ethernet port).
Fig. 19
The top cover screws.
5. Remove any cards or dummy cards from the card reader.
6.
Take away the cover top.


