background image

Instructions & Parts

r_256998_313294_1b

US Patent Number 7,036,171
Korean Patent 338185
Australian Patent Number 152610

2004230905

EP 1610904

r_256998_313294_10b

EnergyComplete

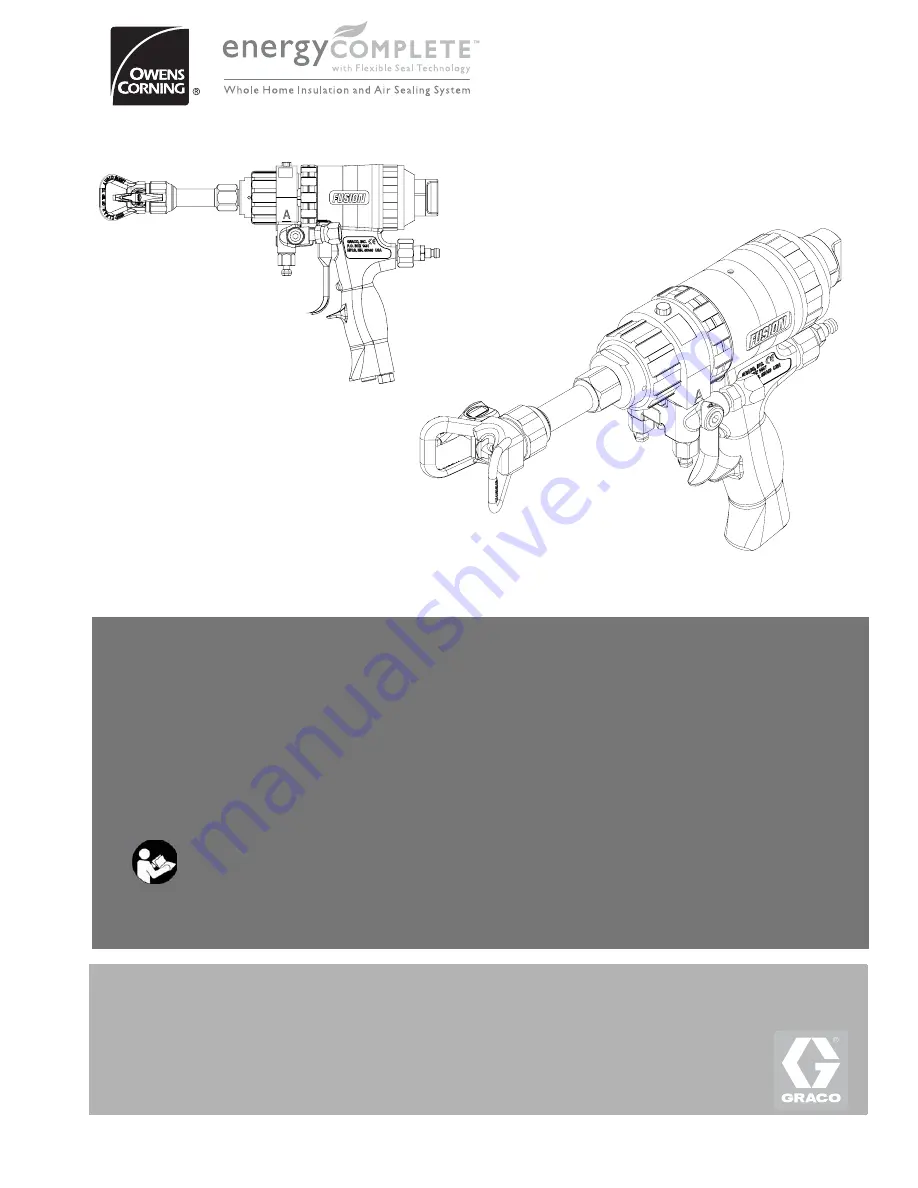
 Spray Gun

Manual No:

For use with EnergyComplete Spray Foam with Flexible Seal Technology.
Not for use in explosive atmospheres or with flammable materials.

Important Safety Instructions

Read all warnings and instructions in this manual. 
Save these instructions.

256998 EnergyComplete Spray Gun with Static Mixer Assembly

3500 psi (24.2 MPa, 242 bar) Maximum Fluid Working Pressure

80-130 psi (0.55-0.9 MPa, 5.5-9.1 bar) Air Inlet Pressure Range

200°F (94°C) Maximum Fluid Temperature

313294D

Содержание EnergyComplete Series

Страница 1: ...y Foam with Flexible Seal Technology Not for use in explosive atmospheres or with flammable materials Important Safety Instructions Read all warnings and instructions in this manual Save these instruc...

Страница 2: ...h Gun 14 Clean Outside of Gun 14 Clean Air Cap 14 Clean Spray Tip 14 Clean Muffler 14 Clean Fluid Manifold 14 Clean Mixer 14 Clean Slip Fit Polycarballoy Mix Module 15 Troubleshooting 16 Repair 18 Too...

Страница 3: ...this manual when you stop spraying and before cleaning checking or servicing equipment TOXIC FLUID OR FUMES HAZARD Toxic fluids or fumes can cause serious injury or death if splashed in the eyes or o...

Страница 4: ...with equipment wetted parts See Technical Data in all equipment manuals Read fluid and solvent manufacturer s warnings For complete information about your material request MSDS forms from distributor...

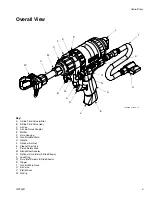
Страница 5: ...Fluid Housing G Gun Fluid Manifold H Handle J Optional Air Inlet K Cleanoff Air Valve L Piston Safety Lock M Static Mixer Adapter N Optional Fluid Inlets A Side Shown P Lock Ring R Fluid Inlet Swivels...

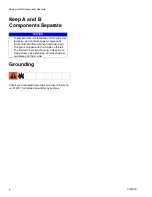
Страница 6: ...13221 for detailed grounding instructions NOTICE To prevent cross contamination of the gun s wet ted parts do not interchange A component white fluid and B component red fluid parts The gun is shipped...

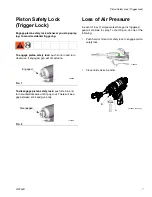
Страница 7: ...e To disengage piston safety lock push knob in and turn counterclockwise until it pops out There will be a gap between knob and gun body Loss of Air Pressure In event of loss of air pressure while gun...

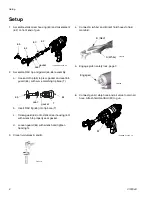
Страница 8: ...ew guard 64 onto static mixer housing 60 with wrench to properly seat gasket d Loosen guard 64 with wrench and tighten hand tight 3 Close fluid valves A and B 4 Connect A white and B red fluid hoses t...

Страница 9: ...y lock page 7 12 Turn RAC tip 65 to spray position 13 Test spray onto cardboard Adjust pressure and temperature to get desired results 14 Apply layer of lubricant over front of gun and lock ring or us...

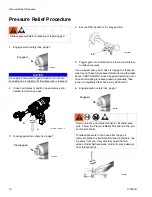
Страница 10: ...ve pressure gradually then loosen completely Clear hose or tip obstruction 6 Engage piston safety lock page 7 Relieve pressure before cleaning or repairing gun NOTICE Air supply is required for gun ac...

Страница 11: ...nlet check valve and fluid housing A side to right 1 Follow Pressure Relief Procedure page 10 2 Disconnect air hose from quick disconnect D and remove fluid manifold G 3 Unscrew lock ring P until fron...

Страница 12: ...c elbows AA and male threads of swivels 42e 42f Install elbows 16 in optional inlets N facing down Install swivels A B in elbows Be sure to install A swivel larger in A side Install plugs 42c where sw...

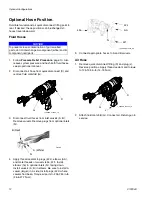
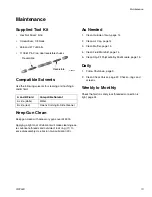
Страница 13: ...ier Lubricate threads and outside of lock ring 11 to ease disassembly Use Fusion Gun Lubricant 29 As Needed 1 Clean Outside of Gun page 14 2 Clean Air Cap page 14 3 Clean Muffler page 14 4 Clean Flui...

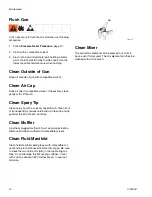
Страница 14: ...spray tip with a solvent soaked brush Clean front of tip frequently to reduce fluid build up Clean tip and tip guard at the end of each work day Clean Muffler A partially plugged muffler 51 will slow...

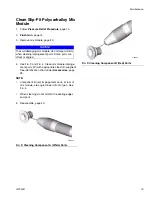
Страница 15: ...ed See identification chart under Accessories page 28 NOTE Component B red impingement ports at rear of mix module are angled toward front of gun See FIG 4 When cleaning do not scratch the sealing edg...

Страница 16: ...losed fluid valves 42b Open Plugged impingement ports Clean page 15 Plugged check valves 36 Clean page 22 Gun actuates slowly or with delayed action Plugged muffler 51 Clean page 14 Damaged piston o r...

Страница 17: ...Replace page 23 Air leakage from front air valve Damaged air valve o rings 37d Replace page 24 Component B resin leak from fluid housing Worn rear rod seal Adjust Rear Rod Seal page 21 Cross Contamina...

Страница 18: ...ent 62 from fluid head 59 4 Loosen air cap 61 and remove from gun 5 Remove mix module nut 54 using a wrench Remove front seal 2 6 Remove mix module 66 7 Unscrew lock ring 37b to remove front end and m...

Страница 19: ...rly assem bled lock ring is snug against handle 4 Push mix module 66 onto rod 34 as far as possi ble 5 Lubricate all threads and reassemble mix module nut 54 fingertight Tighten additional 1 12 turn w...

Страница 20: ...luid housing 37 Remove mix module Engage piston safety lock NOTE If mix module 66 does not protrude from fluid housing 37 slightly loosen then retighten lock ring 37b to allow gripping of edge for rem...

Страница 21: ...nut 37g Lubricate threads and install in fluid housing 37a with nut driver 8 Reassemble Front End page 19 9 Attach fluid manifold Connect air Return gun to service Adjust Rear Rod Seal 1 Follow Press...

Страница 22: ...s 39f 39g If necessary remove screw 39b and disassemble check valve 6 Reassemble check valves Screw 39b should be flush within 1 16 in or 1 5 mm of housing 39a surface Liberally lubricate o rings 39f...

Страница 23: ...damage Unscrew rod from piston with nut driver Inspect o ring 33g Liberally lubricate with Fusion Gun Lubricant To reassemble thread purge rod 34 into piston 40 until rod stops 8 Liberally lubricate...

Страница 24: ...th Loctite or equivalent to threads on stop 33d and cap 33a and reas semble 6 Attach fluid manifold Connect air Return gun to service Air Valve 1 Follow Pressure Relief Procedure page 10 2 Flush Gun p...

Страница 25: ...5 Loosen air cap 61 and remove from gun 6 Use needle nose pliers to remove mixer element 62 from static mixer housing 60 Inspect parts for damage replace if necessary 7 Reassemble static mixer assemb...

Страница 26: ...39c 39d 39f 39a 39g 39 42a 42b 42d 42g 16 42c 42e 42f 35 43 36 11 51 53 56 55 32 12 14 15 17 4 3 1 2 1 1 1 1 1 2 39b 58 33c 33h Torque to 125 135 in lb 14 15 N m Torque to 20 30 in lb 2 3 3 4 N m Tor...

Страница 27: ...VE clean off air 1 37d 246354 O RING package of 6 1 37e 248132 O RING package of 6 1 37f 116550 RING retaining 1 37g 15C378 RETAINER rod seal 1 37h 248003 SEAL KIT purge rod includes 4 seals 1 38 1181...

Страница 28: ...Gun MSD025 available at www graco com Gun Repair Kits Read the chart left to right and top to bottom to find the quantity of each part in the kits Check Valve Filter Screen Kits 10 per kit 80 mesh fil...

Страница 29: ...ent White Inlet Size 6 JIC 9 16 18 UNF female swivel in 1 8 npt f port B Component Red Inlet Size 5 JIC 1 2 20 UNF female swivel in 1 8 npt f port Sound Pressure 70 dB A at 100 psi 0 7 MPa 7 bar Sound...

Страница 30: ...TY IS EXCLUSIVE AND IS IN LIEU OF ANY OTHER WARRANTIES EXPRESS OR IMPLIED INCLUDING BUT NOT LIMITED TO WARRANTY OF MERCHANTABILITY OR WARRANTY OF FITNESS FOR A PARTICULAR PURPOSE Graco s sole obligati...

Отзывы: