4
OWC Mercury Elite Pro mini
Device Setup
2.1 Quick Start
Follow the steps below to use the OWC Drive Guide utility to format your Mercury Elite Pro mini for Mac. If you
installed your own drives, please use the formatting method you are most familiar with or use our recommended
formatting tips:
www.owcdigital.com/format
1. Connect the Mercury Elite Pro mini to your computer using the proper cable. If you prefer to use a
different formatting utility, do so at this time and skip the rest of these instructions.
2. Your drive will appear as ‘OWC SETUP.’ Double-click the disk icon.
3. Double-click the OWC Drive Guide application.
4. Follow the instructions to complete the formatting process.
5. Once the formatting is finished the drive is ready to use.
2.2 Assembly
NOTE:
These assembly instructions are written for users who purchased the Mercury Elite Pro mini as an empty
enclosure. The USB 3.1 Gen 2 / eSATA version is shown, but the steps are the same for the USB 3.1 Gen 1 /
eSATA version. The instructions show how to open the enclosure in order to install a drive. If you purchased the
Mercury Elite Pro mini with a drive already installed, and you remove the drive before the end of the warranty
period, this will VOID the warranty. You may replace the drive after the expiration of the original warranty. You
should start with Step 9 in that case and work backwards.
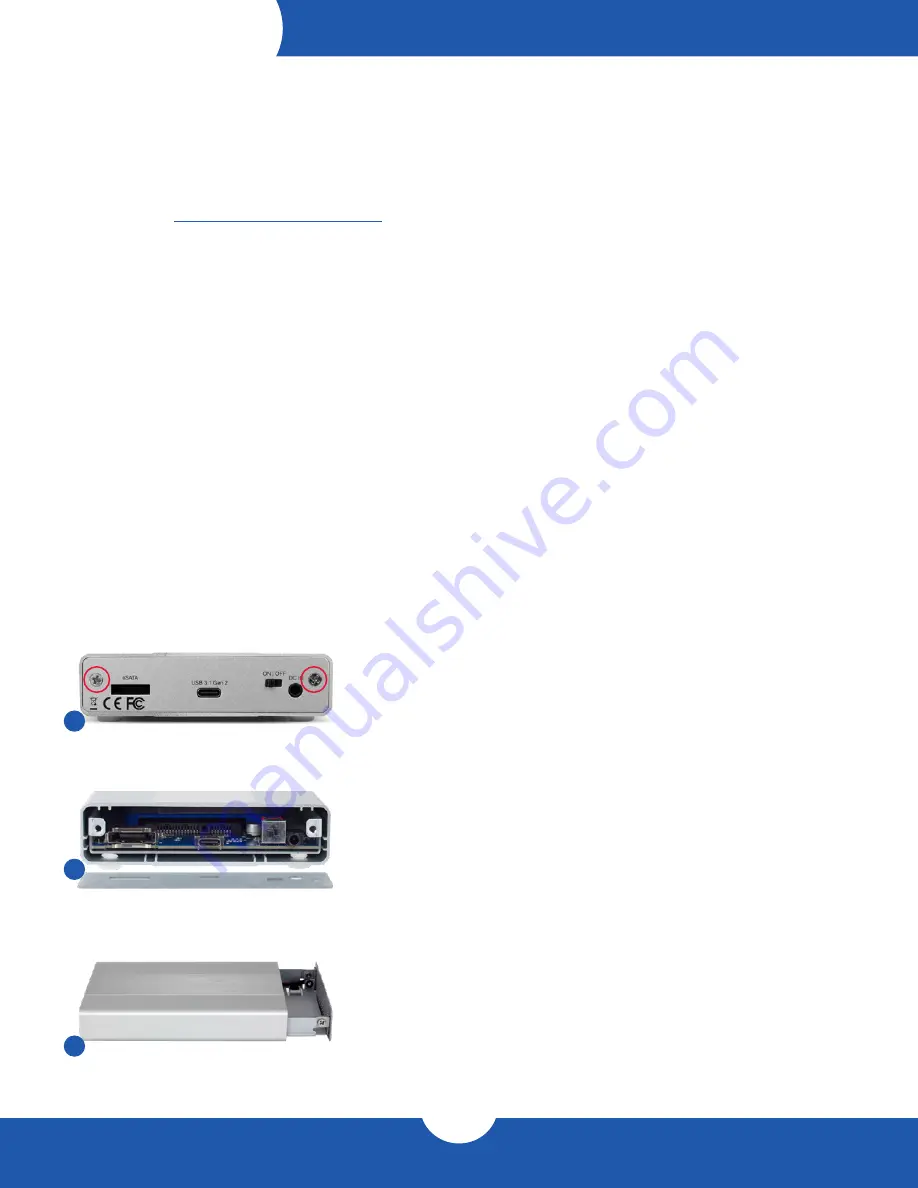
1
1. Required tools: Phillips PH2 driver — Remove the Mercury Elite
Pro mini from its packaging, then use a Phillips driver to remove
the two screws shown at left.
2
2. Tilt the Mercury Elite Pro mini to allow the back plate to fall away
from the outer enclosure. You may need to push the ON|OFF
switch to disengage the ports from the back plate. Once the
plate is removed you will see the inner chassis.
3
3. Push on the inner chassis. It should slide out the front of the
outer enclosure. Once there is enough room, pull the front grill
until the inner chassis separates from the outer enclosure.
DEVICE SETUP


