Installation
2
OWC Data Doubler
2.1 Disassembling the Mac mini
Due to the number and variety of screws involved in this process, we commend you use a device to
organize and keep track of the screws, such as an ice cube tray. This will help you to put the screws back in
the correct locations.
INSTALLATION
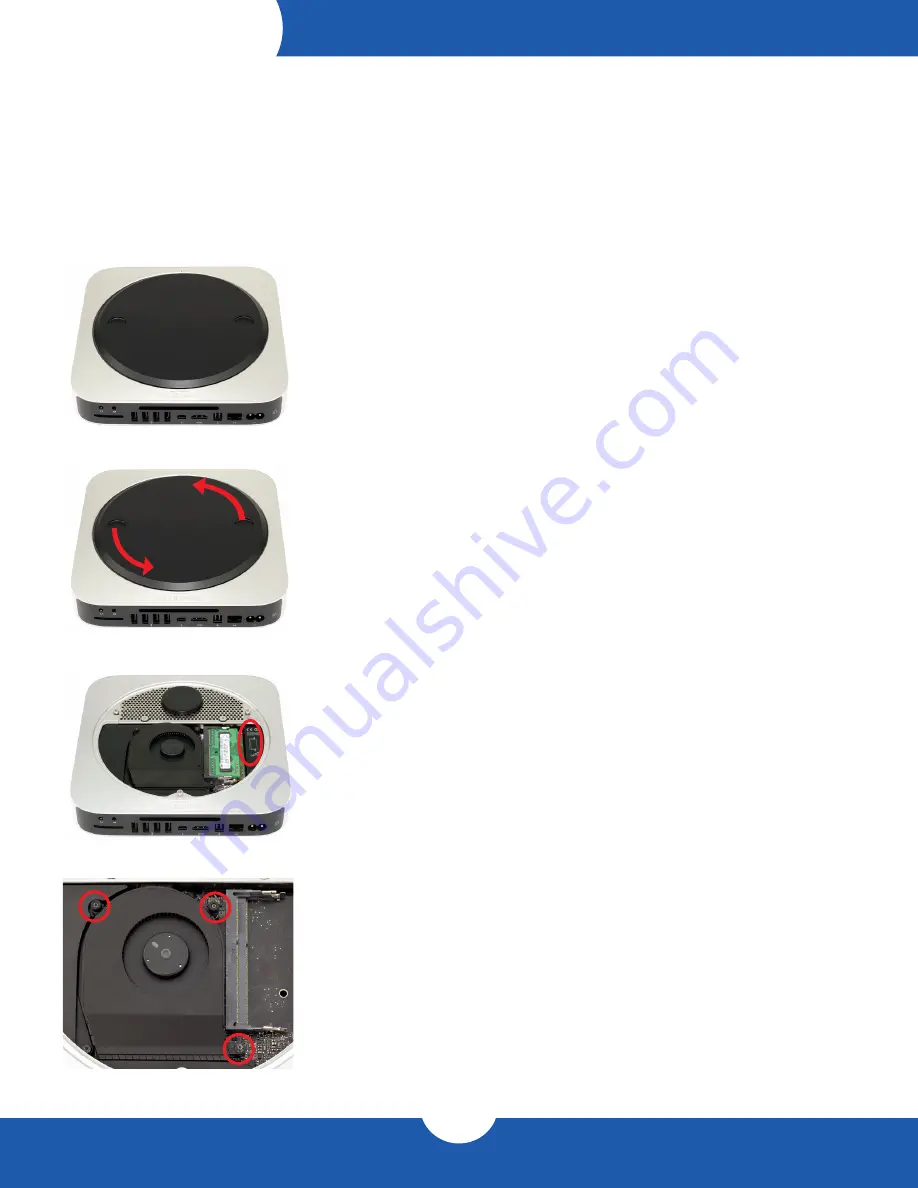
1. Place the Mac mini upside down, as shown. Use a soft surface such as a towel
or a mouse pad in order to protect the Mac mini from scratches.
2. Rotate the bottom cover counterclockwise to the unlocked position, as shown in the
picture to the left. There is a white dot on the bottom cover. When the bottom cover
is unlocked, this white dot will line up with the corresponding dot on the aluminum
housing. When the bottom cover is unlocked, press on one side of the cover to cause
the opposite side to pop up, then remove it.
3. Remove the two memory modules. The instructions for removing the memory modules
are printed directly to the right of the memory inside the Mac mini, as circled in the
picture to the left.
4. Remove the three Torx T6 screws that secure the fan, as circled in the picture
to the left. The two top screws are shorter; the screw on the lower right is a longer
standoff screw.


