C.
A/V Setting
1. Image Setting
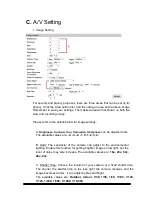
For security and privacy purposes, there are three areas that can be set up for
privacy. Click the Area button first, and then drag an area on the above image.
Remember to save your settings. The masked area will not shown on both live
view and recording image.
Please refer to the details below for image settings:
A. Brightness, Contrast, Hue, Saturation, Sharpness can be adjusted here.
The available values are:
-4, -3, -2, -1, 0, 1, 2, 3, 4.
B. AGC: The sensitivity of the camera can adjust to the environmental
lighting. Enable this function for getting brighter image on low light, but the
level of noise may also increase. The available values are:
16x, 24x, 32x,
48x, 64x.
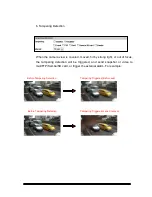
C. Shutter Time: Choose the location of your camera or a fixed shutter time.
The shorter the shutter time is the less light the camera receives and the
image becomes darker , it can adjust by Day and Night.
The available values are:
Outdoor, Indoor, 1/30, 1/50, 1/60, 1/100, 1/120,
1/125, 1/250, 1/500, 1/1000, 1/10,000
.
Содержание OVC-2DVIR
Страница 1: ...User Manual 3 AXIS VANDAL DOME IP CAMERA...
Страница 11: ...1 2 3 4 5 When popup the following dialogue box click Yes...
Страница 14: ...IV IP Camera Configuration Click to get into the administration page Click to go back to the live video page...
Страница 28: ...c Samba Select this option to send the media files via a network neighborhood when an event is triggered...

