background image

- 4 -

1. Quick Installation Instructions

1.1 Product Interface

Figure 1.1 Product Interfaces

1. Speaker

4. Power Switch

7. USB3.0

2. Lens

5. Power

8. Bracket

3. Built-in Mic

6. Line in

1.2 Product Use

1) Installation: Fix the device to the wall, over the display screen or directly put it on the desktop.
2) Power on: Connect the DC12V power adapter to the power input socket.
3) The USB interface is plugged into the computer, video conference terminal or other USB input device through
the USB cable, open the conference software, select the image and audio device output and then use it ;

Содержание KC400

Страница 1: ...1 All in one video bar User Manual V1 0...

Страница 2: ...trictly comply with local electrical safety standards 3 Handle with care Avoid damage to product caused by heavy pressure strong vibration or immersion during transportation storage and installation 4...

Страница 3: ...IEW 5 2 1 PRODUCT INTRODUCTION 5 2 1 1 Dimensions 5 2 1 2 Accessories 5 2 2 PRODUCT FEATURES 6 2 3 TECHNICAL PARAMETERS 6 3 PRODUCT USE 7 3 1 REMOTE INSTRUCTIONS 7 3 2 MENU 7 3 2 1 Main Menu 7 4 MAINT...

Страница 4: ...t Use 1 Installation Fix the device to the wall over the display screen or directly put it on the desktop 2 Power on Connect the DC12V power adapter to the power input socket 3 The USB interface is pl...

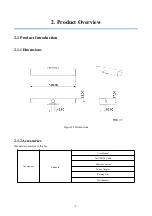
Страница 5: ...w 2 1 Product Introduction 2 1 1 Dimensions Figure 2 1 Dimensions 2 1 2 Accessories Standard accessories in the box Accessories Standard User Manual 5m USB2 0 Cable Remote Control Power Adapter Packin...

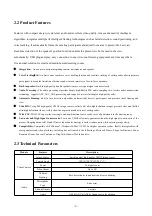
Страница 6: ...rts 6 meters full duplex high quality calls Automatic Framing built in face detection algorithm automatically detects participants and provides ideal framing and view Ultra HD Using 8M high quality CM...

Страница 7: ...rface 1 USB3 0 Type B compatible with USB2 0 Audio Port 1 3 5mm linear input Power Connector HEC3800 power socket DC12V Wall Bracket Standard wall mount bracket 3 Product Use 3 1 Remote Instructions 3...

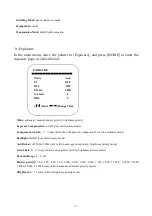
Страница 8: ...s to select the language 2 Setting Move the pointer to Settings in the main menu press HOME to get into the exposure page as shown below Setup Image Style Default Auto Framing Close Voice Location Clo...

Страница 9: ...ation on off only valid in auto mode Compensation Level 7 7 only valid when Exposure Compensation is on in automatic mode Backlight On Off only valid in auto mode Anti flicker off 50Hz 60Hz only valid...

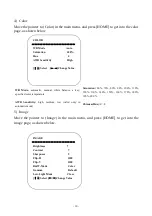
Страница 10: ...alance a key specified color temperature Saturation 60 70 80 90 100 110 120 130 140 150 160 170 180 190 200 AWB Sensitivity high medium low valid only in automatic mode Chroma Hue 0 8 5 Image Move the...

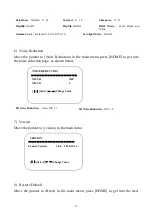
Страница 11: ...Noise Reduction in the main menu press HOME to get into the noise reduction page as shown below NOISE REDUCTION NR 2D OFF NR 3D 4 Select Change Value 2D Noise Reduction Auto Off 1 7 3D Noise Reduction...

Страница 12: ...osive cleanser avoiding scuffing 4 2 Troubleshooting 1 No picture for USB Solution a Check whether the USB cable of the device is connected well and whether the power indicator is on b Check whether t...

Страница 13: ...copy or translate this manual without the company s permission This manual contains no guarantee standpoint expression or other implies in any form Product specification and information in this manual...

Отзывы: