5
Dongguan Ortur Intelligent Technologies Co., Ltd.
https://ortur.tech/obsidian
No. 56 Maxin Road, Changping Town, Dongguan 523565, Guangdong Province, China
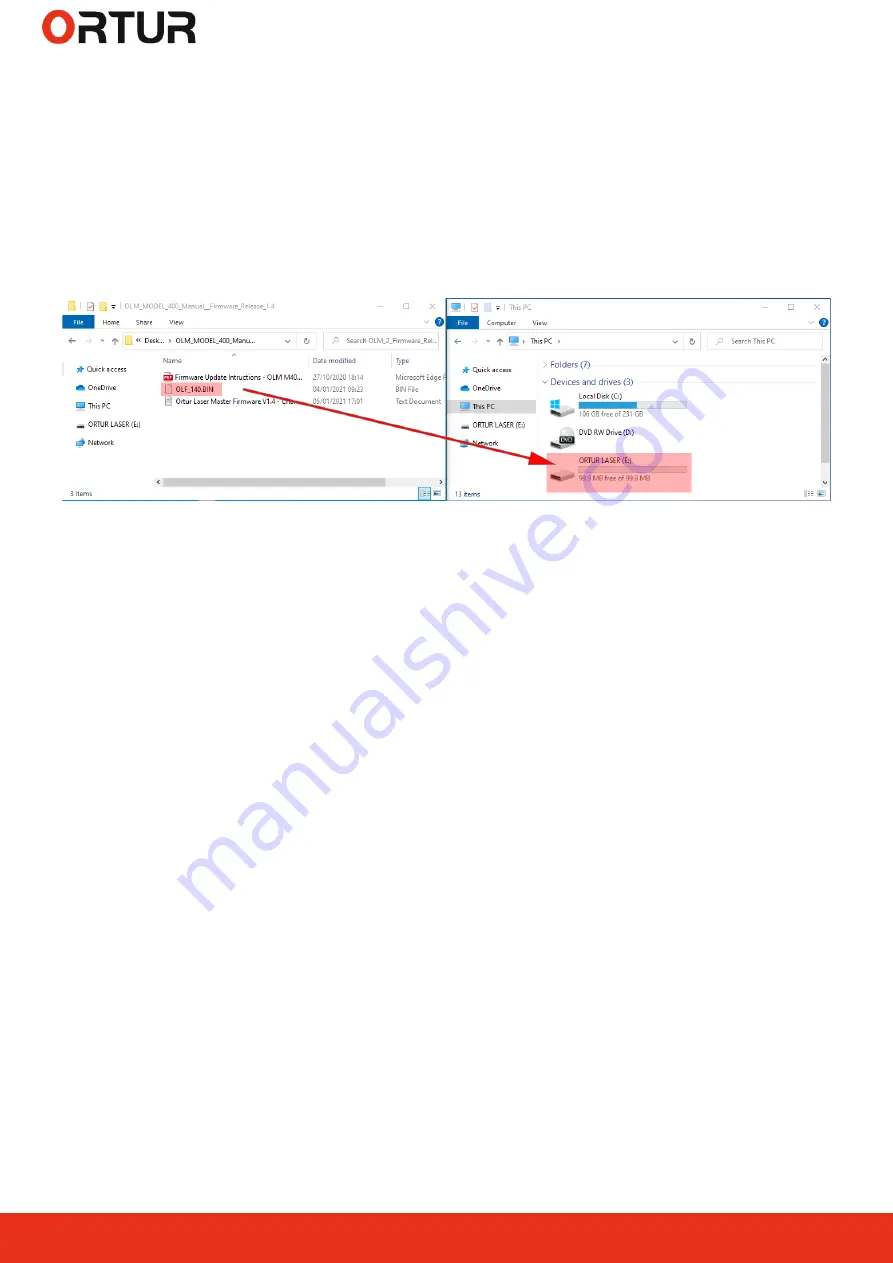
5. From the extracted/unzipped folder drag and drop onto the “ORTUR LASER”
drive the file OLF_140.bin. Alternatively, right click the OLF_140.bin file and press
copy. Navigate to ORTUR LASER drive and right click and press paste;
Note:
The file will have the version number. At the time of writing of this guide
is OLF_140.bin. Any other files included in the ZIP file can be ignored unless
advised by Ortur Support otherwise
6. Wait a few moments to be sure the file is copied properly;
7. Briefly Press the Reset button;
8. Confirm that your Power Adapter is plugged in and its receiving Mains Power;
9. Power on your
Ortur Laser Master M400 v1
by pressing Power Button for a few
seconds;
10. Monitor your
Ortur Laser Master M400 v1
, making sure it performs the homing
cycle correctly.
Step 3 - Confirm Firmware was written correctly
In order to confirm the Firmware was written successfully to your
Ortur Laser
Master M400 v1
Motherboard, is necessary to connect your machine to one of the
following software:
LaserGRBL
or
Lightburn
.
Additionally is required to restore Factory Default settings on the Motherboard to
clear the EEPROM ( Electrically Erasable Programmable Read-Only Memory) -
internal motherboard memory.
Important to NOTE: any customization on the GRBL settings will be
overwritten.


